Fenugreek / Methi seeds, even though used in very small quantities, are very much necessary for our day-to-day cooking. Without fenugreek seeds, preparing Dosa, Sambar Powder, Methi Powder, etc. will not be perfect. These seeds are having some health benefits as well. For all sorts of hair problems, fenugreek seeds works as a good remedy. Not only the seeds, fresh fenugreek leaves are also good for cooking. Roti, Paratha, Stir Fry and various rice items can be prepared using Fenugreek / Methi leaves.
Sometimes, I need fresh methi leaves for my cooking, but we get them very rarely in the convenience stores here. So, since the summer has started, I am growing the fenugreek leaves in our backyard and using the same for cooking. Every week, I will sow the seeds in 1 - 2 rows and within the next 3 weeks, it will be available for cooking. 
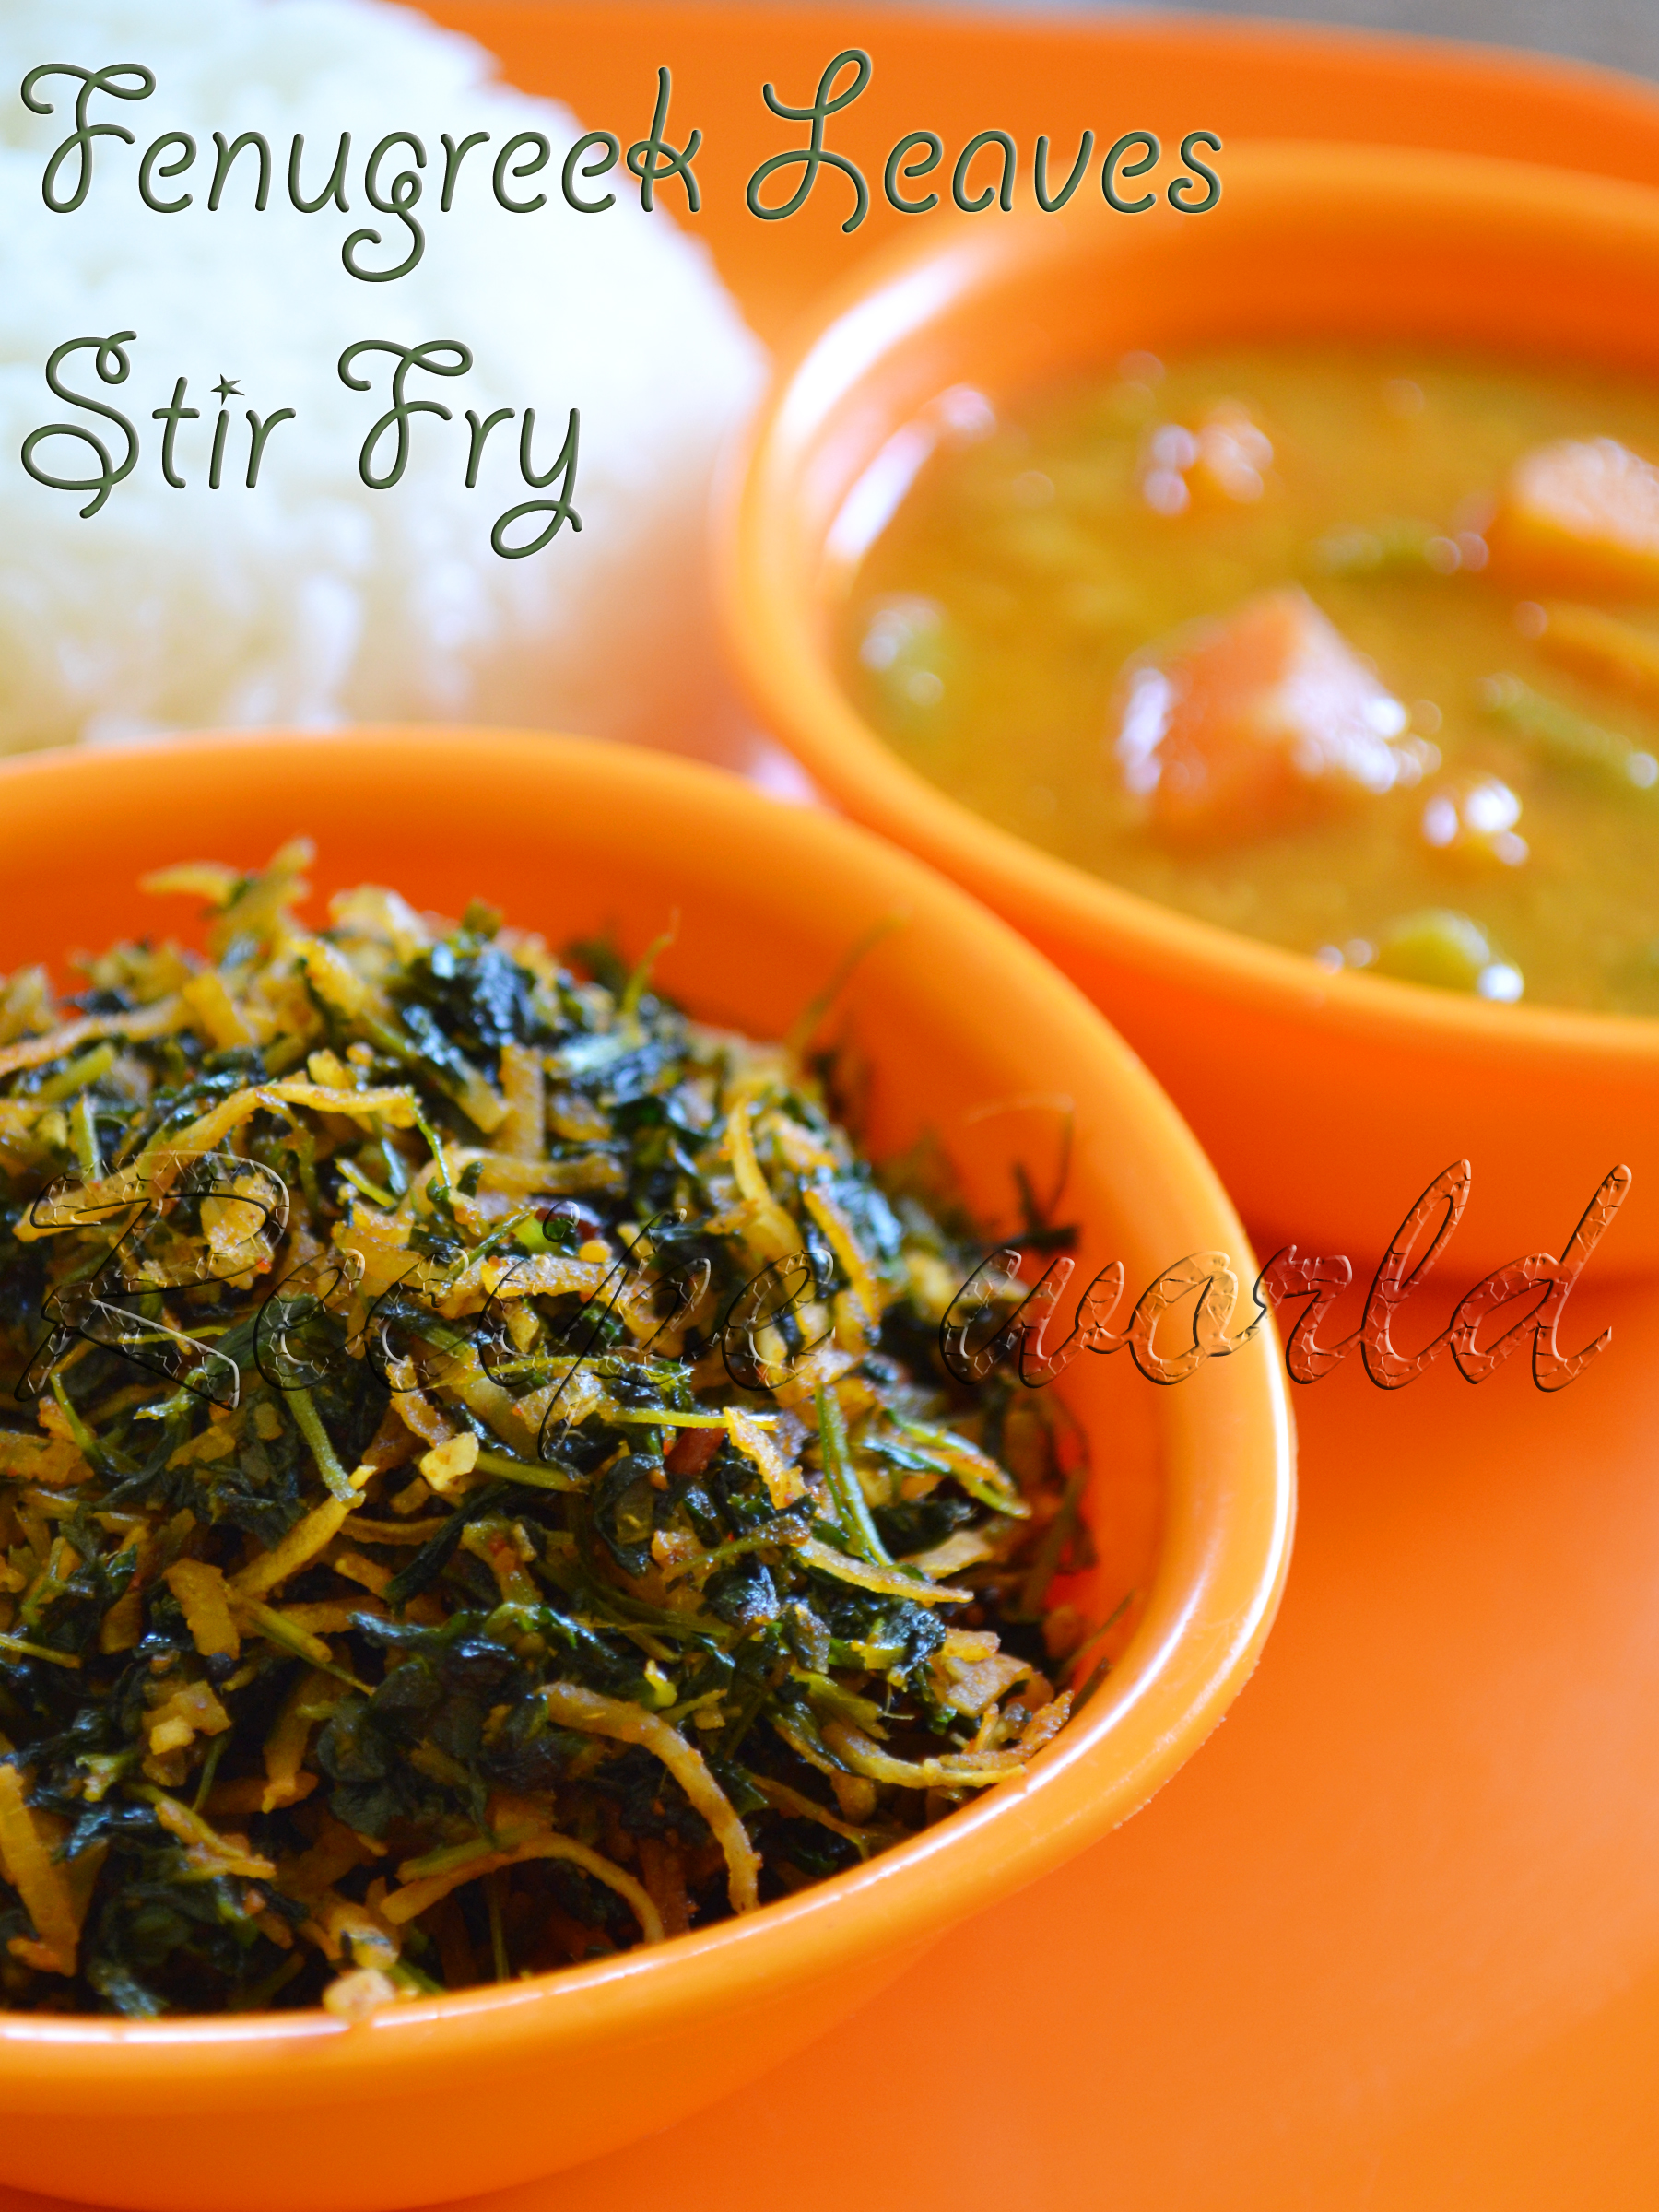
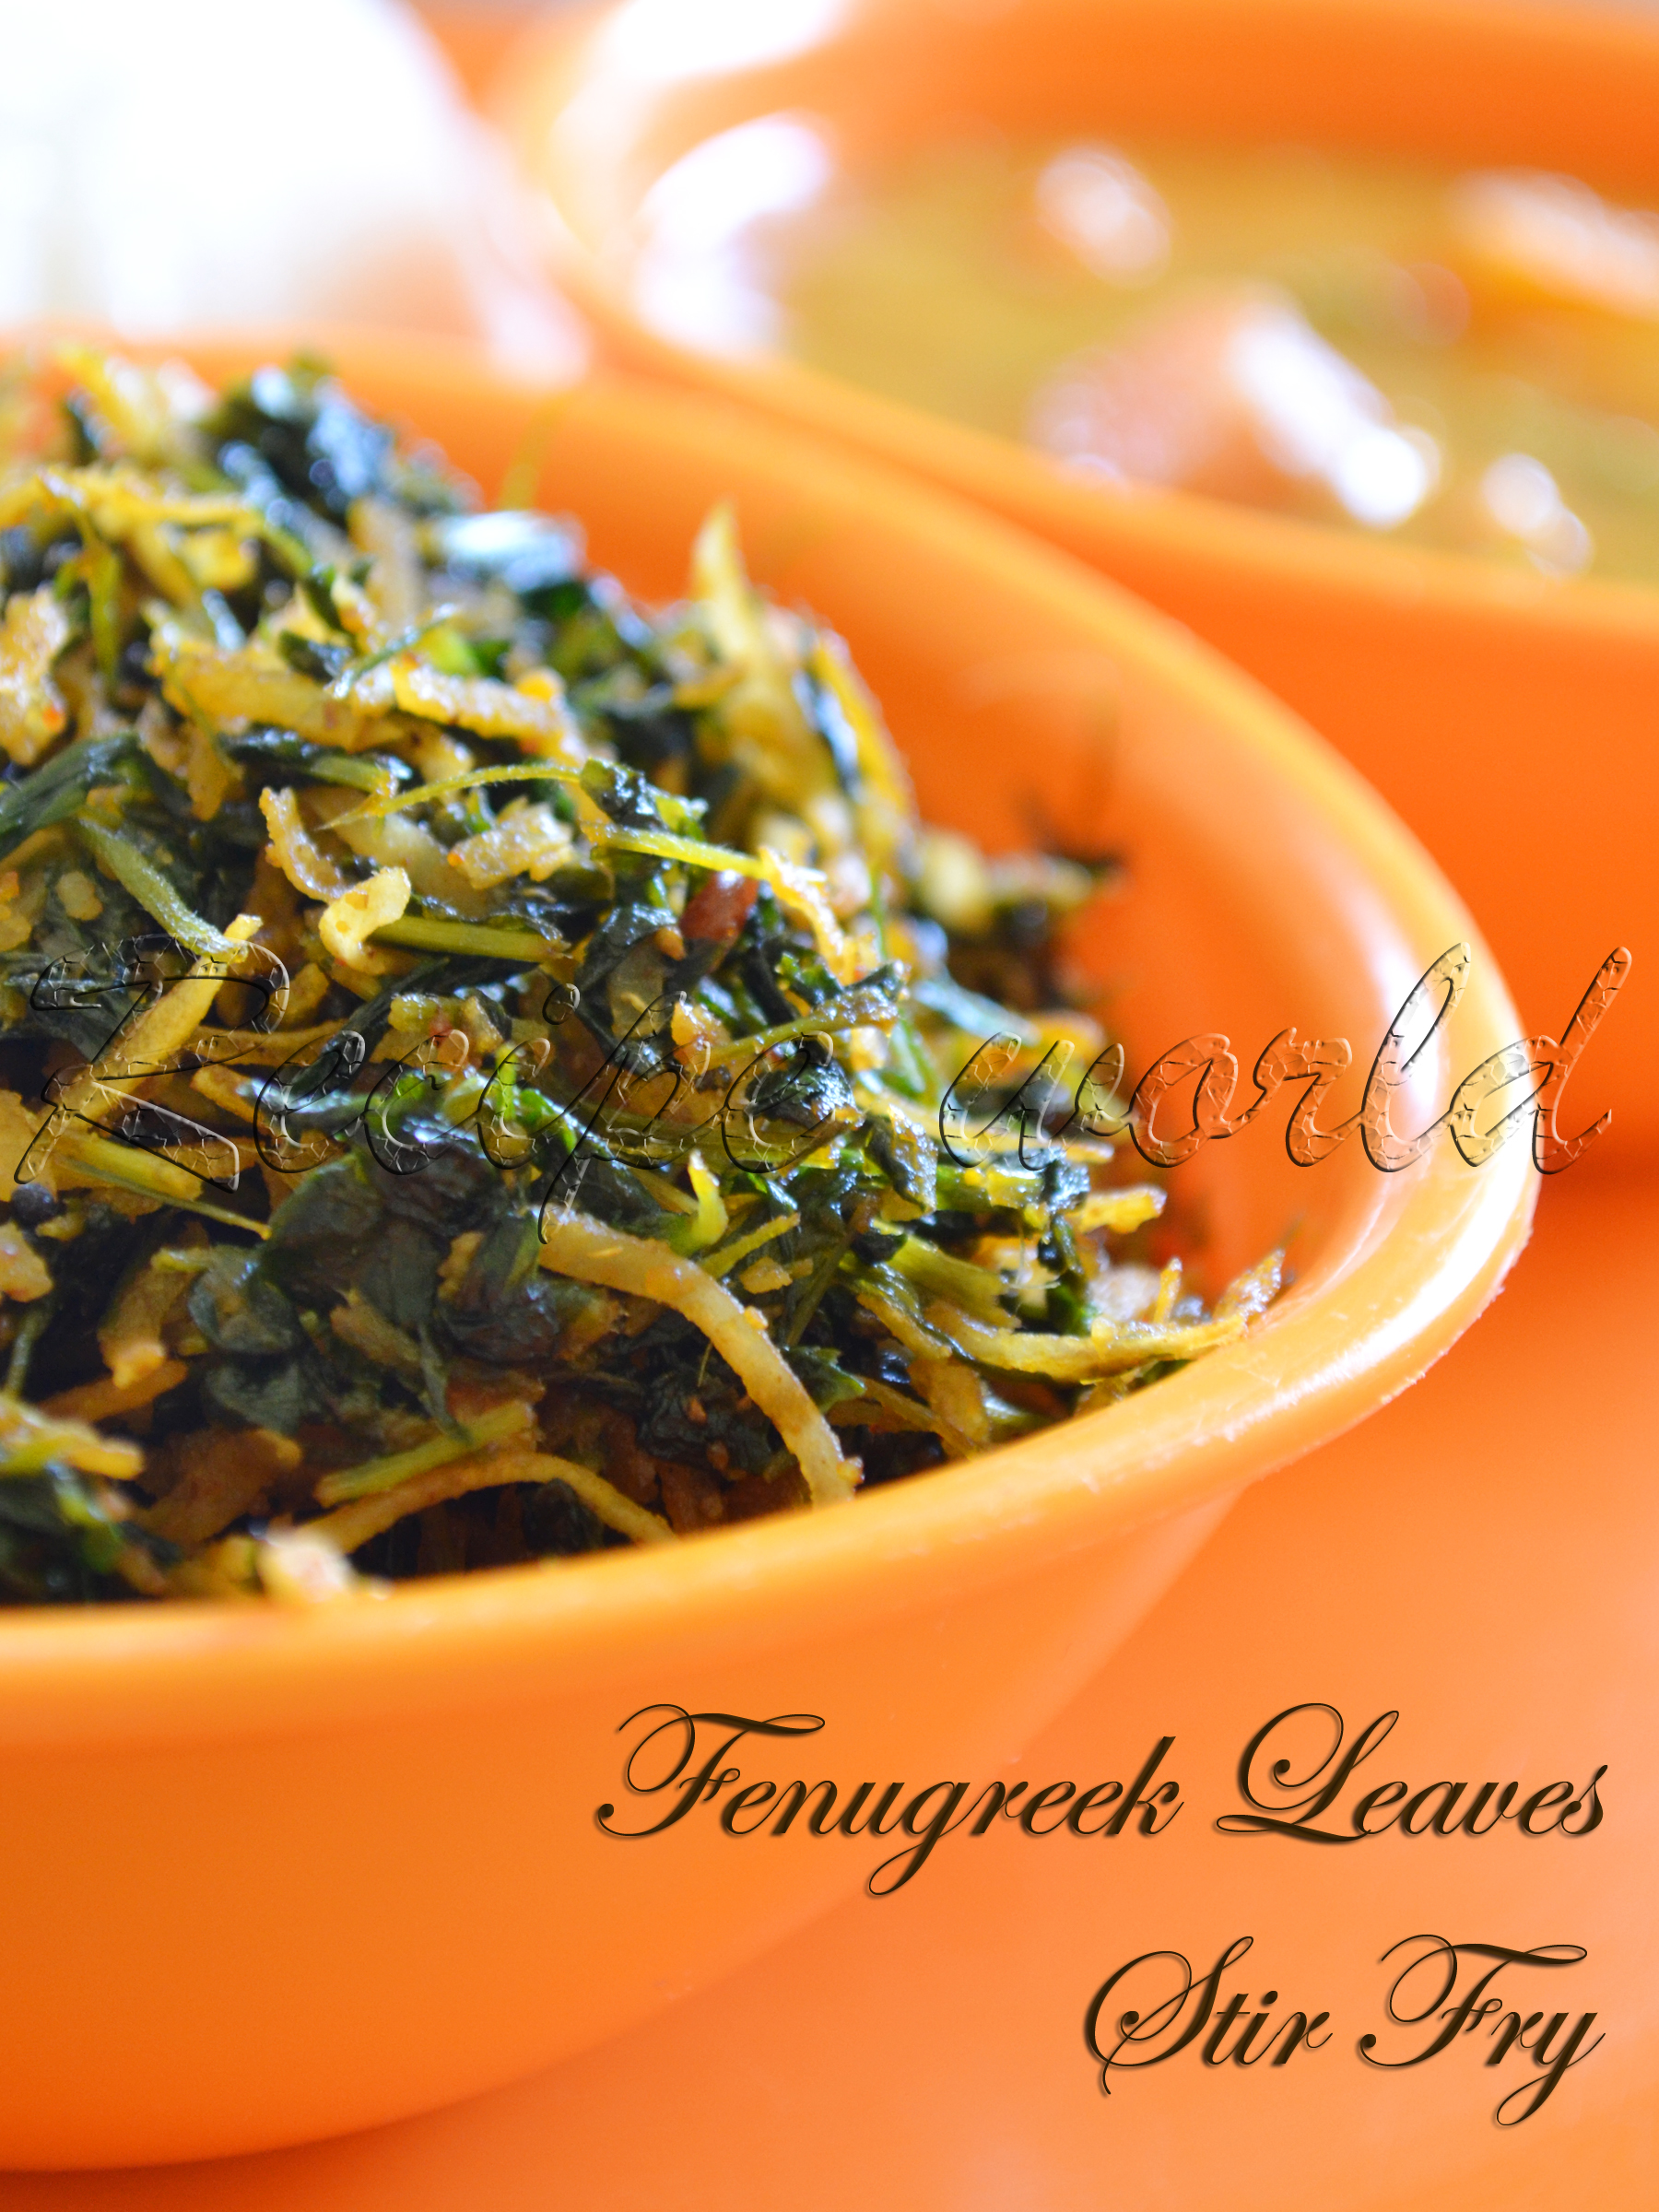
Both fenugreek leaves and dill leaves can be interchanged for some variety of dishes. I had posted the Dill Leaves Stir Fry recipe long back. The same way, you can prepare the Fenugreek Leaves Stir Fry. Since fenugreek leaves are slightly bitter in taste, it tastes better if we add little more sugar to this stir fry. 


Preparation time: 20 minutes
Servings: 2 - 3
Difficulty level: Easy

Ingredients:
  • Fenugreek leaves - 3 big bunch
  • Urid dal - 1 tsp
  • Mustard seeds - 1 tsp
  • Asafoetida - a pinch
  • Sambar powder - 2 tsp or according to taste (see Tips)
  • Sugar - 1 tsp or to taste (see Tips)
  • Amchur powder - 1/2 tsp
  • Salt to taste
  • Grated coconut - fistful
  • Oil - 4 tsp


Method:
  • Wash and clean the fenugreek leaves. Chop them finely including the tender stems. 
  • Heat oil in a heavy bottom pan. Add urid dal, asafoetida and mustard seeds. Once the mustard seeds start crackling, add the sambar powder followed by chopped fenugreek leaves.
  • Add salt, sugar and amchur powder according to your taste. Cook the mixture half covered.
  • Saute the mixture regularly. Cook it for around 7 - 8 minutes or till its dried out fully and looks too dark. 
  • Add grated coconut and cook for 2 - 3 minutes more and switch off the flame. 
  • Serve this delicious stir fry along with Roti, Chapathi or rice.


Tips:
  • Any type of sambar powder, saarina pudi or palyada pudi can be used for this recipe. 
  • Since the fenugreek leaves are bitter in taste, I have made this stir fry slightly sweet in taste. Those who won't like sweet taste, can add less sugar for this recipe.

If there are any special occasions like birthday or anniversary of near and dear ones, it calls for a celebration. Baking a cake at home is not a big deal, but decorating the cake needs some thinking and more efforts. Depending on the type of cake, we need to decide which type of frosting will be suitable.
I tried chocolate frosting for my chocolate cake few days back. Chocolate cake with layers and yummy frosting..it was divine! You can remember my earlier recipe of Egg-less Chocolate Cake which I shared sometime back. I just prepared 2 chocolate cakes in that way, layered and decorated them and finally, here is the outcome!


Time required: 45 - 50 minuted
Cooling time: 2 - 3 hours
Servings: 10 - 12
Difficulty level: Difficult

Ingredients:
- Egg-less chocolate cakes - 2 nos (prepare and keep them ready)
- For Frosting:
  • Unsalted butter (at room temp) - 1 cup
  • Icing sugar - 3 cups (adjust according to taste)
  • Vanilla essence - 1 tsp
  • Dark chocolate - 200 gm
  • Milk - 1/2 cup
  • Big pinch of salt
  • Chocolate shaves - as needed (see Tips)
  • Chocolate coated peanuts (or any other chocolate bytes) - few


Method:
- How to prepare frosting:
  • Melt the dark chocolate and allow to cool.
  • Beat butter using a beater or hand mixer till creamy. 
  • To this, add melted chocolate, salt and 1 cup of icing sugar. Beat them for a minute.
  • Add 2 - 3 tbsp of milk and one more cup of sugar. Beat the mixture again. 
  • Continue adding milk followed by sugar till you are done. 
  • Adjust the consistency and taste.
  • Beat the mixture for 2 - 3 minutes or till its light and creamy. 

- How to assemble the cake:
  • Slice each cake carefully into two layers. You will have 4 separate layers in total now.
  • Keep the first layer on the cake base or on a plate. Cover it with one layer of chocolate frosting.
  • Put the second layer of cake upon that and cover with frosting.
  • Fix all the four layers in the same way and cover the top and sides with frosting.
  • Decorate the sides with chocolate shaves. Arrange the choco-coated peanuts / your favorite chocolates on the top. Sprinkle some chocolate shaves as you like.
  • Refrigerate the cake for 2 - 3 hours before cutting. 


Tips:
  • Dark chocolate which I used for frosting was sweet and hence, 3 cups of icing sugar was enough. If using unsweetened chocolate, add more sugar accordingly.
  • You can prepare the chocolate shaves easily at home. Refrigerate the chocolate block and once it becomes really hard, peel them using a peeler. Your chocolate shaves are ready to use!

There are some well known areas for shopping in Bangalore and one of them I like most is Gandhi Bazar. Evening time will be really good to roam around there, and our shopping will be complete only after having some food, preferably chat food. You can see so many chat shops serving various chat food to the never ending crowd. I had been to Gandhi Bazar with my sister quite a few months back. She knows that area very well and we did plenty of shopping. We were really tired and feeling hungry. She took me to a chat shop in Gavipuram Area. Mango - Sweet Chat from that shop was her all time favorite. So, we ordered the same enjoyed eating. It was so good and so yummy! 
Unripened Totapuri mangoes are perfect for this chat recipe. Grilled sweet corn and finely chopped mangoes are really a wonderful combination. This chat food has become one of our favorite snacks for the evenings. Here is the recipe of Mango - Sweet Corn Chat for you!


Time required: 20 - 25 minutes
Servings: 3
Difficulty Level: Medium

Ingredients:
  • Sweet corn cobs - 2
  • Totapuri mango (medium size) - 1
  • Green chilli paste - 1 tsp (adjust according to taste)
  • Lime juice - for taste
  • Salt - for taste


Method:
  • Roast the corn cobs on direct flame. I did this on my stove top. Separate the kernels when its still hot. You can do this job easily using a knife. 
  • Chop the raw mango finely. I prefer cutting them to the same size as of corn kernels. 
  • Combine corn kernels and chopped mango in a mixing bowl. Add salt, chilli paste and lime juice according to taste. 
  • Toll them quickly and serve immediately! 
  • This delicious chat can be served as salad for the lunch or as evening snacks. 
 

When its mango season, raw mangoes are generously used for cooking in most of the Indian homes. Raw mangoes are perfect for preparing tangy and spicy Indian side dishes like Chutney, Gojju, Appehuli, etc. Here in Australia, whenever we get raw mangoes, I will prepare these yummy dishes. These days, frozen raw mango cubes are available in Indian convenience stores and hence, we are able to enjoy raw mango dishes whenever we feel like. 
During my last visit to native, I had got a nice tip from one of my relatives. She told that she will cut the raw mangoes into cubes in mango season and preserve them in the freezer. They will be good for months and when needed, they can be used for cooking. Hope this tip will be useful for you as well!
I had shared another version of Mango Chutney long back. That was using green chillies and, here is one more version of Mango Chutney. For this recipe, we use dry red chillies and it tastes delicious with the nice aroma of fenugreek and asafoetida. Try this Mango Red Chutney with rice and let me know how you liked it!


Preparation time: 15 minutes
Servings: 5 - 6
Difficulty level: Easy

Ingredients:
  • Raw mango, chopped into medium size cubes - 1 1/2 cup
  • Grated coconut - 1/2 cup
  • Dry red chillies - 2 or 3 (adjust according to taste)
  • Fenugreek seeds - 3/4 tsp
  • Asafoetida / Hing - big pinch
  • Cooking oil - 3/4 tsp
  • Sugar - 1/4 tsp
  • Salt to taste
  • Water - 3/4 cup approx.
For Seasoning: Oil - 1 tsp, Mustard seeds - 1 tsp, Pinch of asafoetida


Method:
  • Heat 3/4 tsp of oil in a small wok. Add broken red chillies and fenugreek seeds. Once they are roasted nicely, add big pinch of asafoetida and turn off the flame. 
  • Grind the roasted ingredients along with grated coconut, mango cubes, salt and sugar into a fine paste. Add water as required while grinding. But don't make it too watery.
  • Check and adjust the taste of Chutney. 
  • Heat 1 tsp of oil for seasoning. Add the mustard seeds and asafoetida. Once the mustard seeds start crackling, turn off the flame. 
  • Add this seasoning to the Chutney. Serve with rice and see how delicious it is!

Tips:
  • Peel off the green skin of mango if it tastes bitter. If not bitter, no need to peel off the skin.

Happy new year to everyone! I was planning to post this recipe on the first day of new year. But it was time to enjoy the long holidays and I couldn't find any time for blogging. We were busy with shopping and roaming around here and there. Holidays got over like that and now, I am back to my routine!
First recipe for this year is dedicated to all the chocolate lovers! I have adopted this recipe from a fellow blogger's site. Few years back when I started my baking journey, I used to keep browsing for varieties of cake recipes. I think, this was the first chocolate cake I prepared. It was so yummy and we just loved it! Then onwards, I have prepared this soft and delicious chocolate cake many a times. I have tried few other versions of chocolate cake recipes, but very much addicted to this recipe.
This recipe is from Raks Kitchen. She has a wonderful collection of recipes with mouth watering picks. I have tried this recipe exactly the same way she wrote and didn't make any changes. Try this yummy cake and let me know how it turned out!


Preparation time: 15 minutes
Baking time: 35 - 40 minutes
Servings: 10
Difficulty level: Medium

Ingredients:
  • All purpose flour / Maida - 1 1/2 cup
  • Cocoa powder - 3 tbsp
  • Baking soda - 1 tsp
  • Salt - 1/4 tsp
  • Sugar - 1 cup
  • Water - 1 cup
  • Oil (vegetable oil or sunflower oil) - 1/4 cup
  • Lime juice / vinegar - 1 tbsp
  • Vanilla essence - 1/2 tbsp


Method:
  • Pre-heat the oven to 180°C. 
  • Grease the baking tray and dust with some flour. Dusting with flour is to avoid the cake sticking to the vessel.
  • Combine all purpose flour, cocoa powder, baking soda and salt in a mixing bowl. Sieve it once so that everything will be mixed properly. 
  • Powder the sugar and mix it with water. Once sugar is diluted, add lime juice, oil and vanilla essence. Mix it well.
  • Fold in the flour mixture into this water and mix it nicely. 
  • Transfer the batter onto the greased baking tray and bake it for 35 - 40 minutes. To check whether its done or not, insert a tooth pick upto the bottom of the cake. If batter is not sticking to the toothpick, its clear that the cake is done. 
  • Allow the cake to cool down. Then, cut it into pieces and enjoy!


Biscuits are the snack time favorites of people of all the ages. We are also biscuit lovers and keep browsing for new varieties of them. Apart from store bought ones, I would love to prepare different types of biscuits at home. When it comes to bakery style food like Benne (Butter) Biscuit, Nippattu, etc., hubby prefers and love to eat the home made ones.
Many of you must have heard of Karachi Bakery in Hyderabad. They are famous for their food products especially Fruit Biscuit and Cashew Biscuits. When we were in Bangalore, we were sure to get a parcel of these goodies if anybody among the friends or family is visiting Hyderabad! My sister's family who stays in Hyderabad, will bring Karachi Biscuits every time when they are coming for vacation. These days, we can find these biscuits in some of the shops in Bangalore as well. 
I was planning to prepare this kind of biscuits at home and was not sure how to prepare. I just went with my recipe of Orange Shortbread, made slight changes and prepared Cashew Biscuits. Hubby and daughter appreciated these biscuits a lot and I was up in the air! Prepared it several times already and the biscuits were sold out quickly! 
Sharing the recipe of these tasty and addictive Cashew Biscuits here with you. Merry Christmas to all!


Preparation Time: 25 - 30 minutes
Baking Time: 20 minutes
Yield: 30 biscuits (depending on the size)
Difficulty level: Medium

Ingredients:
  • All purpose flour / Maida - 4 1/2 cup
  • Butter (at room temperature) - 185 gm
  • Sugar - 3/4 cup + 1 tbsp
  • Vanilla essence - 3/4 tsp
  • Broken cashews - 1 1/4 cup (as desired)


Method:
  • Take out the sugar and make a fine powder using an electric mixer or blender.
  • Beat the butter till its creamy. I have used hand mixer for beating. It can be done using the egg beater as well.
  • Add the sugar powder in 2 - 3 batches to this butter and beat till its fluffy and creamy. Finally add the vanilla essence and beat it for a while.
  • Add the all purpose flour gradually and make a soft, non - sticky dough ball. 
  • Pre-heat the oven to 170°C and line the baking tray with parchment paper. 
  • Divide the dough into two or three equal parts according to your convenience. Roll each dough ball into a square or rectangle of half inch thickness. 
  • Spread the broken cashews generously on the top of rolled dough. Roll it gently to make sure that the cashews are fixed into the dough properly. 
  • Cut them into squares or rectangles and line them on the baking tray. 
  • Bake the biscuits for about 18 - 20 minutes till they turn into light golden color. Mine got done exactly at 20 minutes. 
  • Take the biscuits out after 4 - 5 minutes and allow to cool on a cooling rack.
  • Enjoy the delicious biscuits with a cup of tea or coffee!


Normally it happens every time when we bring big bag of onions to home. We won't use them daily and hence, most of them will be spoiled and become waste. This time also, leaves started coming out from the onions. What I did was I just planted those onions in the backyard. They grew up nicely and I was so happy to use those spring onions for cooking! 
Spring Onion Rotti is my new experiment using these home grown spring onions. We usually prepare different varieties of roties with various vegetables. How about preparing Rotti with spring onion? I just tried it and rotti came out really well! Since these leaves won't have much water content like most other vegetables, I have used some curd and little water in this recipe. 
Below is the recipe of Spring Onion Rotti..hope you like it and give it a try!


Time required: 1 hour
Yield: 8 roties of medium size
Difficulty level: Medium

Ingredients:
  • Spring onion - 1 bunch
  • Onion - 2 (large)
  • Rice flour -1 1/2 cup (my cup weighs around 200 gms)
  • Green chillies - 2 or red chilli powder - 1 1/2 tsp (adjust according to taste)
  • Curd - 3/4 cup (see Tips)
  • Salt to taste
  • Sugar (optional) - 3/4 tsp
  • Water - 1/4 cup
  • Oil or butter - for cooking the Rotti

Method:
  • Chop the spring onion, green chillies (if using) and onions finely and and combine in a mixing bowl. 
  • Add salt and sugar to this mixture and mix it well. Keep it for 10 minutes and allow them to leave off the water content. 
  • Then, add the rice flour and mix it nicely. If not using green chillies, add the red chilli powder at this stage. 
  • Add the curd little by little and prepare a smooth, non sticky dough ball. Add some water (I added 1/4th cup), if needed. 
  • If you have time, leave the dough for 10 minutes before using. If in a hurry, it can be used instantly, no worries!
  • Prepare big lemon size balls from the dough. Grease the plantain leaf or plastic sheet with a tea spoon of oil. Pat the ball into a thin circle using your fingers. 
  • Take out the rotti carefully and cook it on the hot tawa on both the sides. Add little oil or butter while roasting the rotti which makes it more tasty.
  • Serve the hot Rotti along with butter. This Rotti tastes better when its hot.


Tips:
  • I have used sweet curd (regular ones) here. If the curd is sour in taste, use less curd and increase the quantity of water you are adding.
NewerStories OlderStories Home