There are some well known areas for shopping in Bangalore and one of them I like most is Gandhi Bazar. Evening time will be really good to roam around there, and our shopping will be complete only after having some food, preferably chat food. You can see so many chat shops serving various chat food to the never ending crowd. I had been to Gandhi Bazar with my sister quite a few months back. She knows that area very well and we did plenty of shopping. We were really tired and feeling hungry. She took me to a chat shop in Gavipuram Area. Mango - Sweet Chat from that shop was her all time favorite. So, we ordered the same enjoyed eating. It was so good and so yummy! 
Unripened Totapuri mangoes are perfect for this chat recipe. Grilled sweet corn and finely chopped mangoes are really a wonderful combination. This chat food has become one of our favorite snacks for the evenings. Here is the recipe of Mango - Sweet Corn Chat for you!


Time required: 20 - 25 minutes
Servings: 3
Difficulty Level: Medium

Ingredients:
  • Sweet corn cobs - 2
  • Totapuri mango (medium size) - 1
  • Green chilli paste - 1 tsp (adjust according to taste)
  • Lime juice - for taste
  • Salt - for taste


Method:
  • Roast the corn cobs on direct flame. I did this on my stove top. Separate the kernels when its still hot. You can do this job easily using a knife. 
  • Chop the raw mango finely. I prefer cutting them to the same size as of corn kernels. 
  • Combine corn kernels and chopped mango in a mixing bowl. Add salt, chilli paste and lime juice according to taste. 
  • Toll them quickly and serve immediately! 
  • This delicious chat can be served as salad for the lunch or as evening snacks. 
 

When its mango season, raw mangoes are generously used for cooking in most of the Indian homes. Raw mangoes are perfect for preparing tangy and spicy Indian side dishes like Chutney, Gojju, Appehuli, etc. Here in Australia, whenever we get raw mangoes, I will prepare these yummy dishes. These days, frozen raw mango cubes are available in Indian convenience stores and hence, we are able to enjoy raw mango dishes whenever we feel like. 
During my last visit to native, I had got a nice tip from one of my relatives. She told that she will cut the raw mangoes into cubes in mango season and preserve them in the freezer. They will be good for months and when needed, they can be used for cooking. Hope this tip will be useful for you as well!
I had shared another version of Mango Chutney long back. That was using green chillies and, here is one more version of Mango Chutney. For this recipe, we use dry red chillies and it tastes delicious with the nice aroma of fenugreek and asafoetida. Try this Mango Red Chutney with rice and let me know how you liked it!


Preparation time: 15 minutes
Servings: 5 - 6
Difficulty level: Easy

Ingredients:
  • Raw mango, chopped into medium size cubes - 1 1/2 cup
  • Grated coconut - 1/2 cup
  • Dry red chillies - 2 or 3 (adjust according to taste)
  • Fenugreek seeds - 3/4 tsp
  • Asafoetida / Hing - big pinch
  • Cooking oil - 3/4 tsp
  • Sugar - 1/4 tsp
  • Salt to taste
  • Water - 3/4 cup approx.
For Seasoning: Oil - 1 tsp, Mustard seeds - 1 tsp, Pinch of asafoetida


Method:
  • Heat 3/4 tsp of oil in a small wok. Add broken red chillies and fenugreek seeds. Once they are roasted nicely, add big pinch of asafoetida and turn off the flame. 
  • Grind the roasted ingredients along with grated coconut, mango cubes, salt and sugar into a fine paste. Add water as required while grinding. But don't make it too watery.
  • Check and adjust the taste of Chutney. 
  • Heat 1 tsp of oil for seasoning. Add the mustard seeds and asafoetida. Once the mustard seeds start crackling, turn off the flame. 
  • Add this seasoning to the Chutney. Serve with rice and see how delicious it is!

Tips:
  • Peel off the green skin of mango if it tastes bitter. If not bitter, no need to peel off the skin.

Happy new year to everyone! I was planning to post this recipe on the first day of new year. But it was time to enjoy the long holidays and I couldn't find any time for blogging. We were busy with shopping and roaming around here and there. Holidays got over like that and now, I am back to my routine!
First recipe for this year is dedicated to all the chocolate lovers! I have adopted this recipe from a fellow blogger's site. Few years back when I started my baking journey, I used to keep browsing for varieties of cake recipes. I think, this was the first chocolate cake I prepared. It was so yummy and we just loved it! Then onwards, I have prepared this soft and delicious chocolate cake many a times. I have tried few other versions of chocolate cake recipes, but very much addicted to this recipe.
This recipe is from Raks Kitchen. She has a wonderful collection of recipes with mouth watering picks. I have tried this recipe exactly the same way she wrote and didn't make any changes. Try this yummy cake and let me know how it turned out!


Preparation time: 15 minutes
Baking time: 35 - 40 minutes
Servings: 10
Difficulty level: Medium

Ingredients:
  • All purpose flour / Maida - 1 1/2 cup
  • Cocoa powder - 3 tbsp
  • Baking soda - 1 tsp
  • Salt - 1/4 tsp
  • Sugar - 1 cup
  • Water - 1 cup
  • Oil (vegetable oil or sunflower oil) - 1/4 cup
  • Lime juice / vinegar - 1 tbsp
  • Vanilla essence - 1/2 tbsp


Method:
  • Pre-heat the oven to 180°C. 
  • Grease the baking tray and dust with some flour. Dusting with flour is to avoid the cake sticking to the vessel.
  • Combine all purpose flour, cocoa powder, baking soda and salt in a mixing bowl. Sieve it once so that everything will be mixed properly. 
  • Powder the sugar and mix it with water. Once sugar is diluted, add lime juice, oil and vanilla essence. Mix it well.
  • Fold in the flour mixture into this water and mix it nicely. 
  • Transfer the batter onto the greased baking tray and bake it for 35 - 40 minutes. To check whether its done or not, insert a tooth pick upto the bottom of the cake. If batter is not sticking to the toothpick, its clear that the cake is done. 
  • Allow the cake to cool down. Then, cut it into pieces and enjoy!


Biscuits are the snack time favorites of people of all the ages. We are also biscuit lovers and keep browsing for new varieties of them. Apart from store bought ones, I would love to prepare different types of biscuits at home. When it comes to bakery style food like Benne (Butter) Biscuit, Nippattu, etc., hubby prefers and love to eat the home made ones.
Many of you must have heard of Karachi Bakery in Hyderabad. They are famous for their food products especially Fruit Biscuit and Cashew Biscuits. When we were in Bangalore, we were sure to get a parcel of these goodies if anybody among the friends or family is visiting Hyderabad! My sister's family who stays in Hyderabad, will bring Karachi Biscuits every time when they are coming for vacation. These days, we can find these biscuits in some of the shops in Bangalore as well. 
I was planning to prepare this kind of biscuits at home and was not sure how to prepare. I just went with my recipe of Orange Shortbread, made slight changes and prepared Cashew Biscuits. Hubby and daughter appreciated these biscuits a lot and I was up in the air! Prepared it several times already and the biscuits were sold out quickly! 
Sharing the recipe of these tasty and addictive Cashew Biscuits here with you. Merry Christmas to all!


Preparation Time: 25 - 30 minutes
Baking Time: 20 minutes
Yield: 30 biscuits (depending on the size)
Difficulty level: Medium

Ingredients:
  • All purpose flour / Maida - 4 1/2 cup
  • Butter (at room temperature) - 185 gm
  • Sugar - 3/4 cup + 1 tbsp
  • Vanilla essence - 3/4 tsp
  • Broken cashews - 1 1/4 cup (as desired)


Method:
  • Take out the sugar and make a fine powder using an electric mixer or blender.
  • Beat the butter till its creamy. I have used hand mixer for beating. It can be done using the egg beater as well.
  • Add the sugar powder in 2 - 3 batches to this butter and beat till its fluffy and creamy. Finally add the vanilla essence and beat it for a while.
  • Add the all purpose flour gradually and make a soft, non - sticky dough ball. 
  • Pre-heat the oven to 170°C and line the baking tray with parchment paper. 
  • Divide the dough into two or three equal parts according to your convenience. Roll each dough ball into a square or rectangle of half inch thickness. 
  • Spread the broken cashews generously on the top of rolled dough. Roll it gently to make sure that the cashews are fixed into the dough properly. 
  • Cut them into squares or rectangles and line them on the baking tray. 
  • Bake the biscuits for about 18 - 20 minutes till they turn into light golden color. Mine got done exactly at 20 minutes. 
  • Take the biscuits out after 4 - 5 minutes and allow to cool on a cooling rack.
  • Enjoy the delicious biscuits with a cup of tea or coffee!


Normally it happens every time when we bring big bag of onions to home. We won't use them daily and hence, most of them will be spoiled and become waste. This time also, leaves started coming out from the onions. What I did was I just planted those onions in the backyard. They grew up nicely and I was so happy to use those spring onions for cooking! 
Spring Onion Rotti is my new experiment using these home grown spring onions. We usually prepare different varieties of roties with various vegetables. How about preparing Rotti with spring onion? I just tried it and rotti came out really well! Since these leaves won't have much water content like most other vegetables, I have used some curd and little water in this recipe. 
Below is the recipe of Spring Onion Rotti..hope you like it and give it a try!


Time required: 1 hour
Yield: 8 roties of medium size
Difficulty level: Medium

Ingredients:
  • Spring onion - 1 bunch
  • Onion - 2 (large)
  • Rice flour -1 1/2 cup (my cup weighs around 200 gms)
  • Green chillies - 2 or red chilli powder - 1 1/2 tsp (adjust according to taste)
  • Curd - 3/4 cup (see Tips)
  • Salt to taste
  • Sugar (optional) - 3/4 tsp
  • Water - 1/4 cup
  • Oil or butter - for cooking the Rotti

Method:
  • Chop the spring onion, green chillies (if using) and onions finely and and combine in a mixing bowl. 
  • Add salt and sugar to this mixture and mix it well. Keep it for 10 minutes and allow them to leave off the water content. 
  • Then, add the rice flour and mix it nicely. If not using green chillies, add the red chilli powder at this stage. 
  • Add the curd little by little and prepare a smooth, non sticky dough ball. Add some water (I added 1/4th cup), if needed. 
  • If you have time, leave the dough for 10 minutes before using. If in a hurry, it can be used instantly, no worries!
  • Prepare big lemon size balls from the dough. Grease the plantain leaf or plastic sheet with a tea spoon of oil. Pat the ball into a thin circle using your fingers. 
  • Take out the rotti carefully and cook it on the hot tawa on both the sides. Add little oil or butter while roasting the rotti which makes it more tasty.
  • Serve the hot Rotti along with butter. This Rotti tastes better when its hot.


Tips:
  • I have used sweet curd (regular ones) here. If the curd is sour in taste, use less curd and increase the quantity of water you are adding.

Mangoes are my all time favorite. For mango lovers like me, anything with mango tastes good! This year, we had enjoyed the mango season in India to the full extent and now, its the time for mangoes here in Australia! Last week, we had been to the market and saw plenty of delicious mangoes on the store racks. I just picked some and brought them home. Whenever there are plenty of mangoes, I love to prepare Mango Seekarane / Rasayana. This time also, I prepared Mango Seekarane and wanted my daughter to taste it. She is not very much fond of sweets and said 'no' to it, as expected. Instead, she wanted me to bake a cake for her. I just googled for the mango cake recipes and finally, this is the outcome!
This was my first baking attempt using mango. While searching the recipes, I just stopped at Julie's space and found her Mango Cake recipe interesting. I have made some small changes in the original recipe according to my preferences and prepared this delicious loaf cake. This cake is perfect for tea time and also for kids snacks. Give it a try and enjoy eating!


Preparation time: 15 minutes
Baking time: 35 - 40 minutes
Yield: 1 loaf
Difficulty level: Medium

Ingredients:
  • Maida / All purpose flour - 2 cups (my cup weighs around 75 gms)
  • Fine rava (semolina) - 1/2 cup
  • 1 large mango - fully ripened (which amounts to 2 cups of puree)
  • Sugar - 1 1/2 cup
  • Big pinch of salt
  • Milk - 1/2 cup
  • Oil - 1/2 cup
  • Baking powder - 2 tsp
  • Baking soda - 1 tsp
  • Saffron strands (optional) - 8 to 10

Method:
  • Combine maida and baking powder in a mixing bowl and sieve it 2 - 3 times. Fold in the rava and mix it once.
  • Pre heat the oven to 175 °C. Grease the loaf pan and keep it ready.
  • Remove the peel and the seed part of mango. Chop it and blend them along with saffron strands and make a thick puree.  
  • Add salt, sugar and milk to this puree and mix it till sugar dissolves completely. Add beking soda and oil and mix it lightly. 
  • Fold in the sieved maida little by little and prepare the dough.
  • Transfer the dough onto the greased loaf pan and bake it for 35 - 40 minutes until the toothpick inserted comes out clean. Mine got done exactly at 38 minutes. 
  • Allow it to cool down and cut into slices once it becomes cool. 


Tips:
  • You can substitute the fresh mango puree with store bought mango pulp.
ಕನ್ನಡದಲ್ಲಿ ಓದಲು ಇಲ್ಲಿ ಕ್ಲಿಕ್ ಮಾಡಿ. 

Deepavali or Diwali is one of the important festivals we celebrate at home. We had a wonderful festival this time with our daughter darling. This was the second Deepavali for her. Even though we celebrated other Hindu festivals like Nagara Panchami, Ganesh Chaturthi, Navarathri, etc. she enjoyed the Deepavali celebration more than other festivals. Decorating the home, wearing the new clothes, enjoying the delicious food, lighting the candles, all these made her so happy. The next day after the festival, I just asked her how was the festival. She told, 'It was very nice, we will celebrate it today also'!! Ha Ha! Somehow I was able to convince her that we will celebrate it later :)
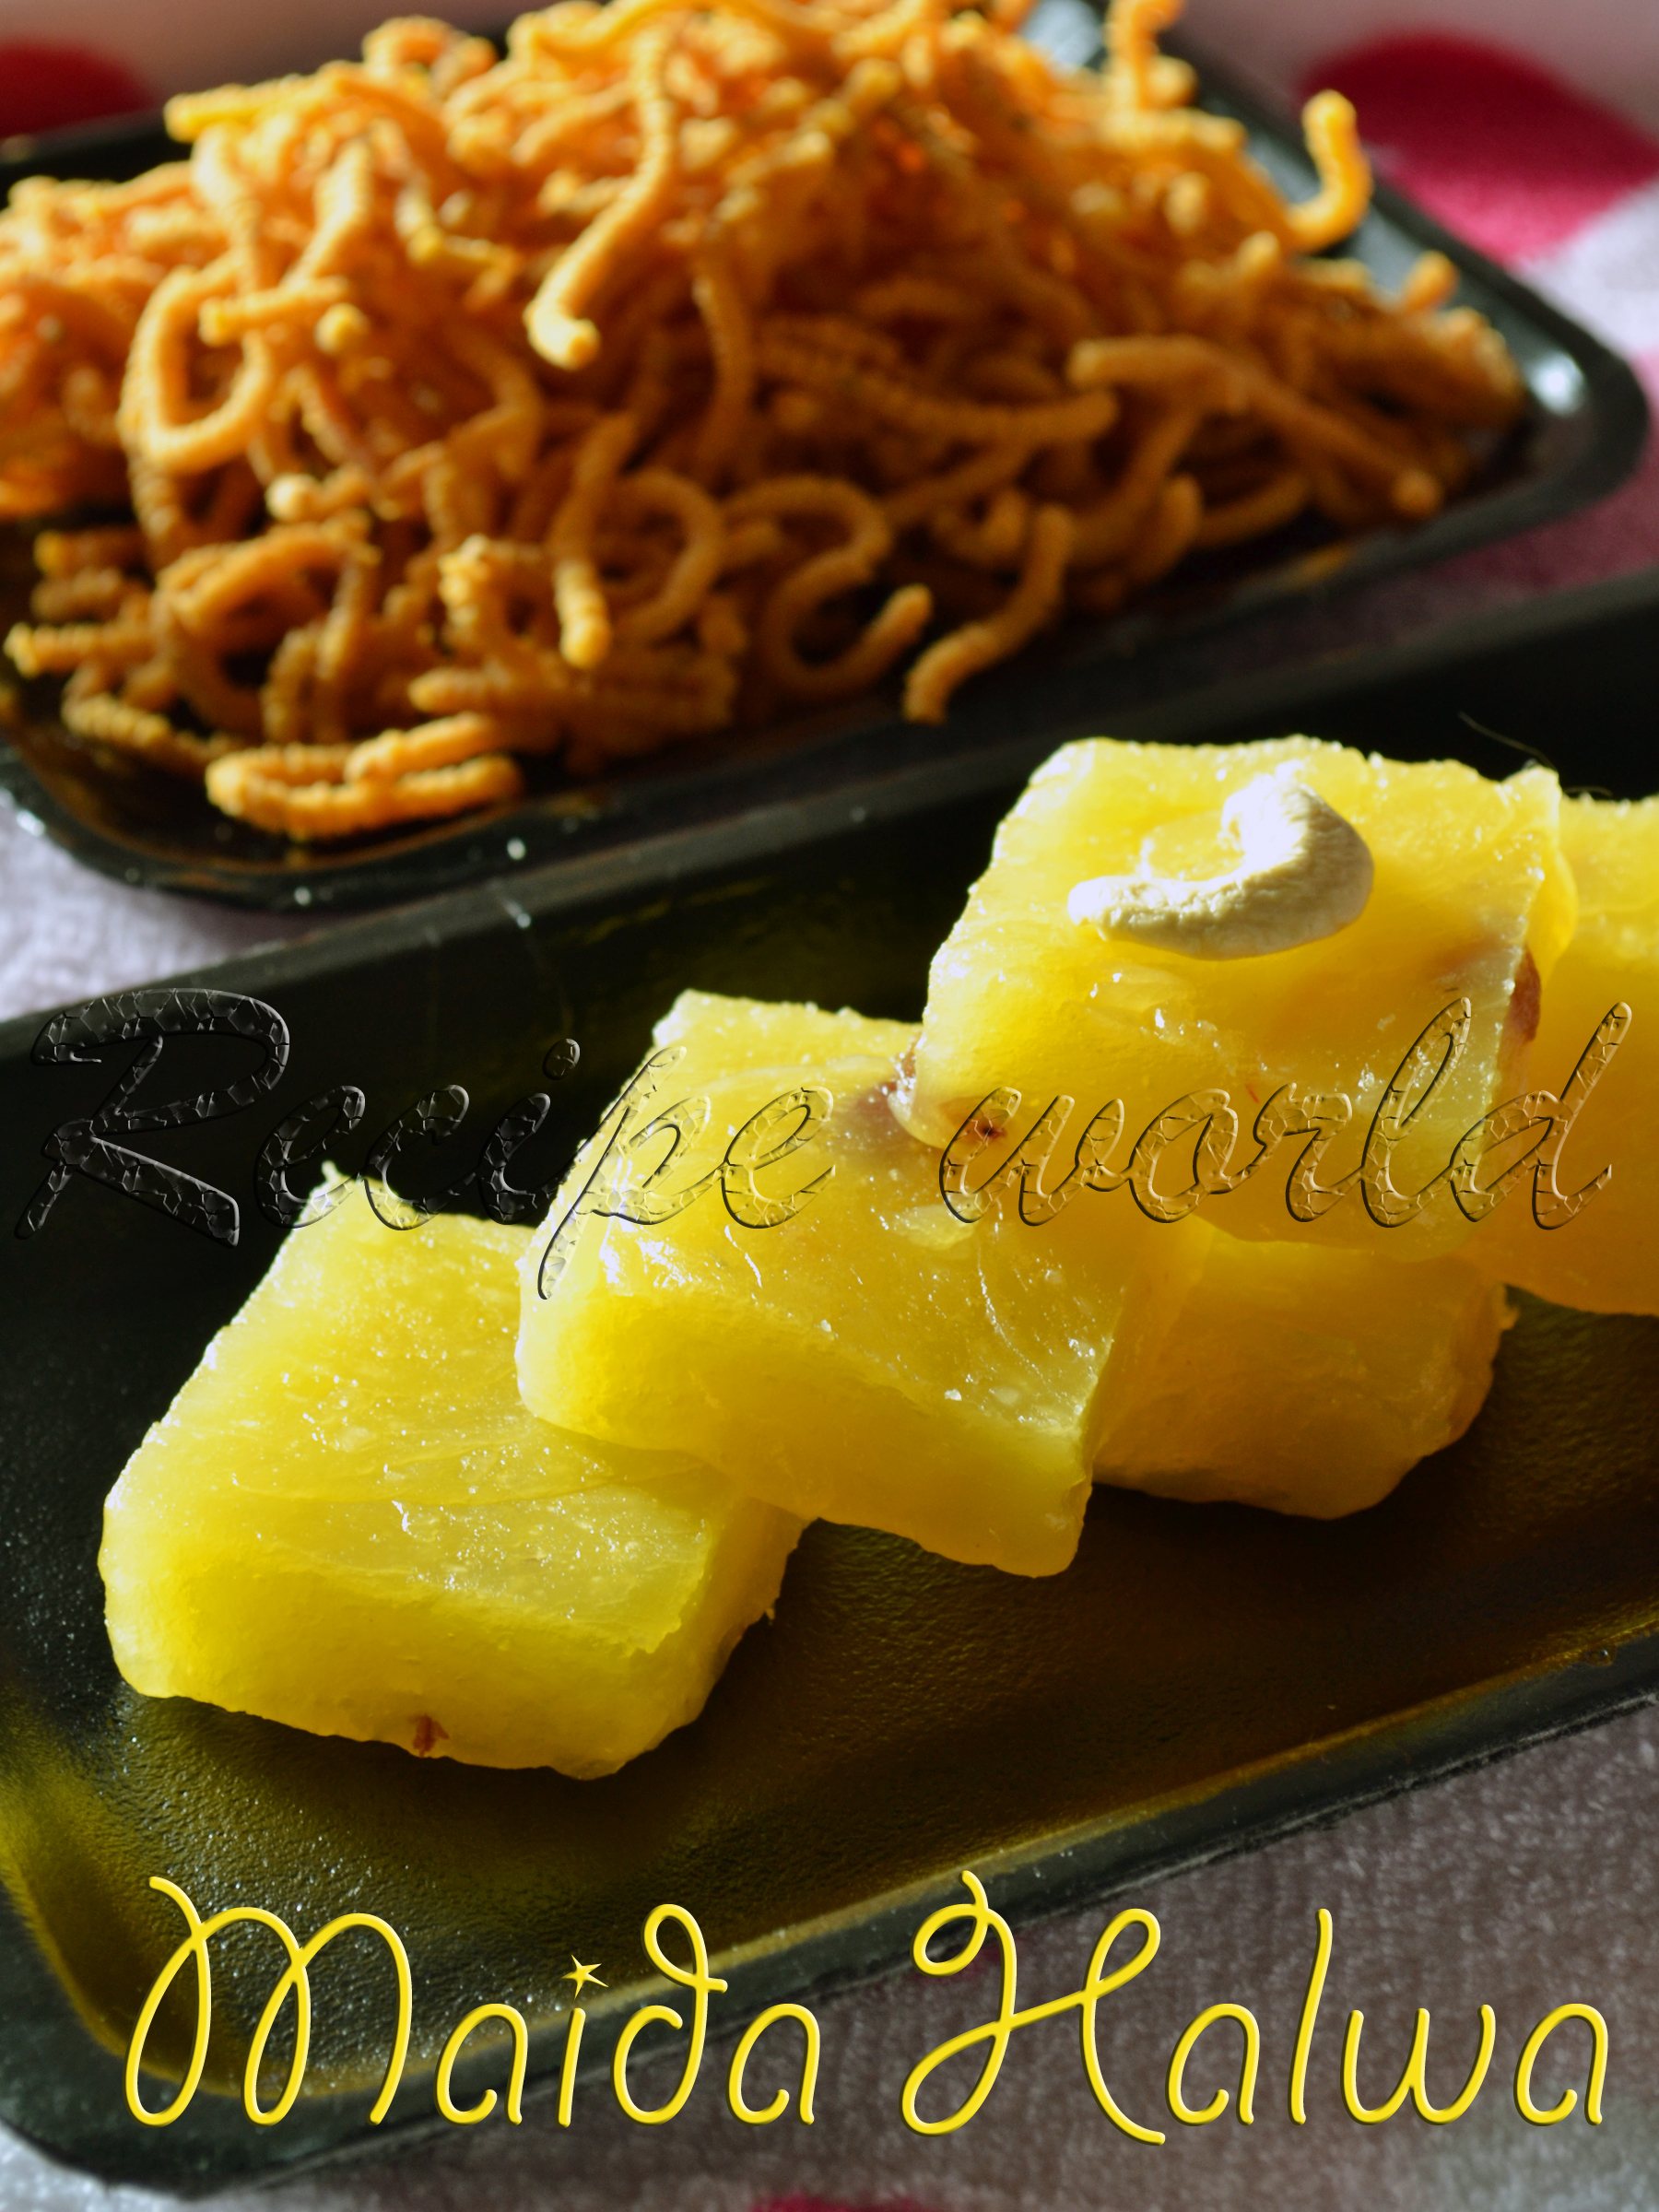
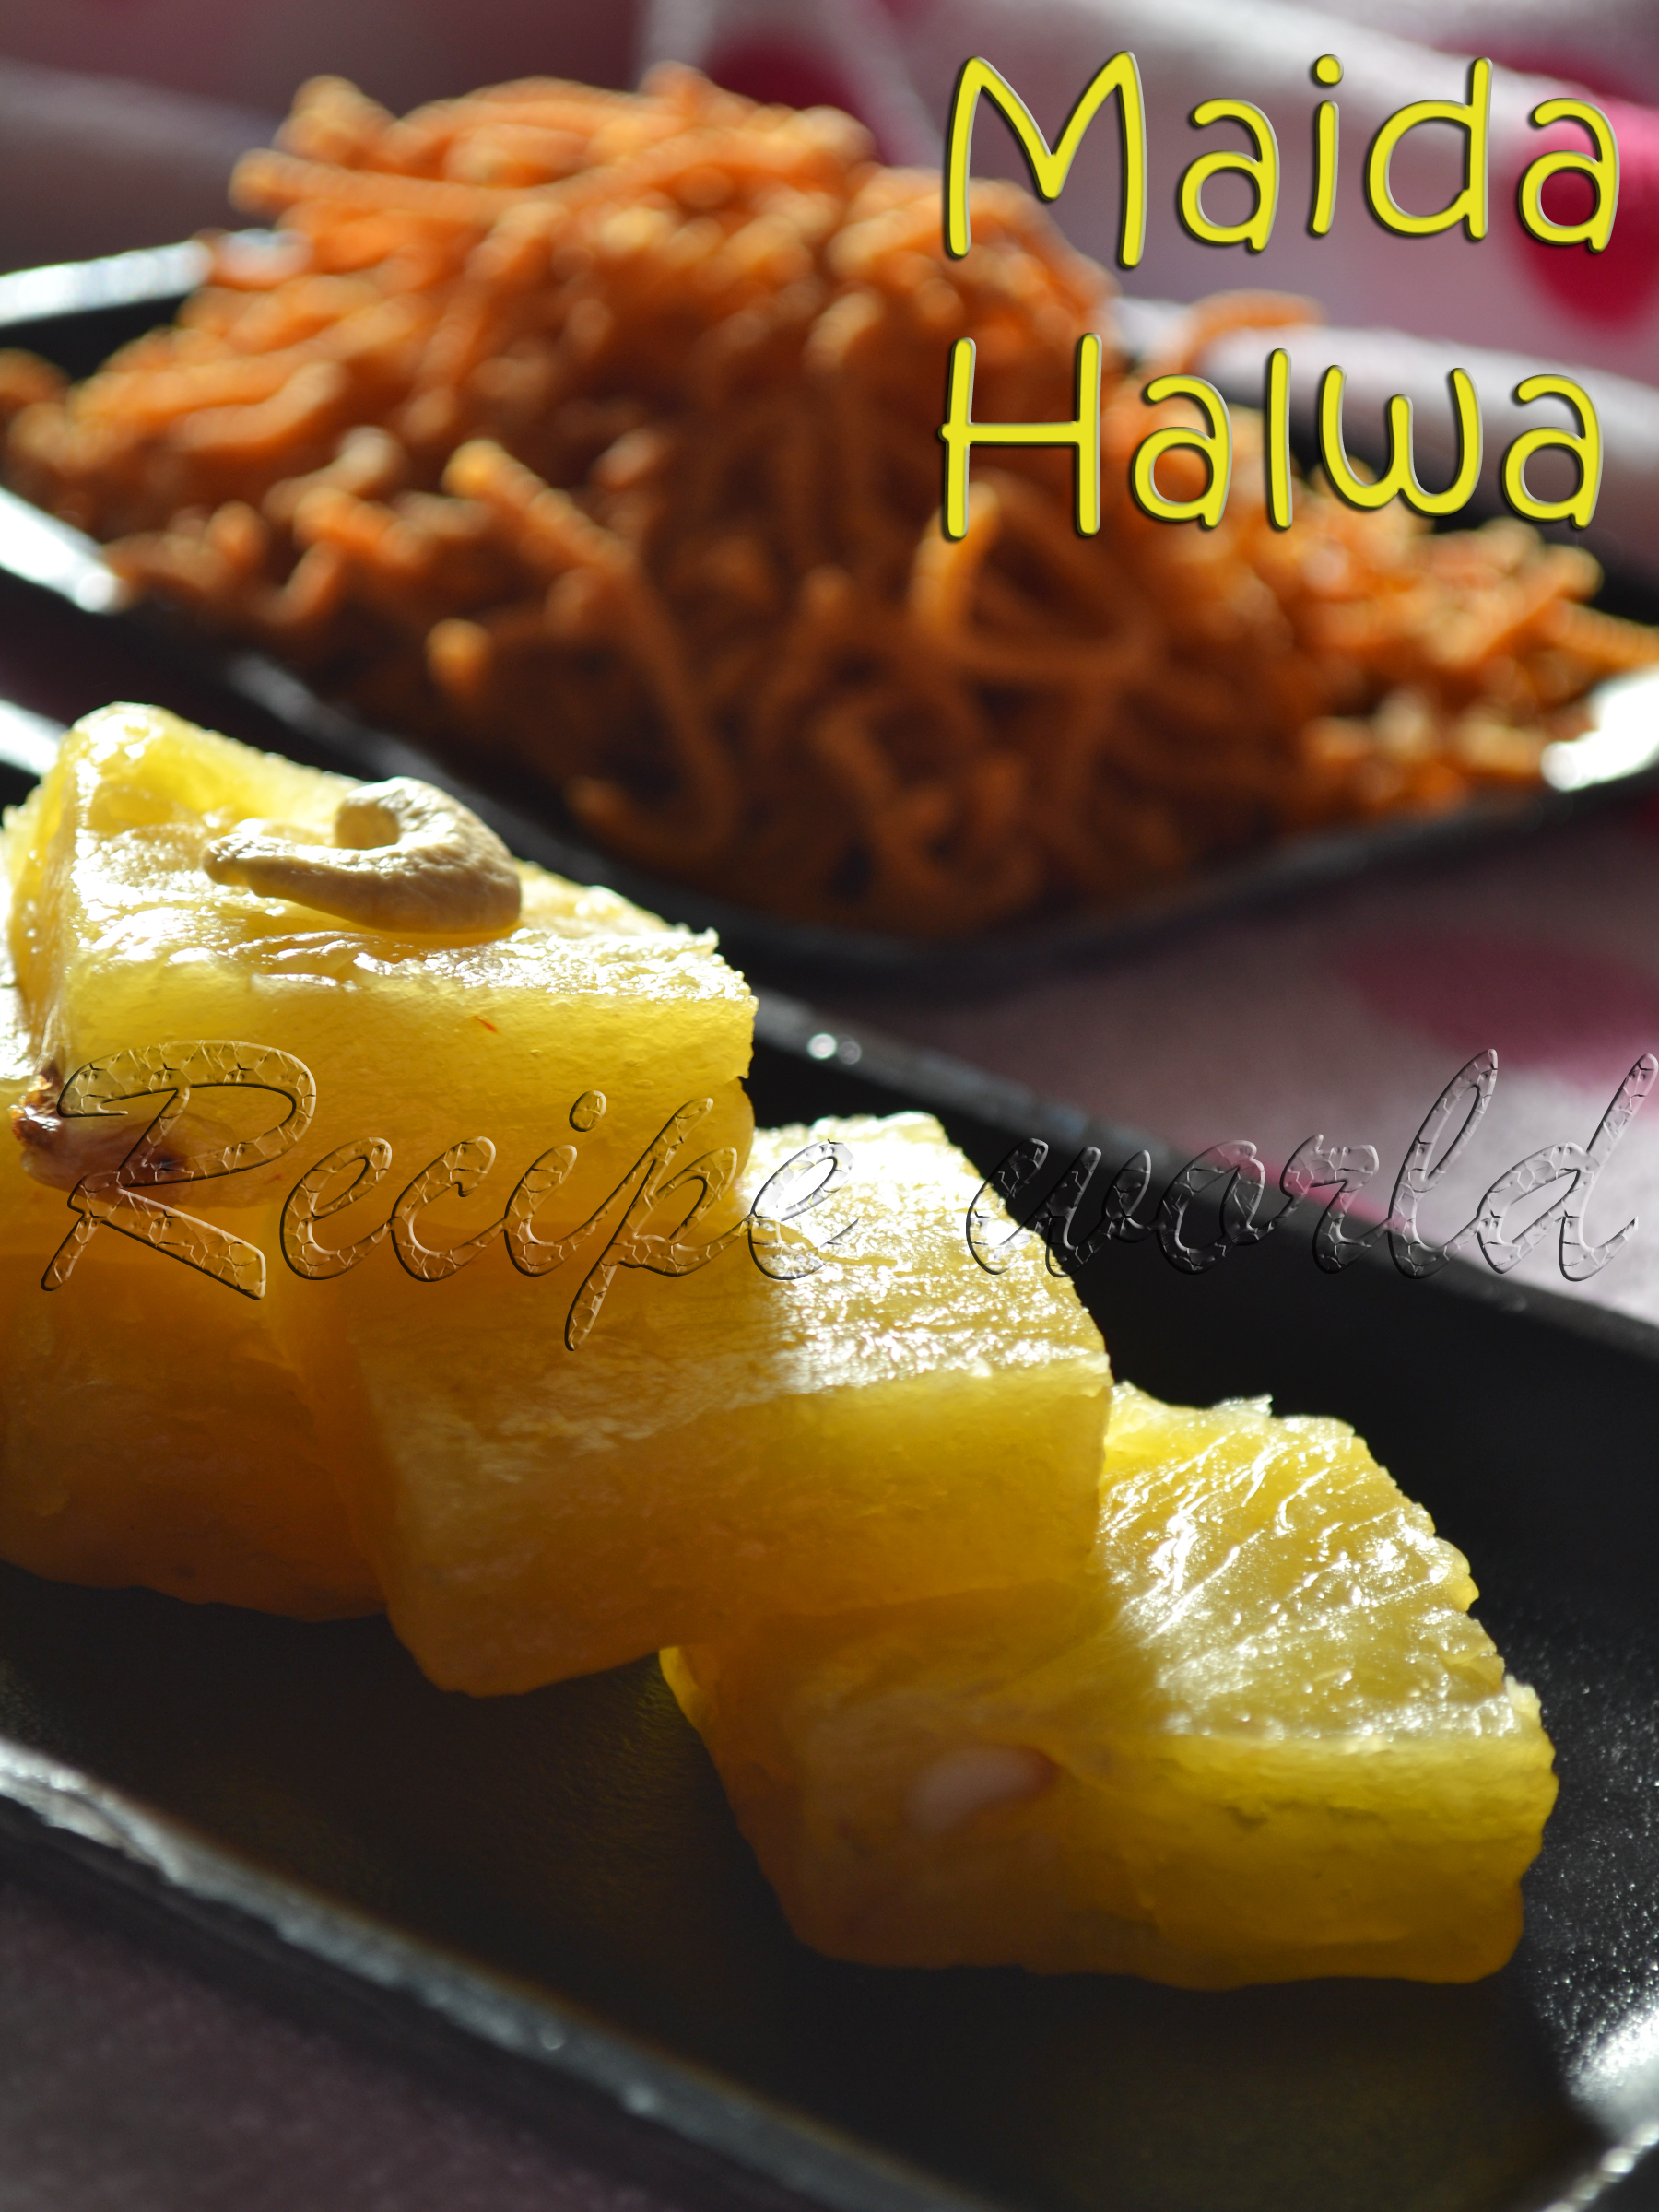
Maida Halwa is one of the sweet delicacies from India which is perfect for festivals and such occasions. It tastes very similar to Wheat Halwa which will be prepared at my Mom's place for every Diwali. Preparing Wheat Halwa is bit difficult as well as time consuming task. Whole wheat need to be soaked for 2 days in water, then need to be cleaned and ground into fine paste, later it needs filtering..keep stirring the batter on the stove top for at-least an hour..uff! such a lengthy and stressful job it is.
We were really happy to find a substitute for lengthy procedure of preparing the Wheat Halwa. My sister was going through a recipe collection sometime back and she found this Maida Halwa recipe interesting. We all loved this Maida Halwa which tasted the same as Wheat Halwa. Then onwards, this recipe has become very popular in our family circle.
This year, Maida Halwa was one of my special preparations for the Diwali festival. We enjoyed the festival of lights with all the sweet and savory preparations at home. Preparing this Halwa is bit stressful, but you feel really its worth preparing when you taste it!


Time required: 35 - 40 minutes
Yield: Around 33 pieces depending on the size
Level of difficulty: Difficult

Ingredients:
  • Maida / All purpose flour - 1 large cup
  • Sugar - 1 1/2 cup
  • Pinch of salt
  • Water - 1 3/4 cup
  • Ghee - 1/2 cup or little more
  • Broken cashew pieces - 2 tbsp
  • Raisins - 2 to 3 tbsp
  • Saffron strands - 1/2 tsp (or 3/4 tsp cardamom powder)


Method:
  • Soak the saffron strands in 2 tbsp of hot water.
  • Take maida in a mixing bowl, add around 1 1/4 cup of water gradually. Prepare the batter without any lumps. Consistency of the batter is the same as dosa batter. 
  • Roast the cashew pieces and raisins in ghee and keep aside. 
  • Take a heavy bottom pan, pour the sugar and add 1/2 cup of water. Bring it to boil. 
  • Once the syrup reaches 2 string consistency, add the maida batter and keep stirring continuously for 2 minutes. 
  • Add the saffron strands (and also the water), pinch of salt and ghee and stir it continuously on low or medium flame. 
  • When the mixture thickens, you feel it really hard to stir the mixture well. Once the mixture starts leaving the edges, take a spoon full of mixture out and make it cool. If you are able to form a ball and its not sticking to the hands, thats the right consistency. 
  • Stir in the roasted cashews and raisins and mix it well. 
  • Spread the mixture on a greased plate (or plates) evenly and allow to cool. 
  • Cut it into desired shapes once its cool. That's all, delicious Maida Halwa is ready to enjoy!


Tips:
  • I have used 1/2 cup of ghee here. Little more ghee can be added if you would like to. Adding more ghee will make it even more delicious.
  • As far as possible, try to consume it fresh. It will be good for 3 - 4 days if kept outside. If kept in refrigerator, taste of Halwa will change a bit.
ಕನ್ನಡದಲ್ಲಿ ಓದಲು ಇಲ್ಲಿ ಕ್ಲಿಕ್ ಮಾಡಿ. 

Motherhood is always an amazing thing which every woman will cherish. Every mother looks after her child with all the affection and care. Little kids need lot of love and care. When it comes to their food, they need healthy and nutritious food which is tasty and easily digestible. Cooked and mashed fruits, Ragi malt, fresh fruit juice, oats porridge, etc. are some of such foods which are good for children. 
I was thinking of posting some baby food recipes from long time. While preparing different variety of foods for my daughter, it comes to my mind and somehow, I was not able to make it out. Last week, I was preparing the Ragi Sari (Ragi Malt) for my kid. Suddenly, it came to my mind that why not I post this recipe! I just took the camera and clicked couple of photos of the same.
I had started giving this ragi malt to my daughter from her 10th month. Not only kids, this healthy mix is good for elders as well. You can prepare them in large quantity and use upto 4 - 5 months. For little ones, better to prepare this malt powder in small quantities so that you can give them the fresh stock. Ragi Malt powder recipe is as follows:


Preparation Time: 8 - 10 days (that's huge!)
Difficulty level: Medium 
Yield: Approx. 2.5 kg malt mix

Ingredients:
  • Finger millet - 1/2 kg
  • Kuchchalakki / boiled rice - 1/4 kg
  • Whole wheat - 1/4 kg
  • Mung bean - 125 gm
  • Almonds - 125 gm
  • Barley - 125 gm
  • Corn kernels - 125 gm
  • Ground nuts - 125 gm
  • Cloves - 15
  • Ondelaga / Centella asiatica - 15 to 20 stalks

Method:
  • Wash finger millet, whole wheat and mung beans separately and soak them in water for a day. Then, wash them and drain all the water. Put them on a thin, wet cloth, tie it tightly and keep it in a vessel for a day or two, till you get nice sprouts. Spread them on a cloth or on the plates and put the  under the sun for drying. 
  • Wash and clean the boiled rice, almonds, barley, corn kernels and ground nuts and dry them nicely under the sun. Better you keep these grains covered with a thin cloth while drying to ensure they are hygienic.  
  • It takes at least 3 - 4 days to get these grains dried completely. 
  • Clean the Ondelaga / Centella asiatica including the leaves and roots and dry them nicely.
  • Once all the ingredients are ready, roast them separately in a heavy bottom pan on law flame till you get a nice aroma. Roast the cloves for 2 - 3 minutes.
  • Mix all the ingredients together once they cool down. Don't forget to put the Ondelaga / Centella asiatica with them!
  • Make a fine powder of these ingredients. You can get it done in a flour mill or even do it at home using the mixer grinder. If done in a mixer grinder, you will get a course powder, not very fine. 
  • Once the malt powder is cool, transfer it to an air tight container. Take out small quantities of flour in small container for regular use.


How to prepare the Malt drink: Take around 1 1/2 tbsp of malt powder and mix it with 3 tbsp of water. Add 1 or 1 1/2 cup of milk and 1/4th tsp of ghee (optional). Add sugar / jaggery for taste. Bring it to boil and stir it occasionally. When it starts boiling, switch off the flame. Serve the malt once it is cool.

Tips:
  • You can add few pods of cardamom while preparing the malt powder to make the drink fragrant. I love adding few strands of saffron as well sometimes. 
  • Mung bean and wheat grains can be added without sprouting also. 
  • If you can't get the finger millets, can add the readily available finger millet flour instead. 

NewerStories OlderStories Home