ಕನ್ನಡದಲ್ಲಿ ಓದಲು ಇಲ್ಲಿ ಕ್ಲಿಕ್ ಮಾಡಿ.

We had a mixer grinder of Butterfly brand from past 3 years. My sister has been using this brand mixer from around 10 years. She suggested me this brand after my marriage. I was happy with the mixer and loved the juice jar which comes along with it! Due to our luggage limit, we sold it in Australia while relocating to India. After coming to Bangalore, I wanted to buy the same model from butterfly again! We searched and searched here, nowhere I could find the same kind of mixer :( Most of the big and branded shops won't have the Butterfly mixer these days and very few shops have some other model in Butterfly. Finally, I was able to get the same model mixer in a small shop and without a second thought, we bought it from them!! Now I have decided not to loose this mixer for any reason for at-least a couple of years.
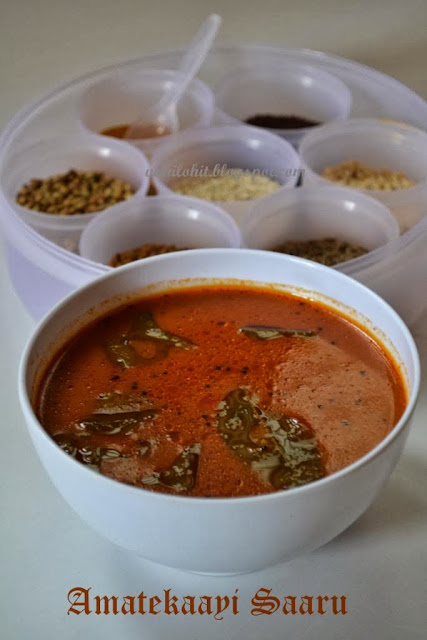
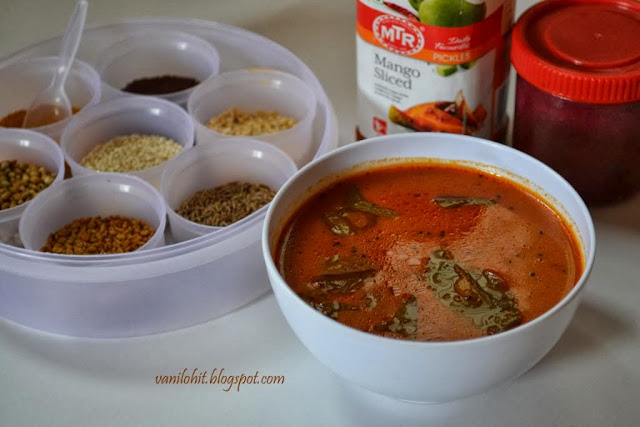
We had been to our native recently. One of our relatives had brought some home grown Amatekayi (Ambatekayi) for us. Since we can't get all these village veggies and fruits here, our bags will be heavily loaded with these items while coming back from the native :) Amatekayi (Ambatekayi) is a kind of tangy fruit which is common in rural areas. It will have a hard skin and a fibrous seed inside. Lot of delicious recipes can be prepared using this Amatekayi. Here is the recipe of sambar using this Amatekayi. This sambar is called as 'Amati' in my place. This sambar will have a spicy, tangy and sweetish taste and goes well with rice!


Preparation time: 25 minutes
Servings: 4 - 5

Ingredients:
Amate (Ambate) kayi - 6
Cloves - 3
Coriander seeds - 1 1/4 spoon
Mustard seeds - 1/2 spoon
Dry red chillies - 3 (adjust according to taste)
Grated coconut - 1/2 cup
Salt to taste
Jaggery - 4 spoon (for sweetness)
For seasoning: oil - 2 spoon, urad dal - 1/2 spoon, mustard seeds - 1/4 spoon, pinch of asafoetida, few curry leaves

Method:
Take 3 cups of water in a vessel and cook the Amatekayi till soft.
Once the cooked Amatekayi is cool, add salt and sugar. Squeeze off the Amatekayi in that mixture and let the skin and seed remain in the gravy.
Heat 2 spoons of oil in a small wok and add cloves, red chillies, coriander seeds and mustard seeds. Roast them until you hear the spluttering sound and grind them finely along with grated coconut.
Heat oil in a heavy bottom pan, add urad dal, mustard seeds, asafoetida and curry leaves.
Add the cooked Amatekayi gravy to the seasoning and boil it for 4 - 5 minutes.
Sambar (Amati) is ready to serve with hot rice! It can be preserved upto a week in refrigerator.  


ಕನ್ನಡದಲ್ಲಿ ಓದಲು ಇಲ್ಲಿ ಕ್ಲಿಕ್ ಮಾಡಿ.

Here is a very simple recipe for preparing a special pulav! If you hear the word pulav, you will think of the ingredients which you need for it and a complicated method of doing it.. My mother never  uses garam masala for preparing pulav. She uses her own masala powder . She cooks rice  and vegetables separately  and mixes in the seasoning. Then what, pulav is ready! Don't worry about my mother's secret pulav powder, you can prepare pulav with your own sambar/ saaru powder also. Here is the recipe for you...


Preparation time: 30 - 35 minutes
Servings: 2

Ingredients:
Rice - 1 1/2 cup
Water - 3 cups
Beans 6-7
Carrot - 1
Green peas (optional) - few
Cloves 3-4
Cinnamon - 1" piece
Cumin seeds - 1/2 spoon
Fennel seeds - 1/4spoon
Mustard seeds - 1/4 spoon
Ginger garlic paste - 1 spoon
Onion - 1 medium sliced thinly
Sambar / rasam powder - 1 1/2 spoon as per your taste
Green chilli -1
Sugar - 1/4 spoon
Salt to taste
Lime juice - 1 spoon
Oil - 3 tbsp
Ghee - 1 1/2 spoon


Method :
Wash the rice thoroughly and cook with 1:2 cups of water.                                                            
Mix  long cut carrot, beans and green peas with little salt in a pressure cooker for one whistle. Let it cool and drain all the water.
Heat oil in a pan and add cinnamon pieces, cloves, mustard seeds and fry for a while. Add cumin seeds, fennel seeds, sliced green chilli, ginger garlic paste and saute for a minute. 
Now add thinly sliced onion and fry for 3-4 minutes. 
Add sambar/rasam powder and cooked vegetables into the pan and cook for 2 minutes. 
Then add cooked rice, salt , lime juice and sugar and mix well. 
Finally add ghee and cover the pan, simmer for 4 minutes. Now your pulav is ready!!  It's tastier if you eat hot with raitha.


ಕನ್ನಡದಲ್ಲಿ ಓದಲು ಇಲ್ಲಿ ಕ್ಲಿಕ್ ಮಾಡಿ.

Here is a variety of chutney which I learned from my mom. For this chutney, don't use the green chillies which r too hot. Use more of green chillies which are less hot to give a nice aroma to the chutney. This chutney goes well with all varieties of dosa, idli and chapathi.


Preparation Time: 10 minutes
Servings: 2

Ingredients:
Grated coconut - 3/4 cup
Urad dal - 1 spoon
Sesame seeds - 1/4th or 1/2 spoon
Mustard seeds - 1/4 spoon
Oil - 1 1/2 spoon (I prefer using coconut oil)
Green chillies - 3 

Method:
Heat oil in a small wok. Add urad dal, mustard seeds and sesame seeds.
Once it is nicely roasted and starts spluttering, add chopped green chillies.
Saute them for 2 - 3 minutes and remove from the flame.
Grind this seasoning along with grated coconut into a coarse paste.
Add salt to taste and do the seasoning with mustard seeds.
ಕನ್ನಡದಲ್ಲಿ ಓದಲು ಇಲ್ಲಿ ಕ್ಲಿಕ್ ಮಾಡಿ.

I always love doing new experiments in kitchen. Especially for breakfast, I will keep trying new varieties frequently. Mom knows my liking towards cooking. Normally, when she goes through an interesting recipe, she will note it down for me! Happy to say that, she has added lot of recipes to my collection :) Also, she will share lot of tips with us for improving the taste of recipes.
Here is a recipe from my mom's collection which suits for your breakfast. This variety of idli is prepared using cucumber and rice as the main ingredients. It's a stomach filling idli since we use the rice. Fermentation is not required for this idli, so you can start working on it just an hour before breakfast!


Preparation time: 35 minutes
Cooking time: 25 - 30 minutes
Servings: 2

Ingredients:
Rice  - 1 1/2 cup
1 medium size cucumber
Grated coconut - 3/4 cup
Green chilli - 1 (adjust according to taste)
Ginger - 1/2 inch
Chopped coriander leaves - 1/4 cup
Cumin Seeds - 1/4 spoon
Fenugreek seeds - 1/4 spoon
Carom seeds - 1/4 spoon
Salt to taste


Method:
Wash the rice and drain all the water. Spread it on a cotton cloth for 10 - 15 minutes for drying. Then, make a coarse powder same as Idli Rava from the rice. This can be done previous night itself to save the time!
Dry roast fenugreek seeds, cumin seeds and carom seeds and make a fine powder. Only half of this powder is sufficient for preparing idli with the above measurement. Preserve the remaining powder for using next time.
Peel and grate the cucumber. Keep the crushed ginger and chopped green chilli ready.
Take the grated cucumber in a mixing bowl, add the coarsely powdered rice, grated coconut, chopped green chilli, crushed ginger, chopped coriander leaves, powdered spices and salt to taste. Mix it well.
Wash the idli plates and apply little oil. Fill the roundels with idli batter and cook them for about 25 - 30 minutes. It will take exactly 25 minutes in my Idli Kadai.
Serve it hot with coconut chutney.


ಕನ್ನಡದಲ್ಲಿ ಓದಲು ಇಲ್ಲಿ ಕ್ಲಿಕ್ ಮಾಡಿ.
 
Kannekudi or Soralekudi is a plant variety of Malnad region, the leaves of which will be used for cooking. It will grow like a bush. I don't know its scientific name. People use it for cooking mostly during the rainy season. It has good health values..especially when we get cold, fever, etc, it is good to have Katne with rice. 
If you can get Kannekudi, don't miss out preparing this healthy and tasty dish. The same way, Katne can be prepared using Spinach (Palak) leaves also!


Preparation Time: 20 - 25 minutes
Servings: 4

Ingredients:
Kannekudi (Soralekudi) - 25 leaves
Pepper corns - 15
Cumin seeds - 3/4 spoon
Garlic 7 - 8 cloves
Oil for seasoning
Mustard seeds - 1/4 spoon
Salt to taste
1 lime
Grated coconut - 1 cup


Method:
Wash the Kannekudi leaves thoroughly in water. Remove the leaf stalks and leaf veins which are hard.
Heat 2 spoons of oil in a pan and roast the pepper corns till you hear the crackling sound.
Add the cumin seeds and saute for a while. Then, add the Kannekudi leaves and saute for 2 - 3 minutes. Switch off the flame once the leaves change their color.
Grind these ingredients along with grated coconut into a fine paste. Add 3 - 4 cups of water to adjust the consistency. 
Add salt to taste and boil it for 5 minutes. Switch off the flame and add the lime squeeze.
Do the seasoning with mustard seeds and crushed garlic before serving.
This healthy and tasty Katne is a good combination with rice especially during winter and rainy days.


Tips:
  • For this recipe, amchur can be used instead of lime squeeze. But adding of lime will give a nice aroma to Katne.
ಕನ್ನಡದಲ್ಲಿ ಓದಲು ಇಲ್ಲಿ ಕ್ಲಿಕ್ ಮಾಡಿ.

Due to my passion towards sweets, I will keep preparing some or the other sweet / desserts at home. Believe me, when I visit anybody's food blog / website, first thing I will check for is sweet varieties. I don't know why, but for me, this has become one of the main criteria to make an impression!! No doubt, I will admire other dishes also, but sweets will always occupy the first rank :)
Coming to the recipe, Saate is a special sweet variety which you can find in North Kanara. It looks bit similar to Badusha, but the taste will be different. Badusha will have a smooth texture whereas Saate will be kind of crispy. You will find this sweet dish in almost all the sweet stalls in North Kanara, but nowhere else I have seen this sweet variety in Karnataka.I checked for Saate recipe in the net, but didn't get any postings still!! So, I am very glad to post this recipe.. may be I am the first person to post this ;) I learned this recipe from one of my cousins, who has expert hands for preparing these goodies..


Preparation time: 2 hours
Yield: 13 - 14 pieces

Ingredients:
2 large cups of all purp. flour / maida
Ghee / dalda - 1/4 cup
Sugar - 2 cups
Pinch of salt
Water 
Oil for deep frying
Nylon cloth

Procedure:
Mix all purp flour, salt and ghee / dalda nicely. To this, Add water little by little and prepare a non - sticky dough like chapathi dough.
Close it with a lid and allow it rest for 10 minutes.
Divide the dough into 2 equal parts (this is just for convenience; you can use the whole quantity at once).
Roll the dough like a big chapathi.


Fold it twice and you will get a triangle shape. Roll it again like chapathi and fold it.


Repeat this step at-least 15 - 16 times to get lot of layers.
Finally, roll it into 1 inch thick chapathi and cut into circle or any other shapes.


Combine the remaining dough, roll it 15 - 16 times and cut them.
Prick the circles with a fork to avoid puffing up. Also, it helps to cook the inner layers of saate nicely.
Add very little water to the sugar just to liquidize it and bring to boil. Prepare a thick sugar syrup. Consistency should be such that, if it becomes cool, it should crystallize.
Heat oil in a heavy bottom pan. Deep fry the Saate on low or medium flame for around 20 minutes or until it becomes crispy.
Transfer the deep fried Saate onto a tissue paper to absorb the excess oil.
Once Saate becomes cool, arrange them on a nylon cloth.


Heat the sugar syrup and liquidize it. Pour around 3 spoons of sugar syrup on the top of each Saate and spread it little-bit.
Once the sugar syrup is settled and crystallized, its the time to take out the Saate from the cloth.
Enjoy the Saate with your family and store the remaining in an airtight container. It will last upto a week if preserved properly. 


Sending it to the Event Love Lock With Sweets @ Sweet Karam Kapi.

ಕನ್ನಡದಲ್ಲಿ ಓದಲು ಇಲ್ಲಿ ಕ್ಲಿಕ್ ಮಾಡಿ.

It's a well known sweet prepared during festivals in India. It tastes  very similar to jilebi. I  thought of this recipe to welcome a new member in our family.  It's my first experiment. Even if  I  do not guarantee you about the shape, taste is guaranteed!


Preparation Time: 1 hour
Soaking Time: 6 hours
Fermentation Time: 1 hour
Yield: 20 jangirs

Ingredients:
Black gram  - 1 cup
Sugar - 2 cups
Water - 1 cup
Lemon - 1/2
Oil for deep fry
Food color (optional) - pinch
Zip lock cover -1

Method :
Soak black gram for 5-6 hours and keep in the refrigerator for one hour. This is to make sure that the      batter should not get warmed while grinding.
Mix together a cup of sugar and a cup of water and boil to make a syrup of one thread consistency. Now add lemon juice and turn off the gas and keep it aside covered.
Take out the black gram from the refrigerator and filter it. Grind the gram to get a batter soft like butter by adding very little water. The batter should be thicker than dosa batter. Keep in mind that the batter should not  get even warm.
Add a pinch of food color if you want. I added a pinch of turmeric here.
Make a round hole in a zip lock cover with the help of hot nail. Fill the cover with the batter and lock the cover. Test the cover by pressing it  on a plate  whether the batter is coming out properly.
Heat the oil in a pan on medium heat and put the batter in jangir shape in it. Fry until crispy.
Put these jangirs in sugar syrup for 2 minutes.


8. Take out the jangirs and keep them  on a plate and later transfer them to a storage container.


Jangir will be tastier if you eat after 2-3 hours. Otherwise it might have black gram smell.

NewerStories OlderStories Home