Showing posts with label Havyaka Recipes. Show all posts

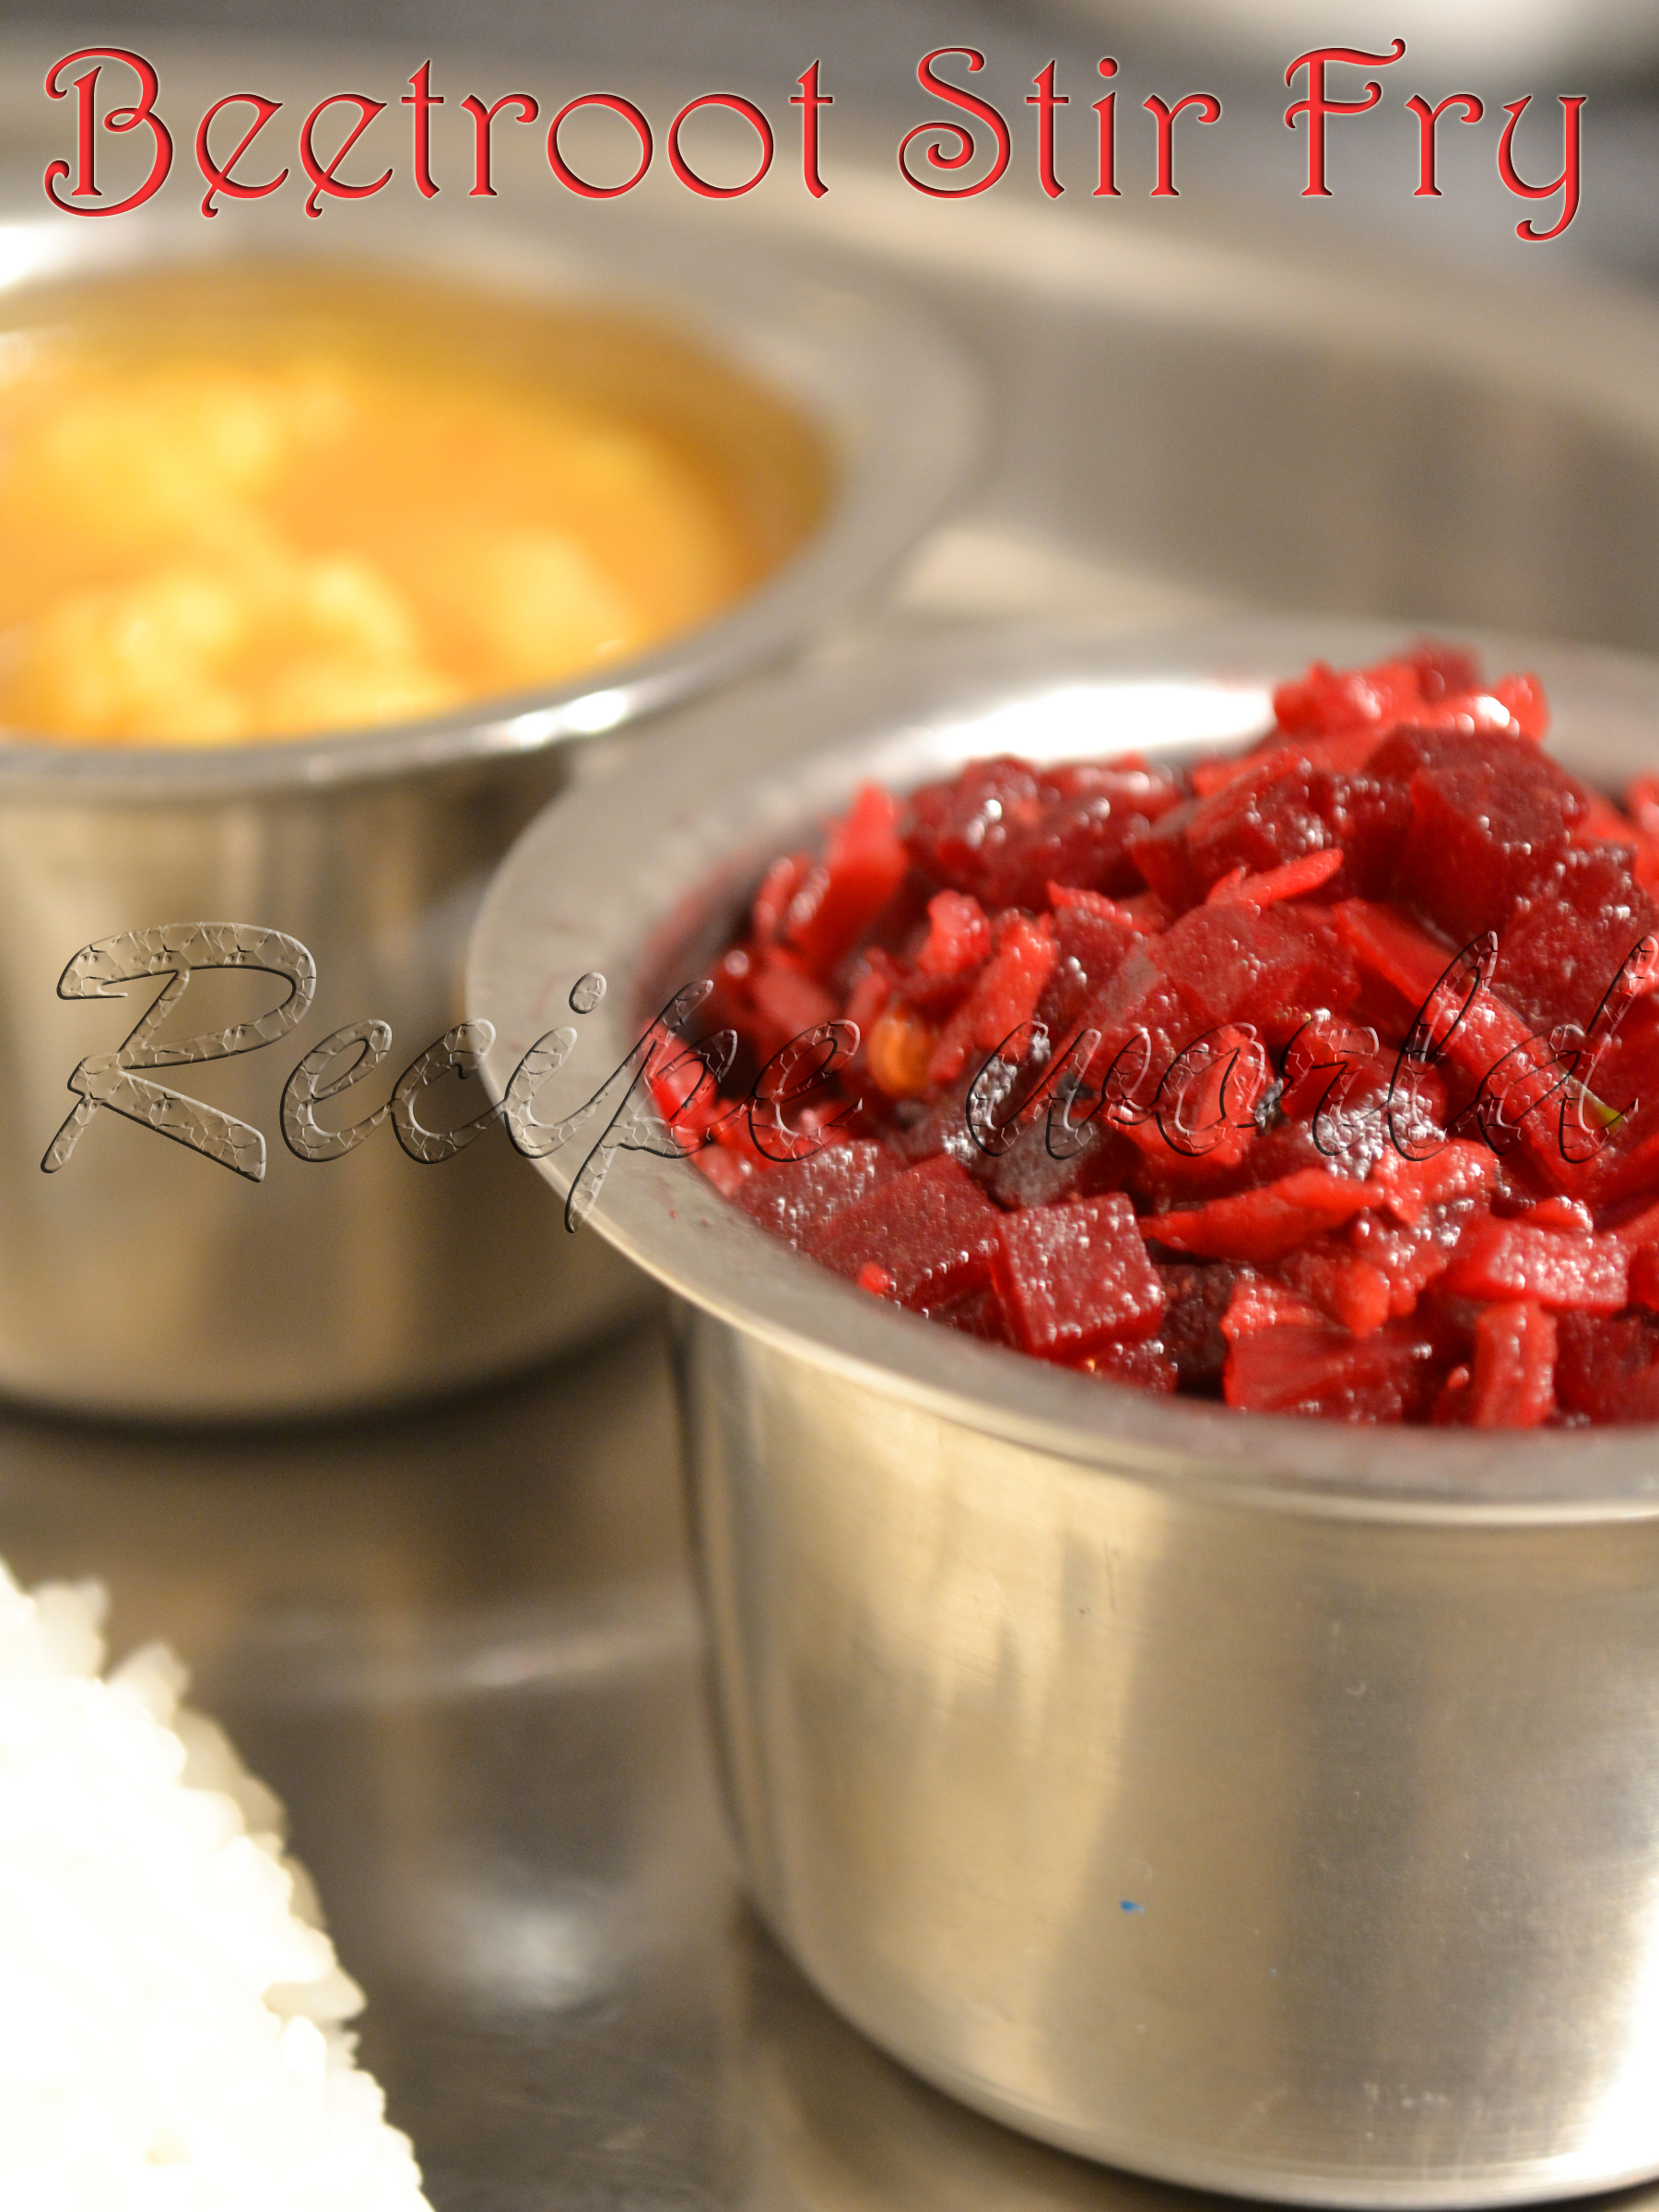
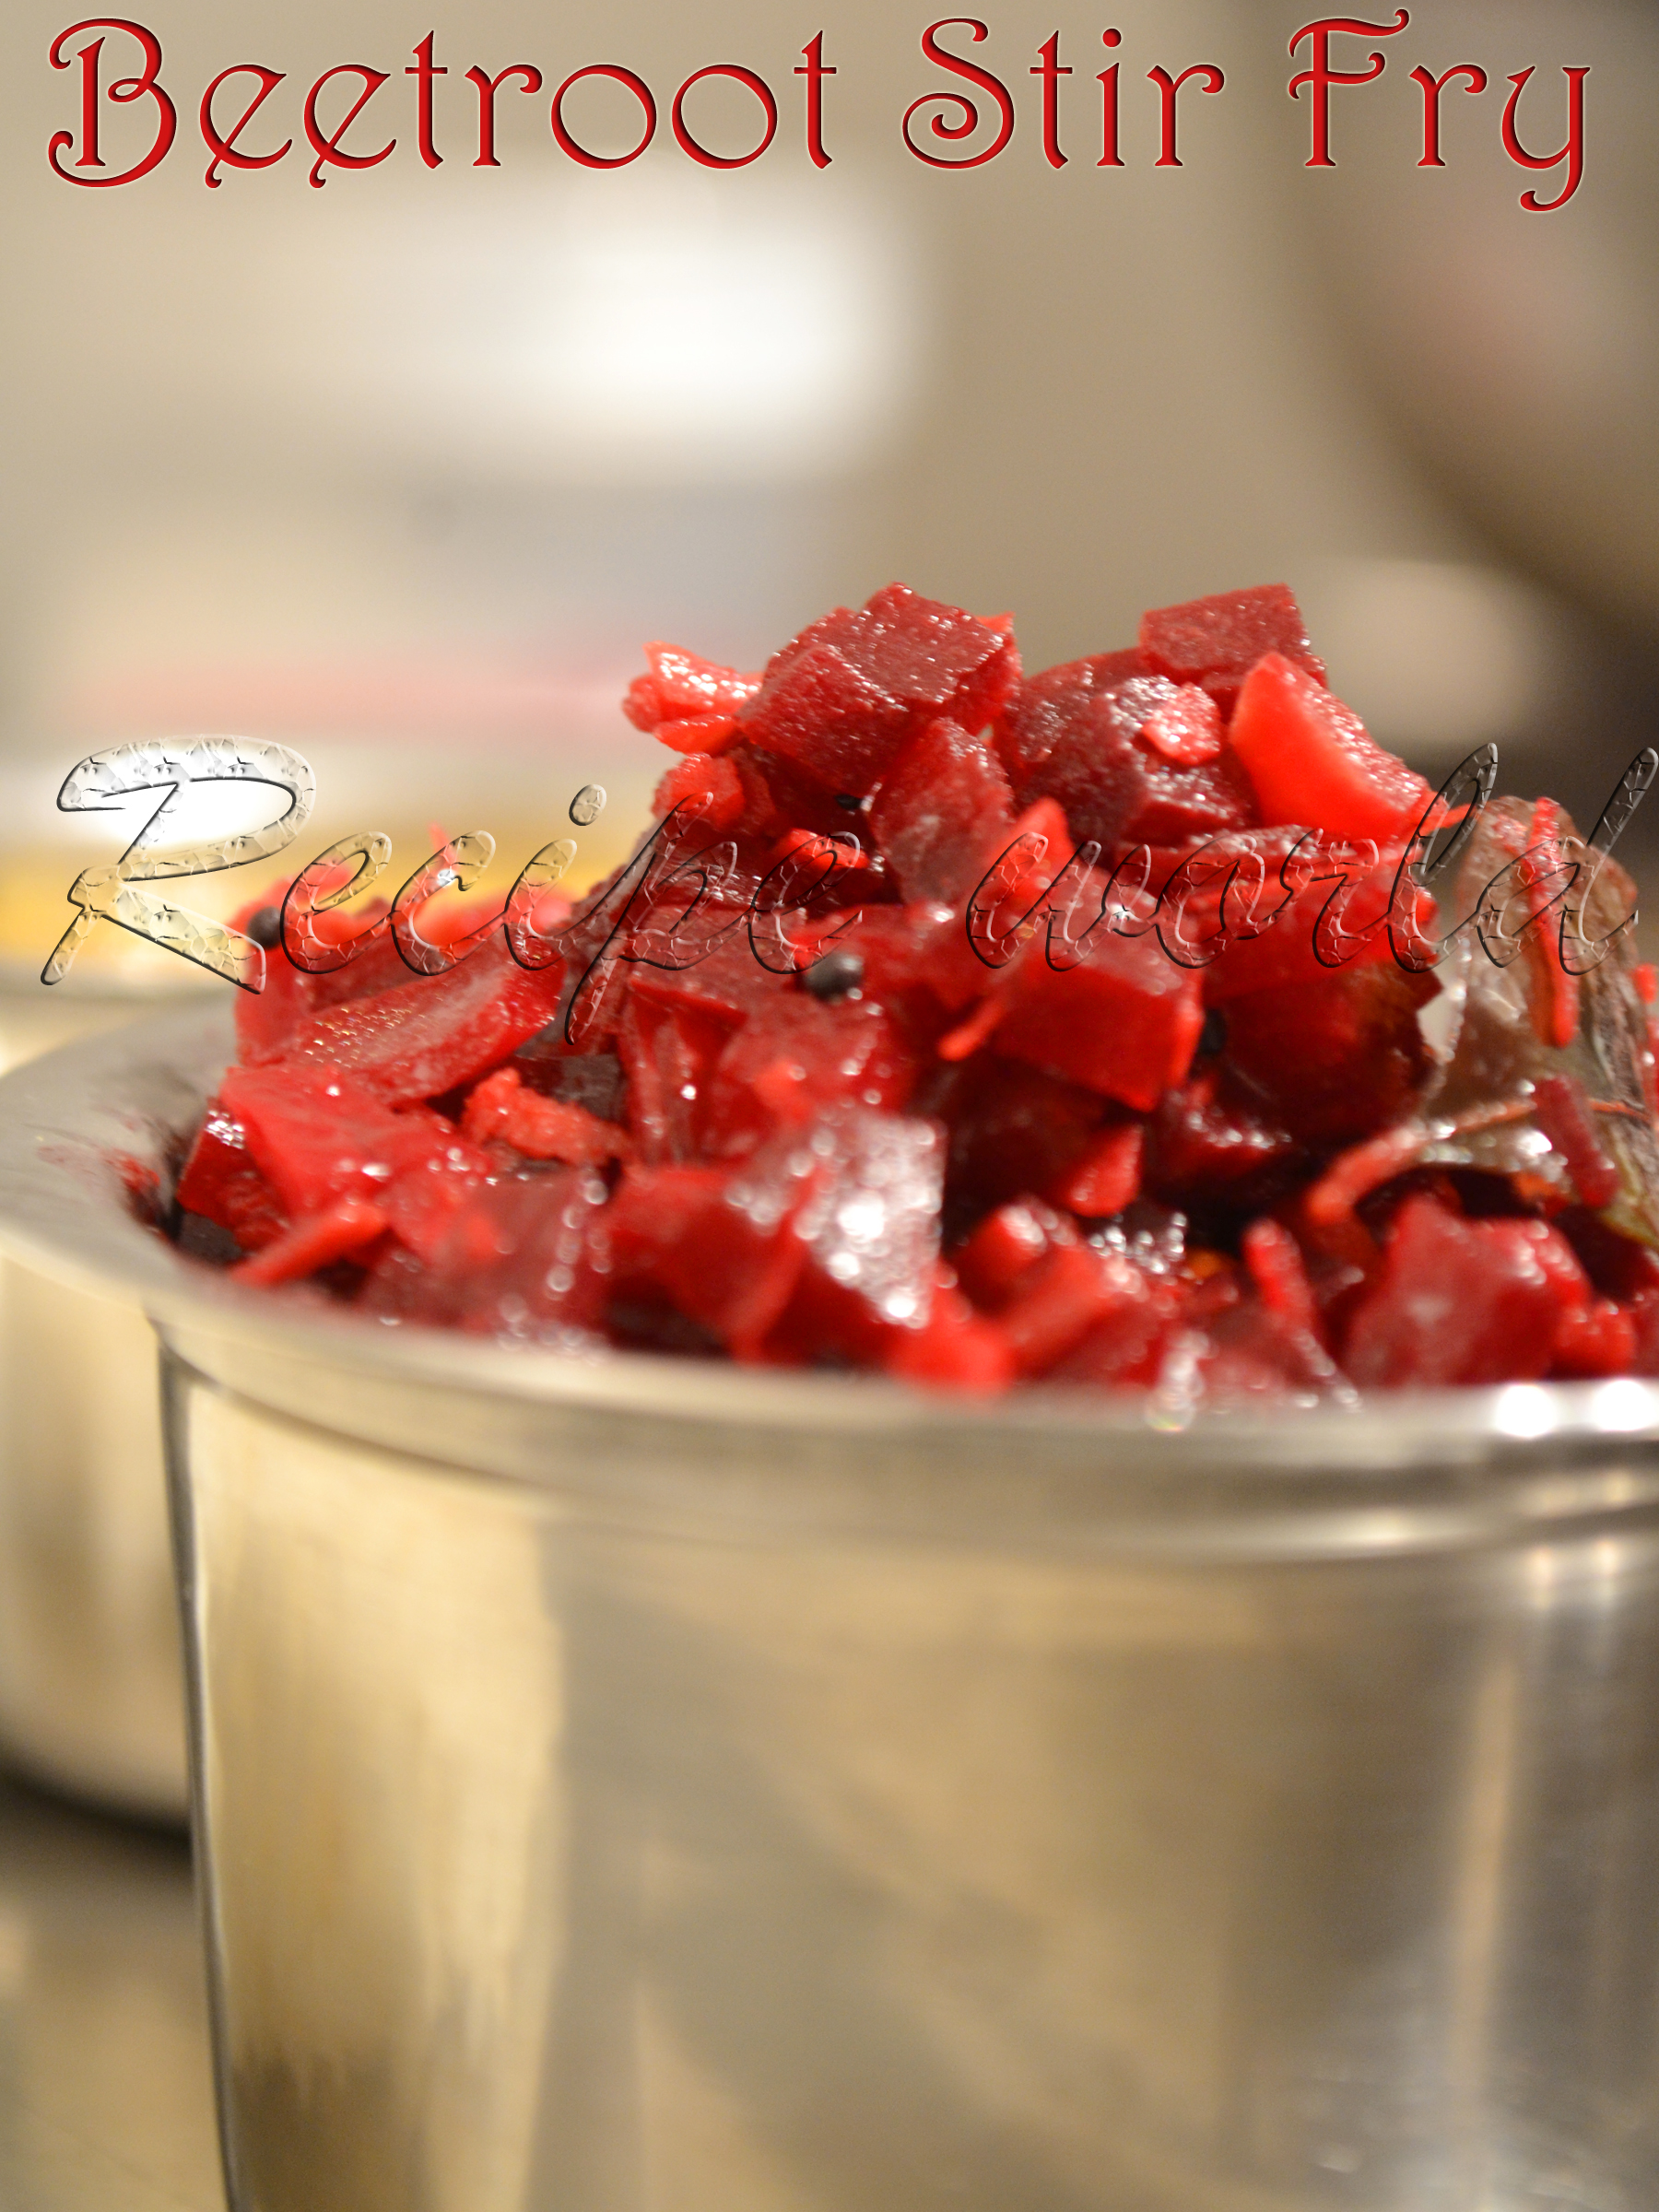
Beetroot is one of the nutritious vegetables which tastes awesome with its natural sweetness. This root vegetable is good for preparing delicious stir fry, sambar, salads and sweets. Beetroot Palya / Stir Fry and Sambar are my family favorites. My little one also loves to have it because of its nice red color!
Here is the recipe of Beetroot Palya / Poriyal. This tastes very good with rice, chapathi, roti and poori. Give it a try and let me know your feedback :)


Preparation time: 40 - 45 minutes
Servings: 5
Difficulty level: Medium

Ingredients:
  • Beetroot - 1 1/2 bulb
  • Dry red chilli - 1
  • Urid dal - 1 tsp
  • Mustard seeds - 1 tsp
  • Asafoetida / hing - big pinch
  • Turmeric powder - 1/4 tsp
  • Green chilli - 1 (adjust according to taste)
  • Curry leaves - 4 to 5 leaves
  • Cooking oil - 3 tbsp
  • Grated coconut - 1/2 cup
  • Onion - half
  • Salt - for taste
  • Amchur powder - for taste
  • Sugar - 1 tsp or according to taste
  • Water - 1 1/4 cup or little more (as needed for cooking)


Method:
  • Wash the beetroot cleanly and peel off the skin. Chop them finely.
  • Heat oil in a heavy bottom pan. Add broken red chilli pieces, urid dal, asafoetida and then mustard seeds. Once the mustard seeds start crackling, add turmeric powder, slit green chillies and curry leaves.
  • Saute it for a while and add finely chopped beetroot and mix it well. 
  • Add 1 1/4th cup of  water for cooking the mixture. Close the lid and cook it for 18 - 20 minutes. Stir the mixture occasionally. Add more water if needed.
  • When the mixture is almost cooked and water is evaporated, add salt, amchur powder and sugar and adjust the taste. Also add the chopped onion and grated coconut and mix well.
  • Cook it for 8 - 10 minutes more and turn off the flame. 
  • Serve this Palya along with rice, chapathi or poori.


Tips:
  • Beetroot bulbs are bit hard. If you find it difficult to chop them finely, just cut them into 2 or 3 pieces and pressure cook till 2 whistles. Then, chop them finely and follow the above recipe. Only change you need to consider is no need to add water after doing the seasoning since the veggie will already be cooked.

Ganike Soppu, also known as Kage Soppu in Kannada, is a medicinal plant which is not familiar to many people. Scientific name for this plant is Solanum Nigrum (Black Nightshade). Leaves of this plant are used as a good remedy for cold, cough, mouth ulcer and stomach related problems. Kids love to eat the small, black colored fruits of this plant. 
I use Ganike soppu as medicine for my daughter whenever she gets cold. I will crush the leaves with little water, collect about 2 table spoons of extract, then mix it with sugar / jaggery and make her drink. This works really well for her. I have few Ganike Soppu plants in my backyard just for kiddo. She loves to pick and eat those small berries from these plants daily!
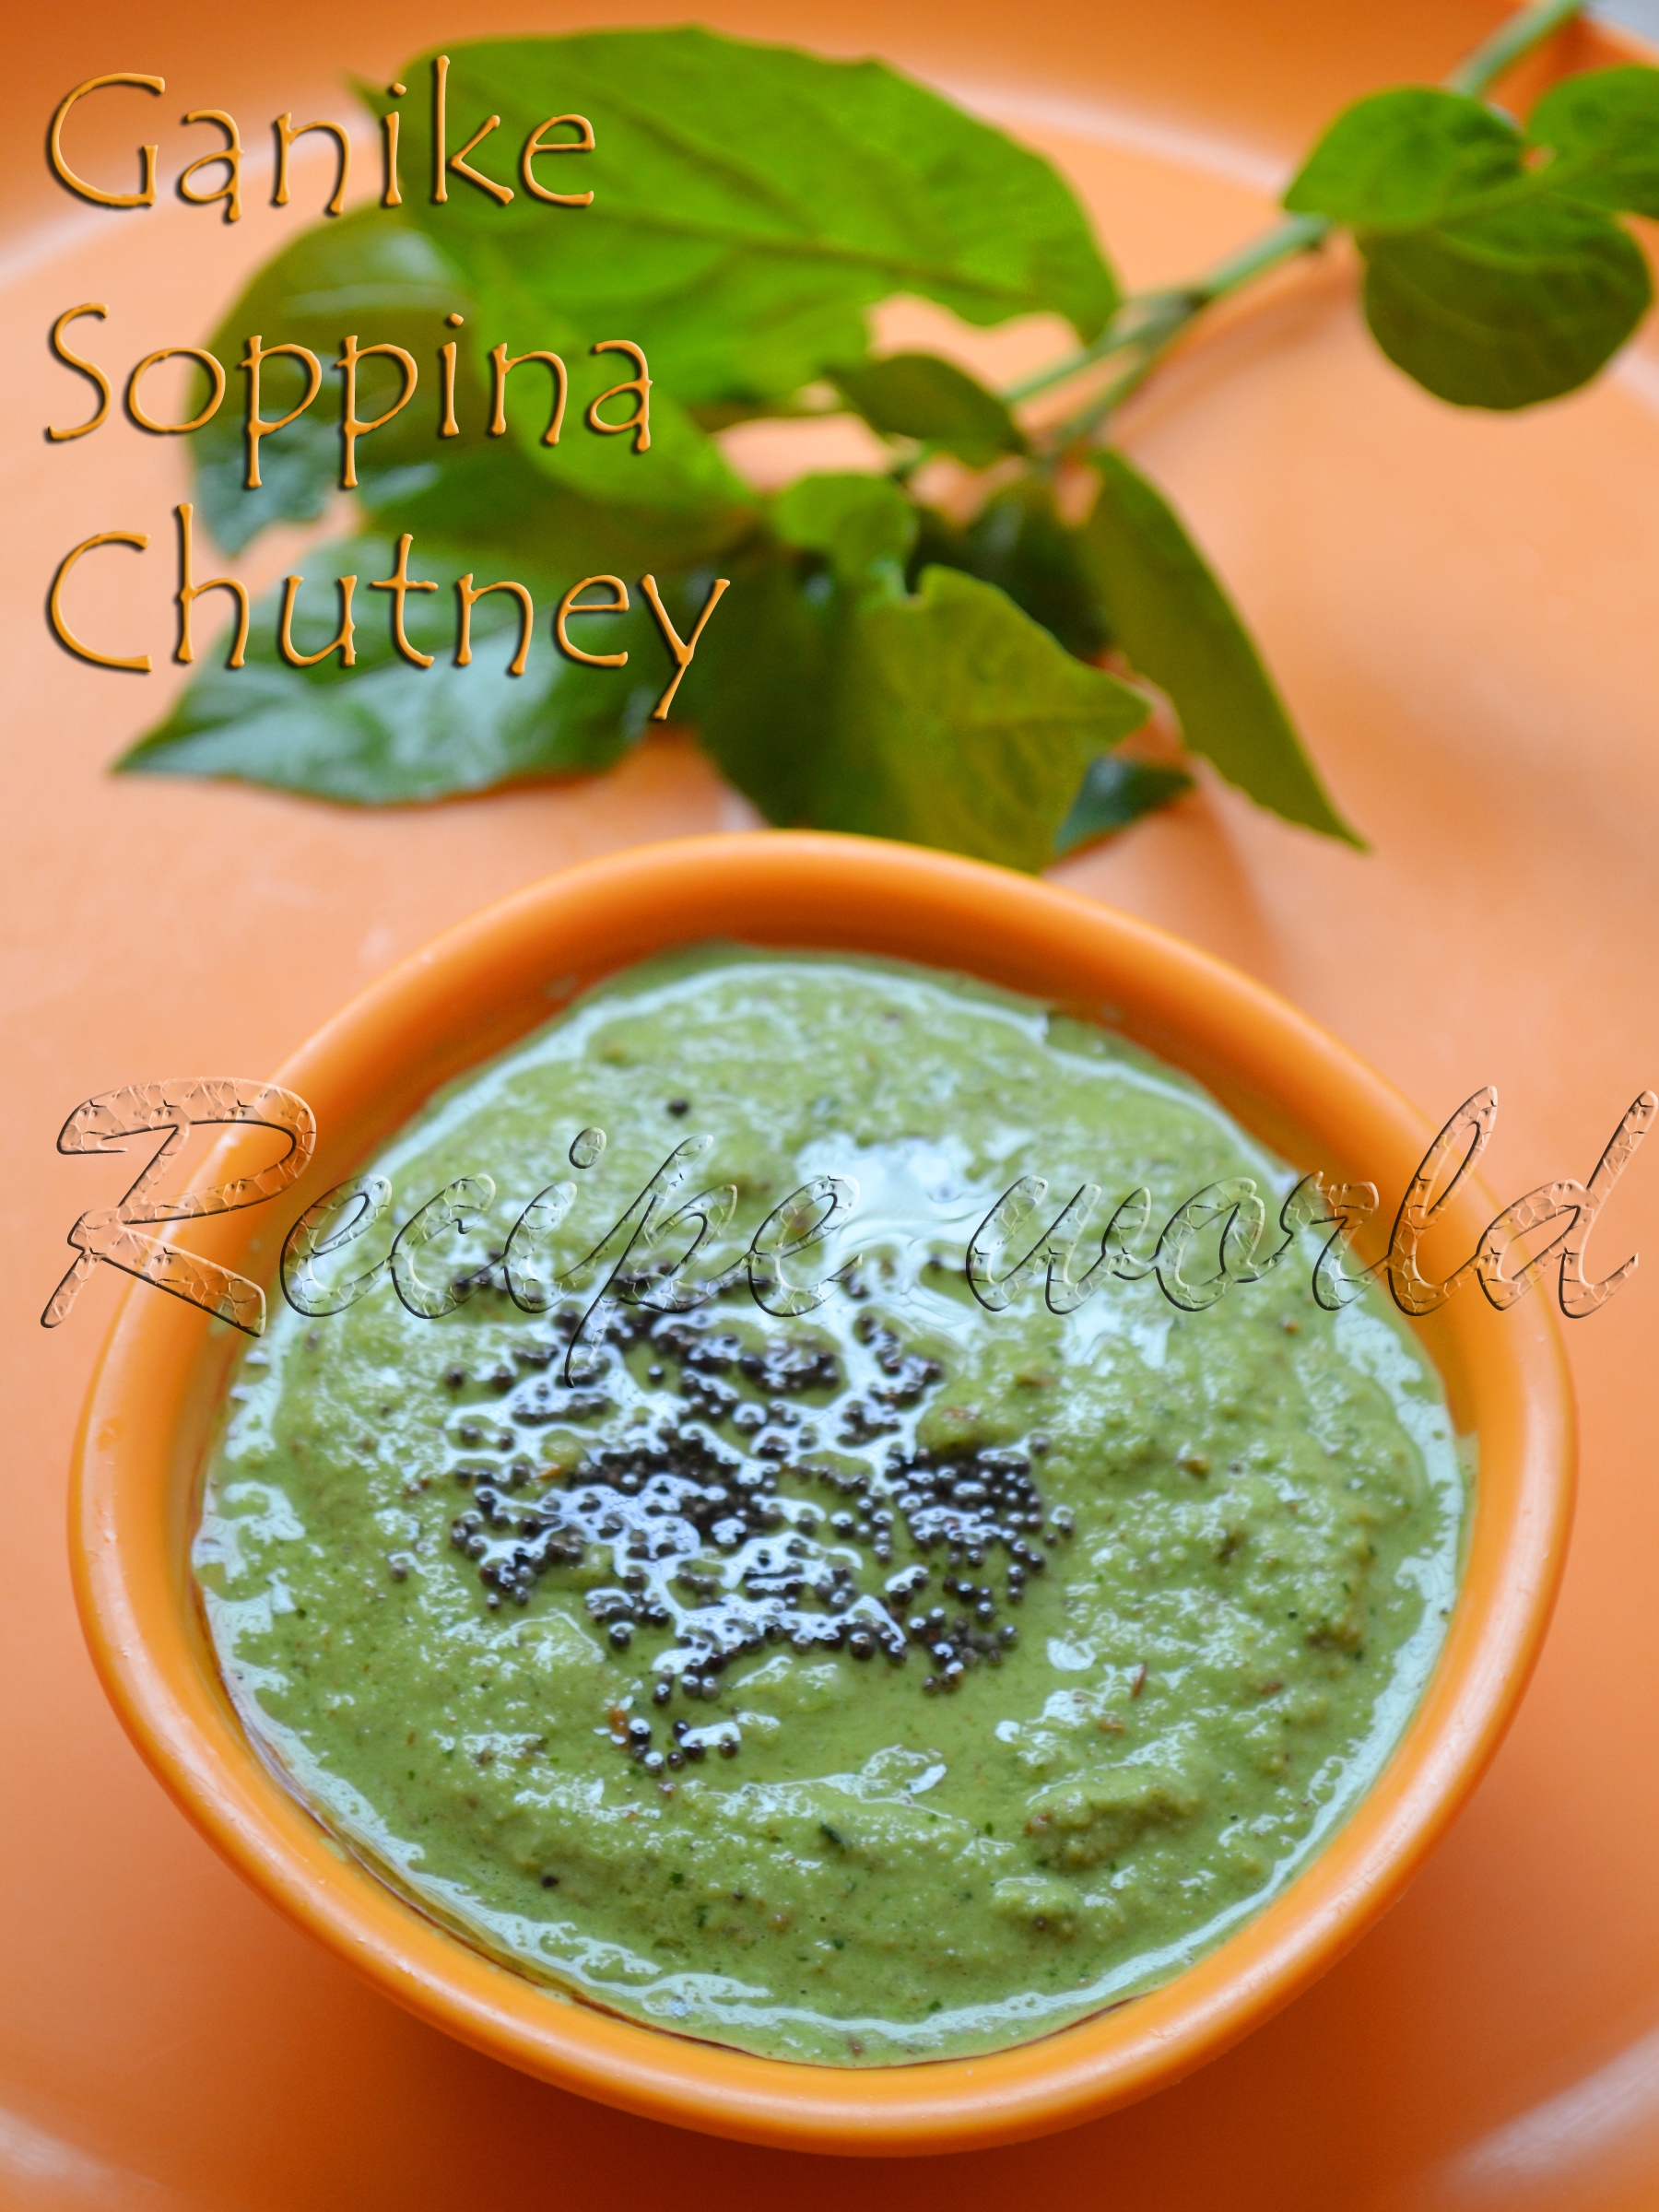
Few days back, I was talking to Mom something about my plants. She told me that delicious Chutney can be prepared using Ganike leaves. I just tried her recipe and it tasted really well. Its so easy to prepare and also good for health.
Sharing the Ganike Soppina Chutney with you now..hope you like it!


Time required: 10 minutes
Servings: 6 - 7 
Difficulty level: Easy

Ingredients:
  • Ganike / Kage leaves - handful (I have used 30 - 32 leaves here)
  • Grated coconut - 1 1/4 cup
  • For seasoning:
          Oil - 3 tsp (divided)
          Green chillies - 2 (adjust according to taste)
          Cumin seeds - 1 1/4 tsp
          Sesame seeds - 1 1/4 tsp
          Mustard seeds - 1 tsp
  • Tamarind - gooseberry size (around 1 1/2 tbsp)
  • Salt to taste
  • Water for grinding

Method:
  • Heat 1 1/2 tsp of oil in a heavy bottom pan. Add cumin seeds and sesame seeds and roast them till nice aroma comes. 
  • Then add the cleaned Ganike leaves. Saute them for 1 - 2 minutes till it changes the color and switch off the flame.
  • Grind together the roasted ingredients along with grated coconut, tamarind and salt to taste into fine paste. Add water as required.
  • Heat oil in a heavy pan. Add mustard seeds and when they start crackling, switch off the flame. Add this seasoning to the ground paste.
  • Delicious Chutney is ready now. Serve it as a side dish with rice.


Tips:
  • Instead of 2 green chillies, 2 red chillies and 1 green chilli can be used here.
  • If you don't want to preserve it in the refrigerator, heat the Chutney nicely and it will be good for few more hours.

Fenugreek / Methi seeds, even though used in very small quantities, are very much necessary for our day-to-day cooking. Without fenugreek seeds, preparing Dosa, Sambar Powder, Methi Powder, etc. will not be perfect. These seeds are having some health benefits as well. For all sorts of hair problems, fenugreek seeds works as a good remedy. Not only the seeds, fresh fenugreek leaves are also good for cooking. Roti, Paratha, Stir Fry and various rice items can be prepared using Fenugreek / Methi leaves.
Sometimes, I need fresh methi leaves for my cooking, but we get them very rarely in the convenience stores here. So, since the summer has started, I am growing the fenugreek leaves in our backyard and using the same for cooking. Every week, I will sow the seeds in 1 - 2 rows and within the next 3 weeks, it will be available for cooking. 
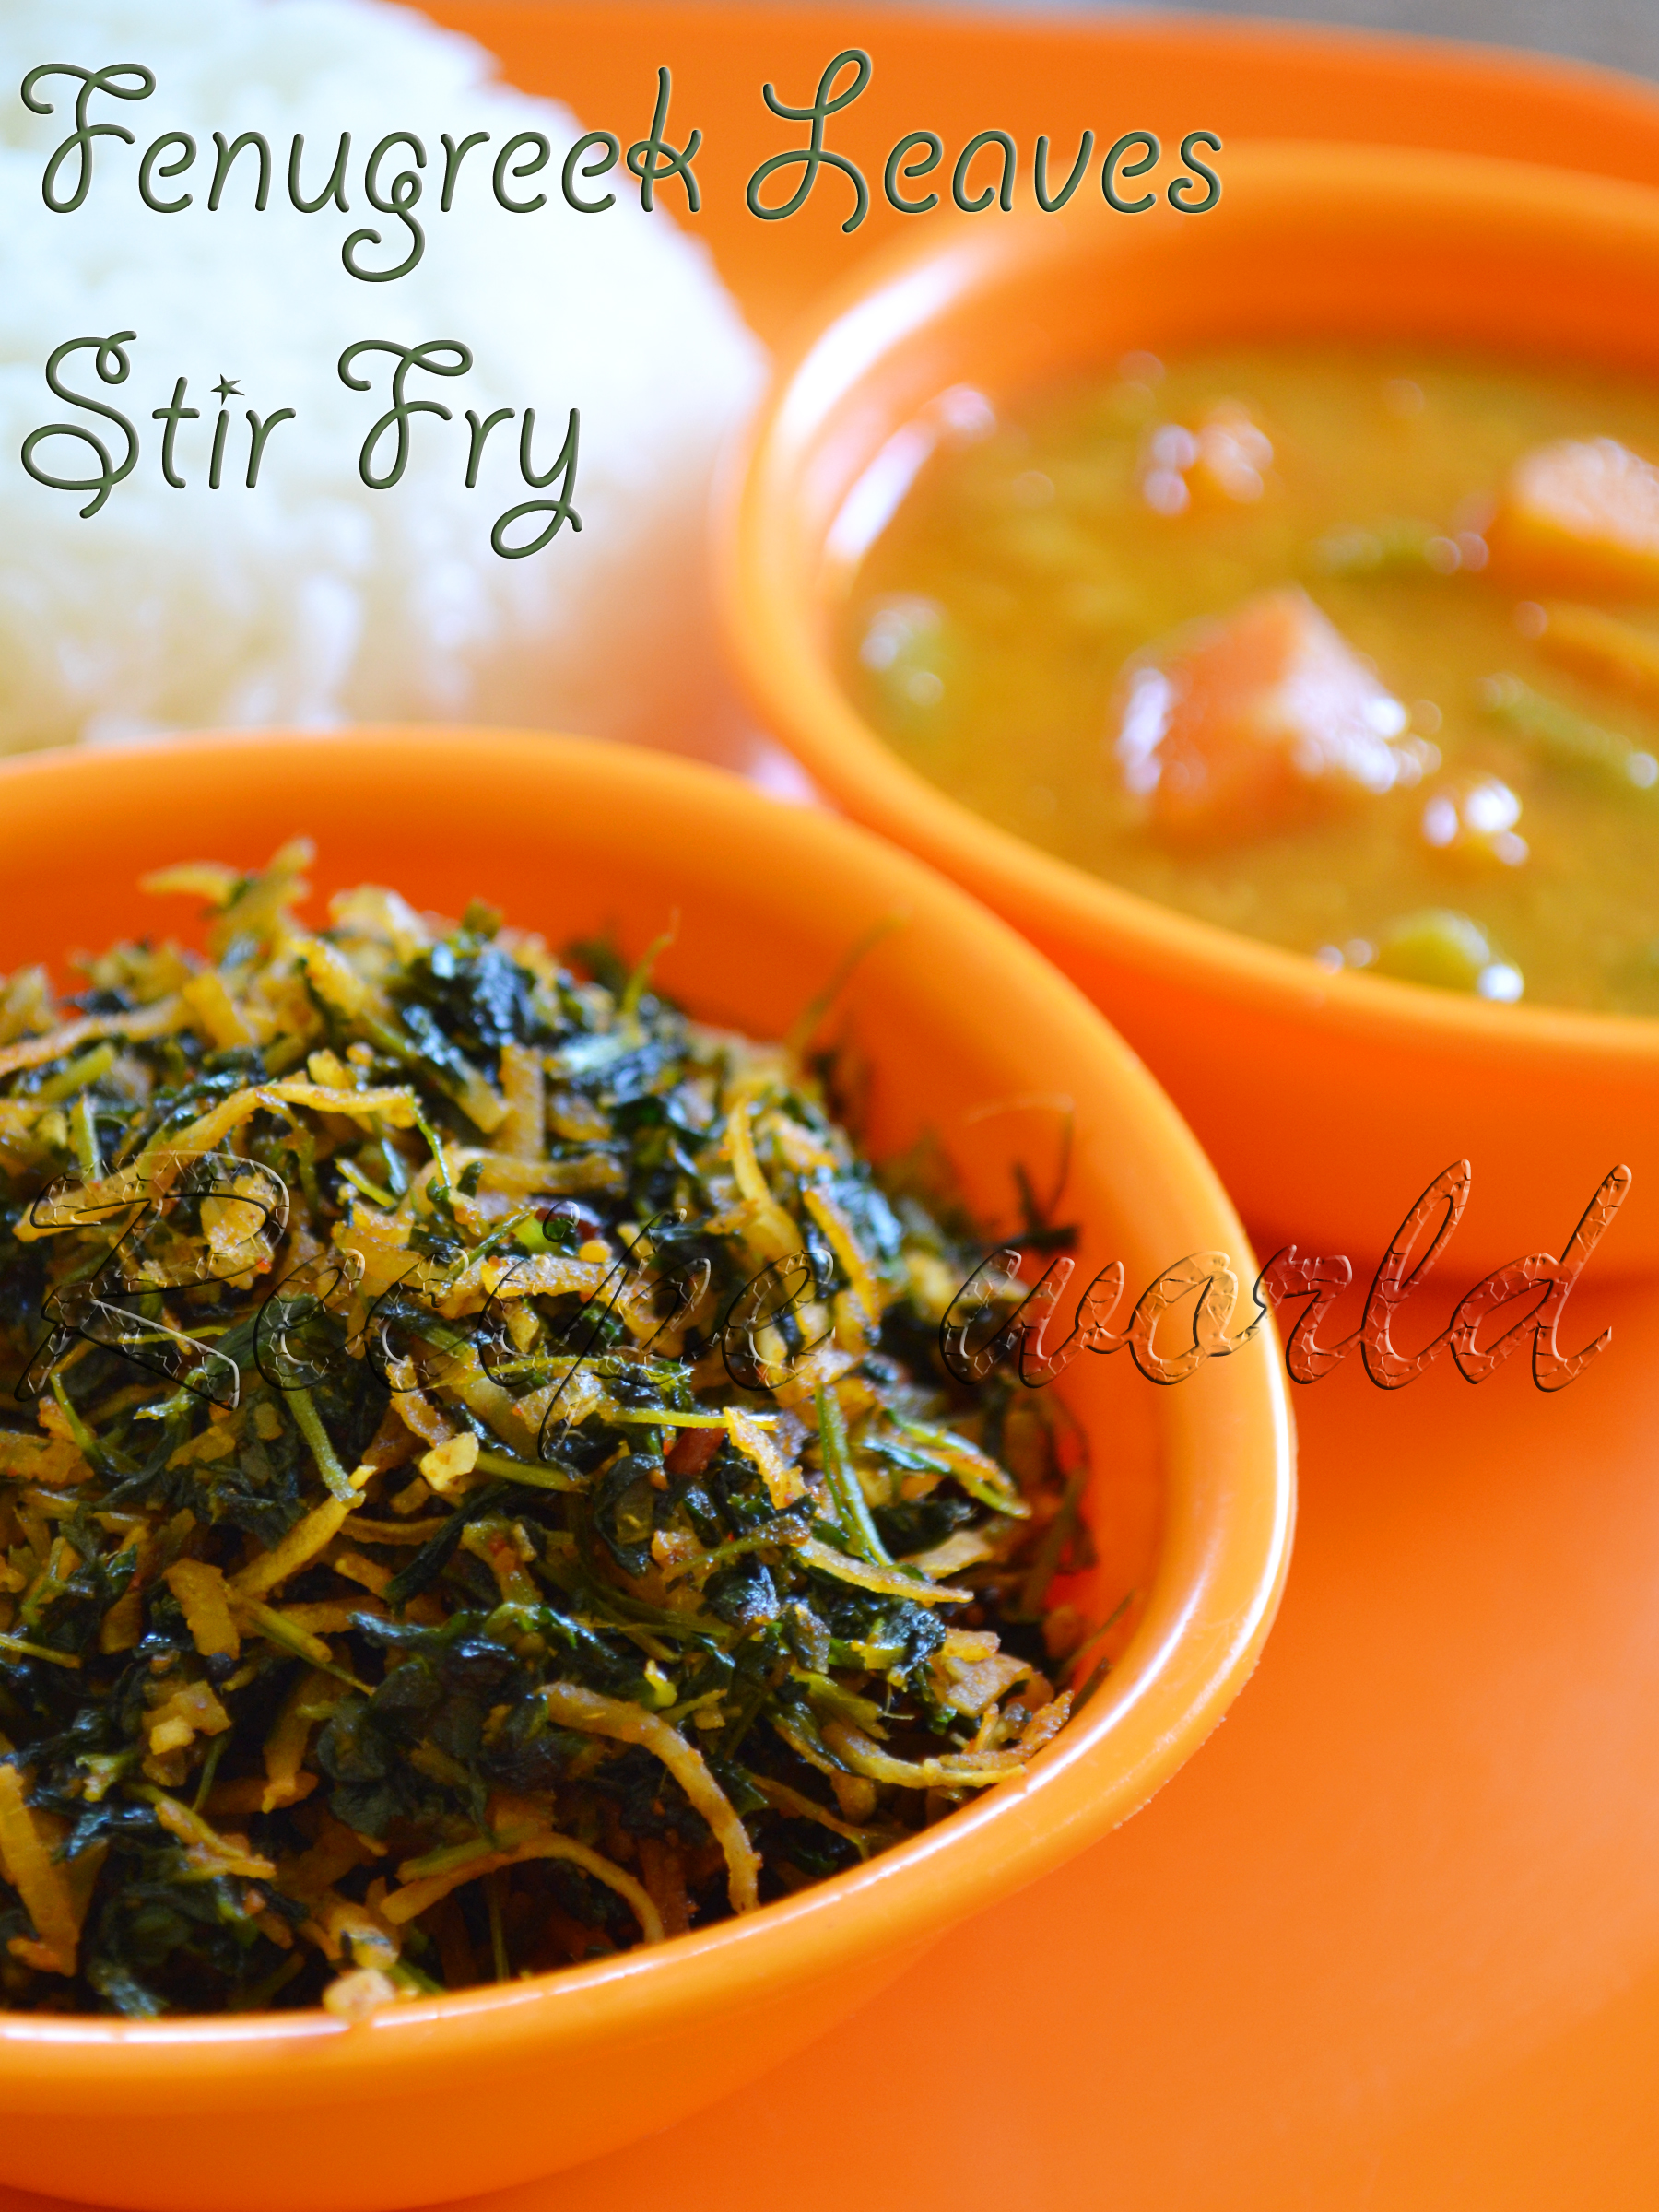
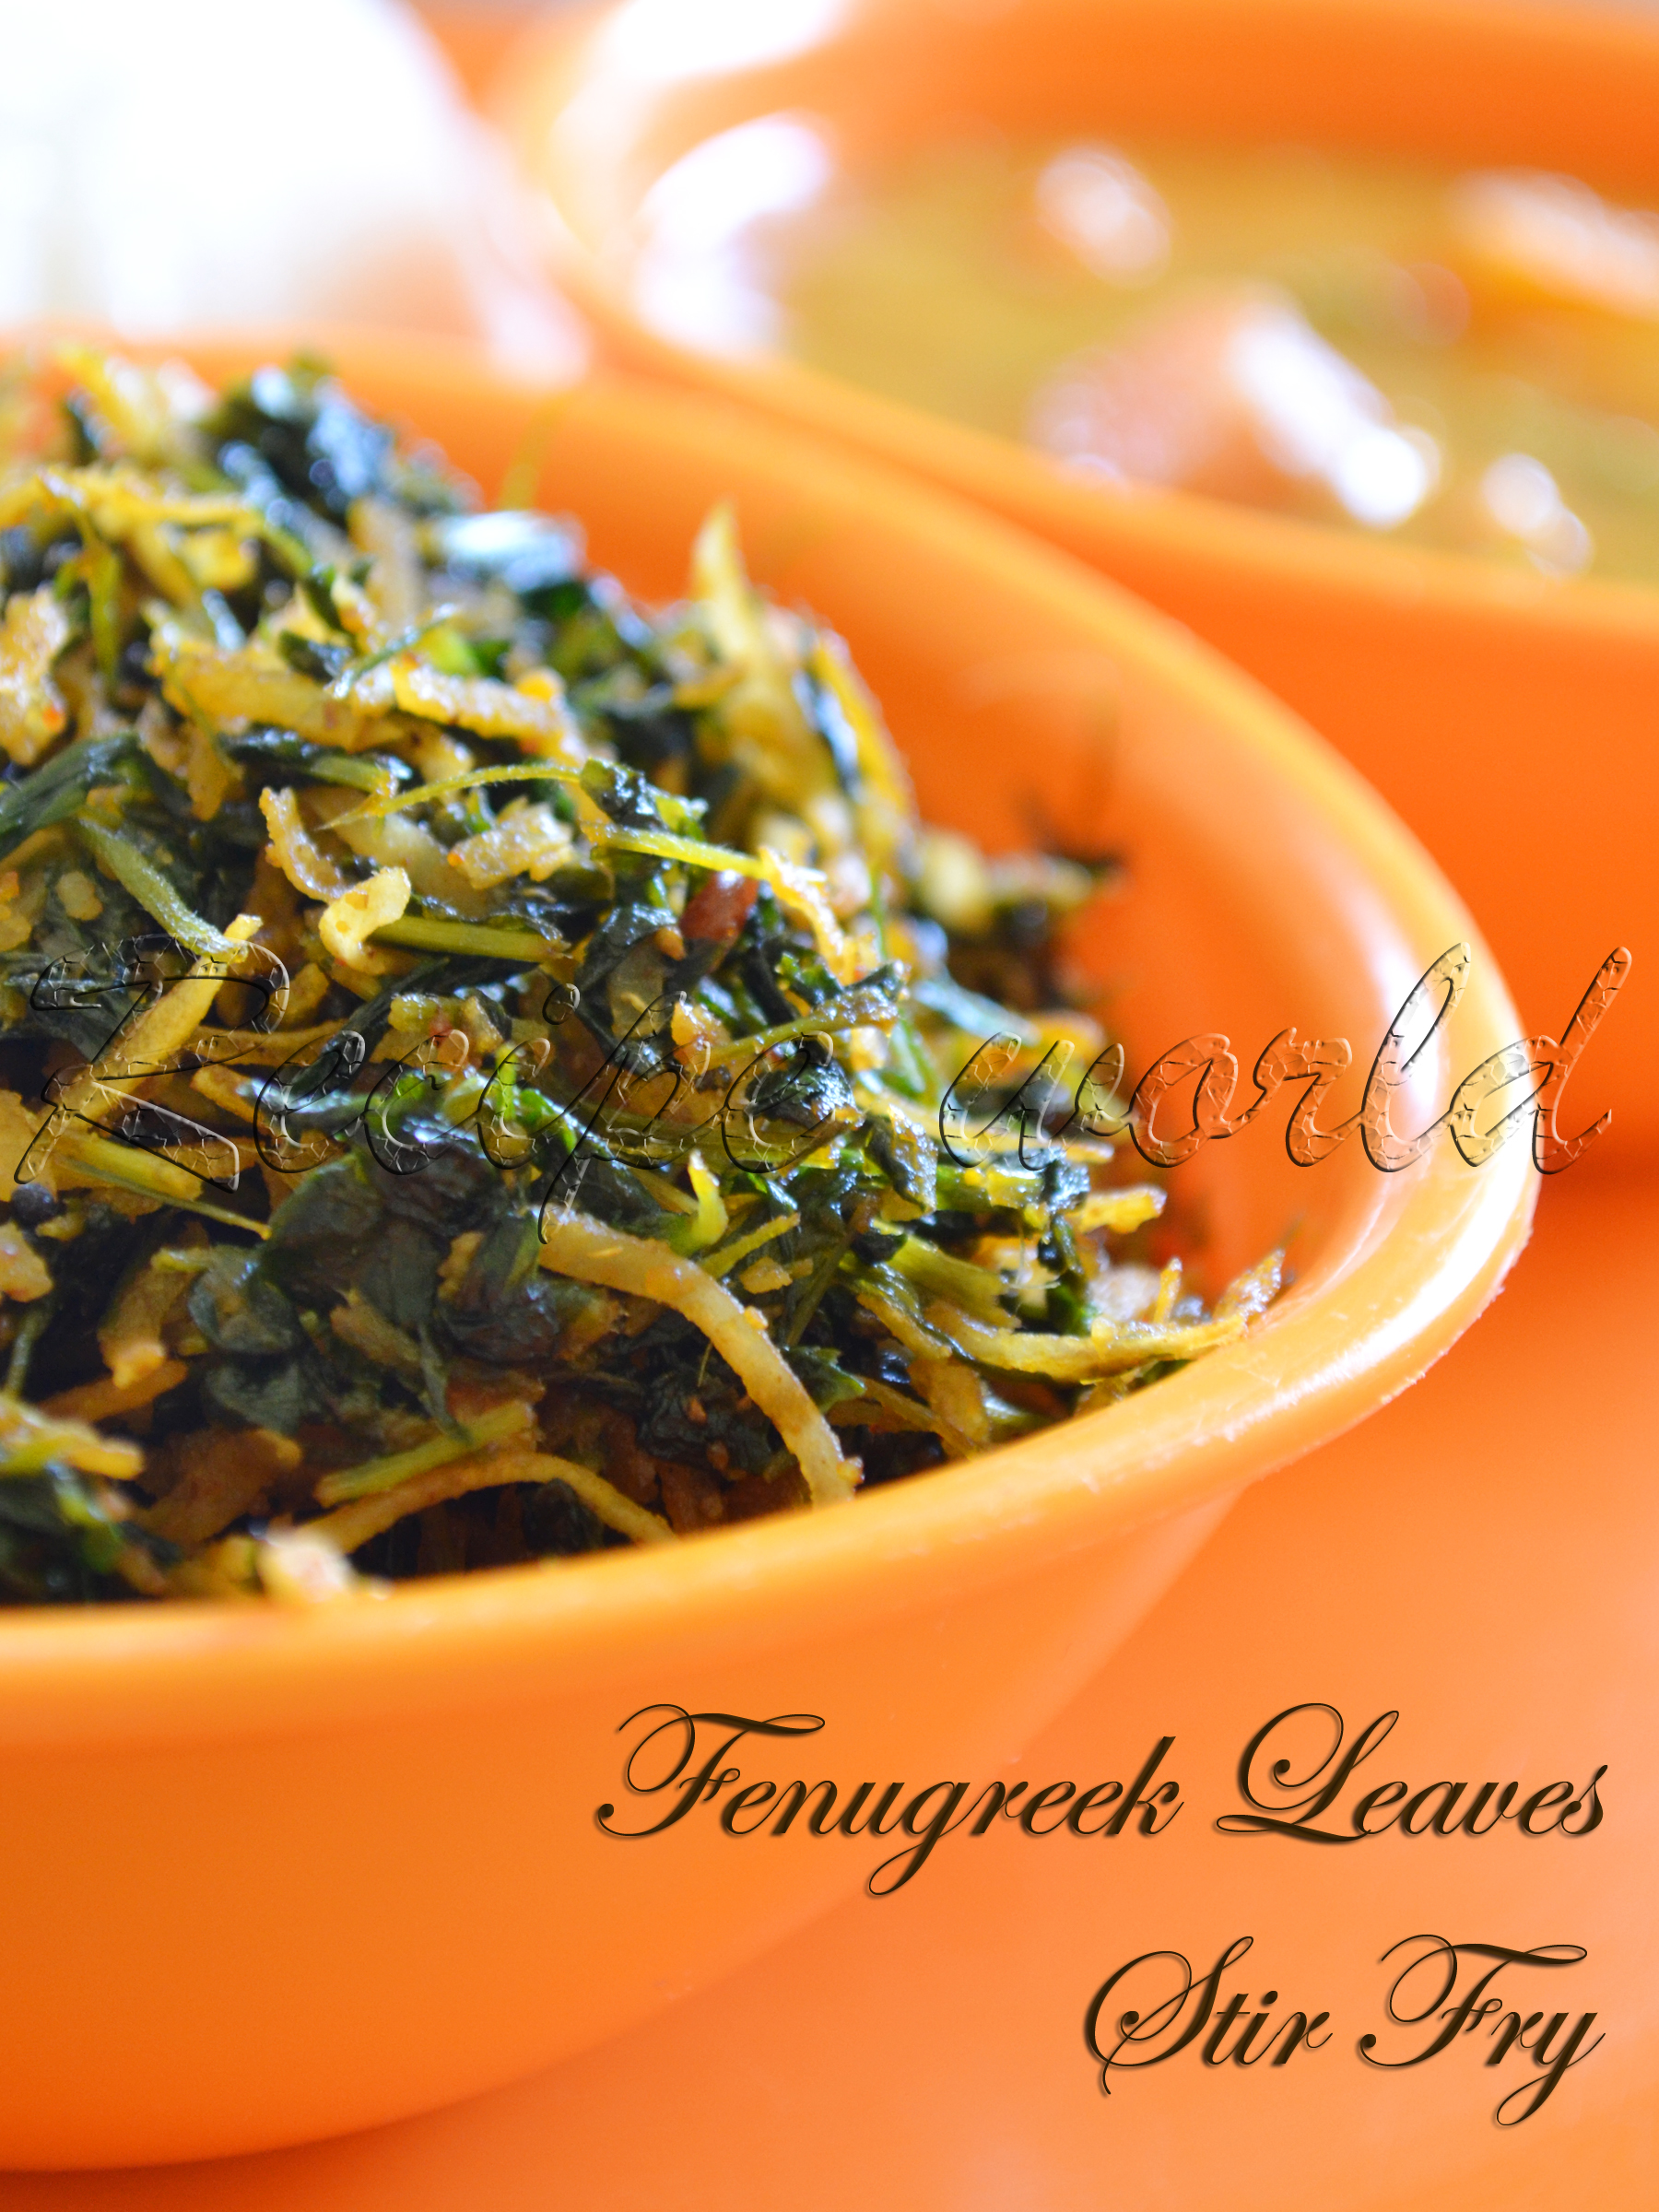
Both fenugreek leaves and dill leaves can be interchanged for some variety of dishes. I had posted the Dill Leaves Stir Fry recipe long back. The same way, you can prepare the Fenugreek Leaves Stir Fry. Since fenugreek leaves are slightly bitter in taste, it tastes better if we add little more sugar to this stir fry. 


Preparation time: 20 minutes
Servings: 2 - 3
Difficulty level: Easy

Ingredients:
  • Fenugreek leaves - 3 big bunch
  • Urid dal - 1 tsp
  • Mustard seeds - 1 tsp
  • Asafoetida - a pinch
  • Sambar powder - 2 tsp or according to taste (see Tips)
  • Sugar - 1 tsp or to taste (see Tips)
  • Amchur powder - 1/2 tsp
  • Salt to taste
  • Grated coconut - fistful
  • Oil - 4 tsp


Method:
  • Wash and clean the fenugreek leaves. Chop them finely including the tender stems. 
  • Heat oil in a heavy bottom pan. Add urid dal, asafoetida and mustard seeds. Once the mustard seeds start crackling, add the sambar powder followed by chopped fenugreek leaves.
  • Add salt, sugar and amchur powder according to your taste. Cook the mixture half covered.
  • Saute the mixture regularly. Cook it for around 7 - 8 minutes or till its dried out fully and looks too dark. 
  • Add grated coconut and cook for 2 - 3 minutes more and switch off the flame. 
  • Serve this delicious stir fry along with Roti, Chapathi or rice.


Tips:
  • Any type of sambar powder, saarina pudi or palyada pudi can be used for this recipe. 
  • Since the fenugreek leaves are bitter in taste, I have made this stir fry slightly sweet in taste. Those who won't like sweet taste, can add less sugar for this recipe.

When its mango season, raw mangoes are generously used for cooking in most of the Indian homes. Raw mangoes are perfect for preparing tangy and spicy Indian side dishes like Chutney, Gojju, Appehuli, etc. Here in Australia, whenever we get raw mangoes, I will prepare these yummy dishes. These days, frozen raw mango cubes are available in Indian convenience stores and hence, we are able to enjoy raw mango dishes whenever we feel like. 
During my last visit to native, I had got a nice tip from one of my relatives. She told that she will cut the raw mangoes into cubes in mango season and preserve them in the freezer. They will be good for months and when needed, they can be used for cooking. Hope this tip will be useful for you as well!
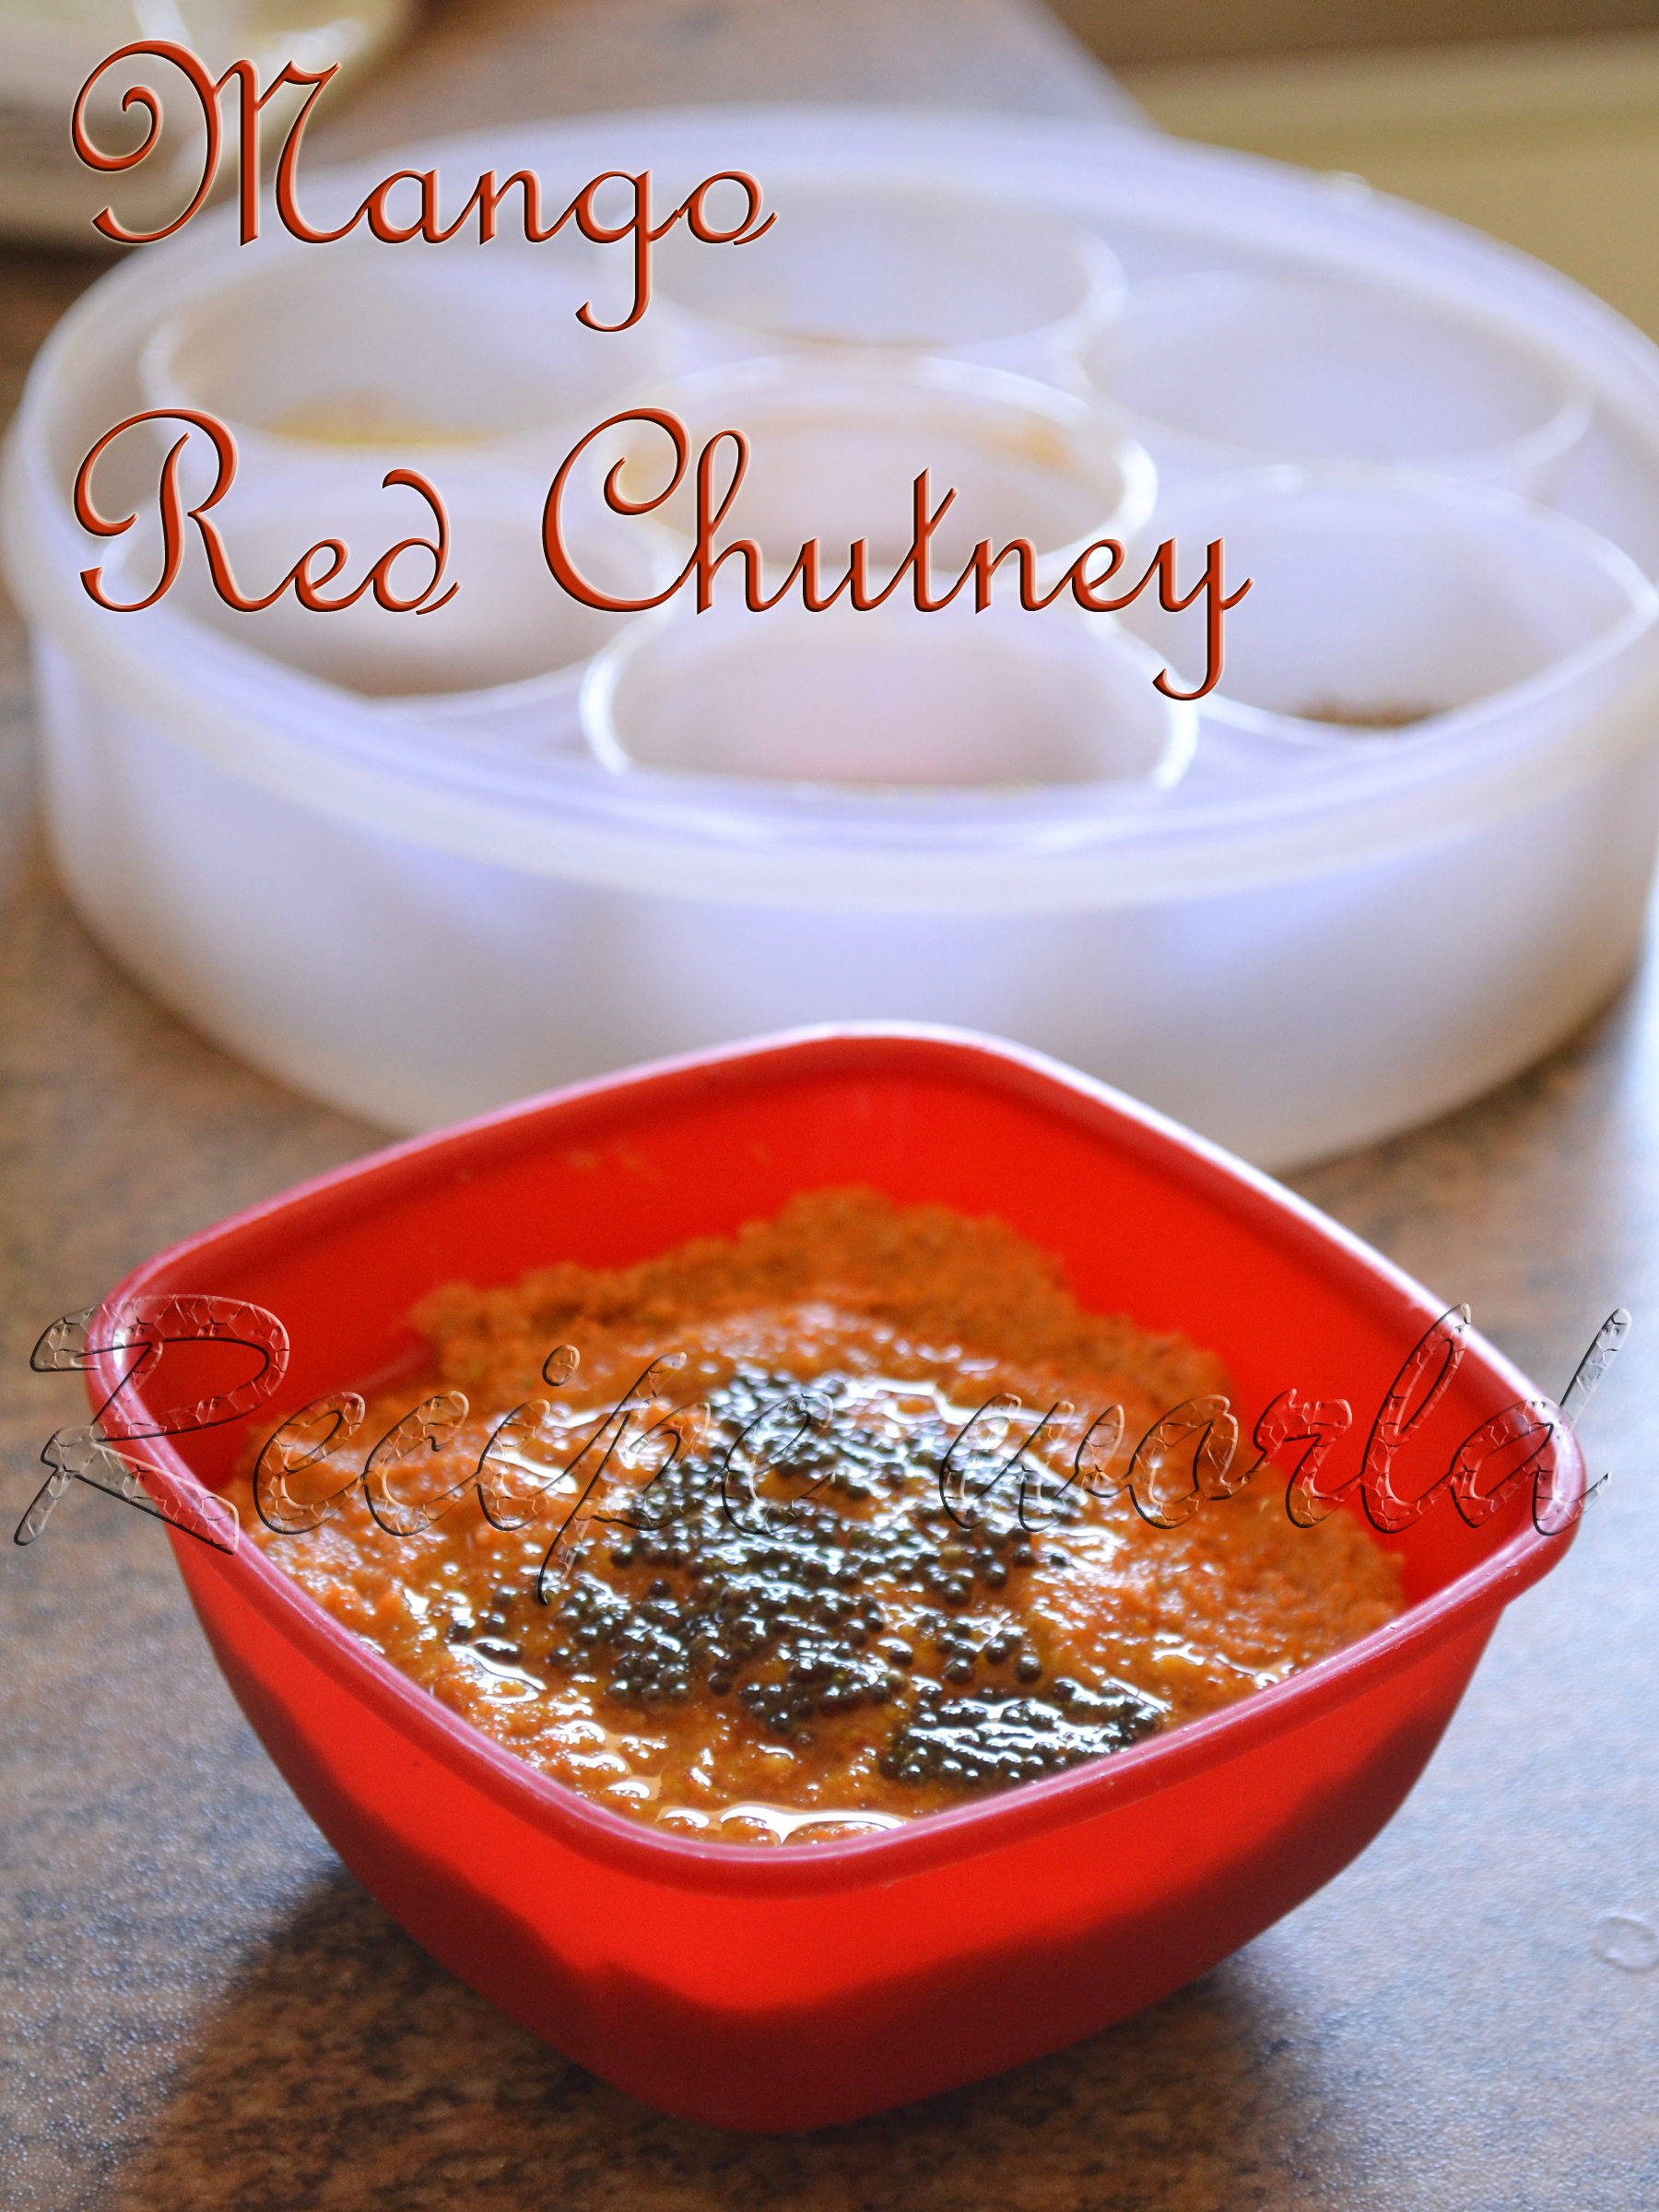
I had shared another version of Mango Chutney long back. That was using green chillies and, here is one more version of Mango Chutney. For this recipe, we use dry red chillies and it tastes delicious with the nice aroma of fenugreek and asafoetida. Try this Mango Red Chutney with rice and let me know how you liked it!


Preparation time: 15 minutes
Servings: 5 - 6
Difficulty level: Easy

Ingredients:
  • Raw mango, chopped into medium size cubes - 1 1/2 cup
  • Grated coconut - 1/2 cup
  • Dry red chillies - 2 or 3 (adjust according to taste)
  • Fenugreek seeds - 3/4 tsp
  • Asafoetida / Hing - big pinch
  • Cooking oil - 3/4 tsp
  • Sugar - 1/4 tsp
  • Salt to taste
  • Water - 3/4 cup approx.
For Seasoning: Oil - 1 tsp, Mustard seeds - 1 tsp, Pinch of asafoetida


Method:
  • Heat 3/4 tsp of oil in a small wok. Add broken red chillies and fenugreek seeds. Once they are roasted nicely, add big pinch of asafoetida and turn off the flame. 
  • Grind the roasted ingredients along with grated coconut, mango cubes, salt and sugar into a fine paste. Add water as required while grinding. But don't make it too watery.
  • Check and adjust the taste of Chutney. 
  • Heat 1 tsp of oil for seasoning. Add the mustard seeds and asafoetida. Once the mustard seeds start crackling, turn off the flame. 
  • Add this seasoning to the Chutney. Serve with rice and see how delicious it is!

Tips:
  • Peel off the green skin of mango if it tastes bitter. If not bitter, no need to peel off the skin.
ಕನ್ನಡದಲ್ಲಿ ಓದಲು ಇಲ್ಲಿ ಕ್ಲಿಕ್ ಮಾಡಿ.

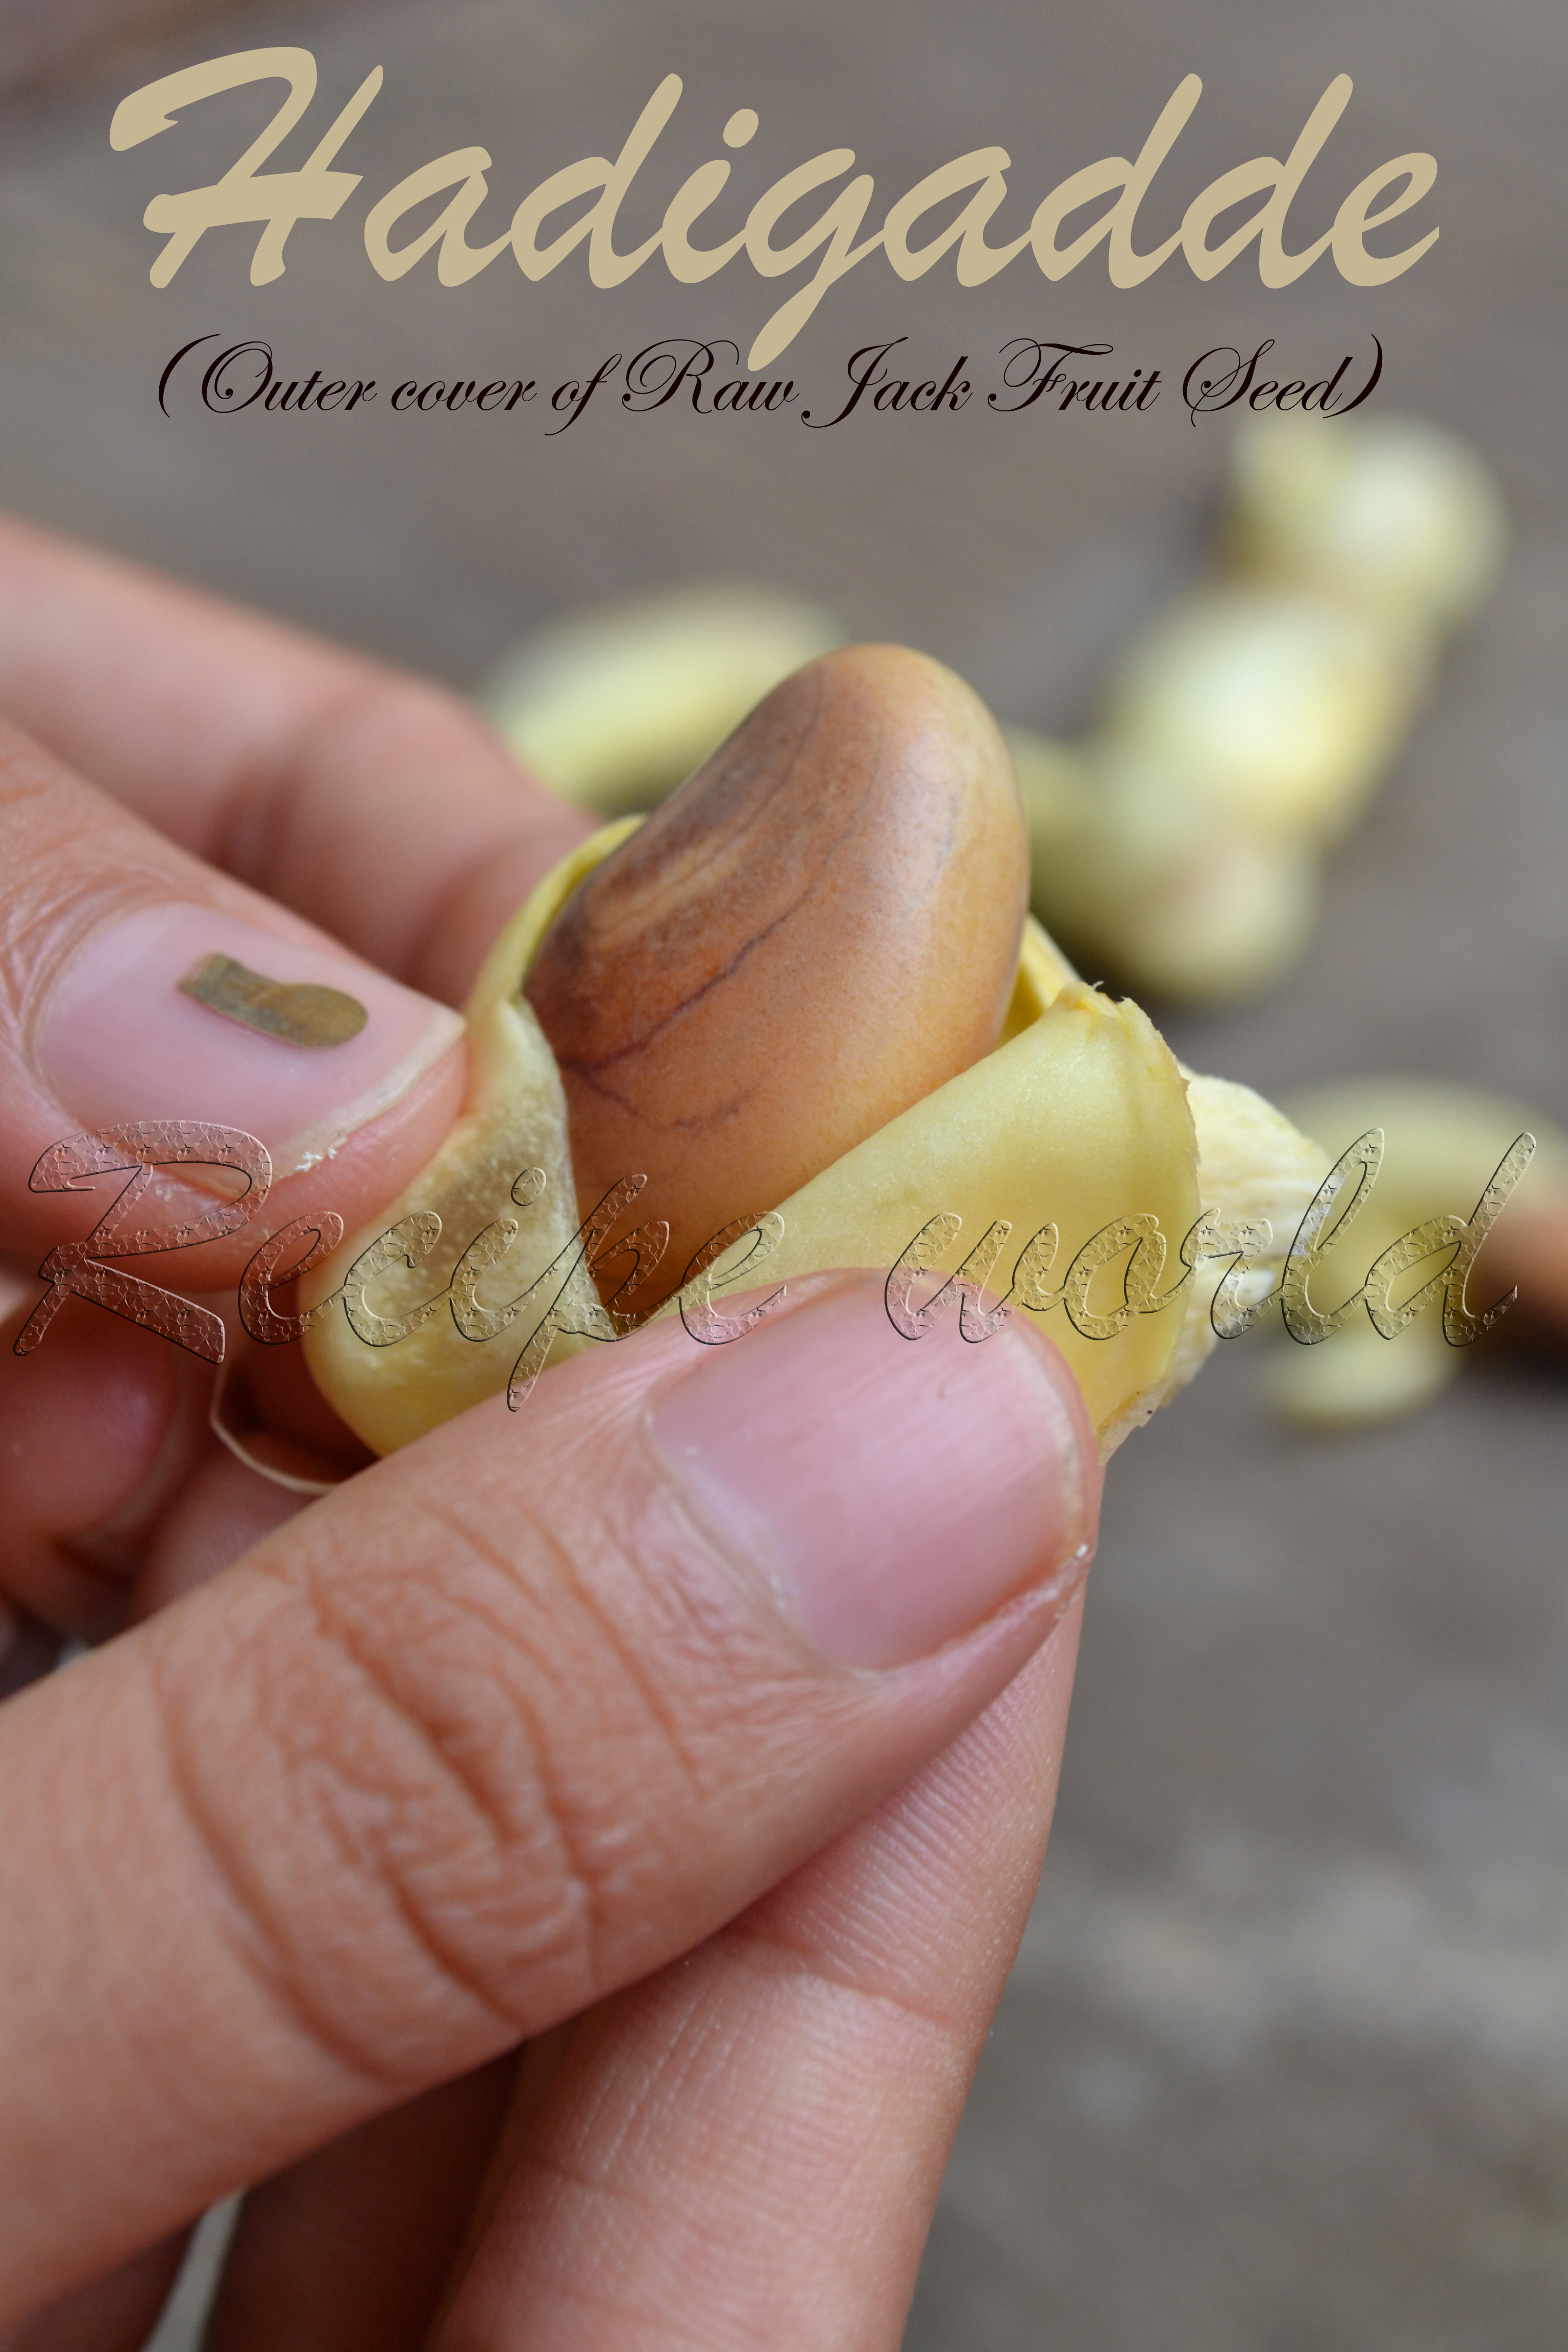
This was one of the delicious jack fruit side dishes which I enjoyed during my last visit to native. 'Hadigadde', in Kannada means the soft, outer cover of raw jack fruit seed. For those who are well known with the jack fruit, every part of jack fruit is useful in one or the other way! We, human beings use jack fruit flesh, seeds and the Hadigadde (outer cover of raw jack fruit seed) for our cooking. Rest of the parts are used as food for the cows in rural areas. 
Hadigadde Palya is a rare recipe which I learned from Mom recently. Usage of Hadigadde is not known to many people. This tastes so good and has become one of my seasonal favorites now! Normally, while preparing raw jack fruit chips or happala, we will collect and keep the Hadigadde aside and this delicious Palya will be the part of our lunch (or dinner) menu that day. 
So, don't forget to try this simple and tasty Palya when you get the raw jack fruit next time!   


Preparation time: 15 - 20 minutes
Servings: 4
Difficulty level: Easy

Ingredients:
  • Cooking oil -8 tbsp
  • Hadigadde (Soft, outer cover of raw jack fruit seed), finely chopped - 3 1/2 cup
  • Urad dal - 1 1/2 tbsp
  • Asafoetida - a pinch 
  • Mustard seeds - 1 tbsp
  • Sambar powder - 2 tbsp or according to taste
  • Salt to taste
  • Amchur powder - for taste
  • Sugar - 1/2 tsp
  • Grated coconut - 1/2 cup


Method:
  • Heat around 8 tbsp of cooking oil in a heavy bottom pan. Add urad dal, asafoetida and then mustard seeds. Roast them till mustard seeds start crackling. 
  • Add sambar powder to the seasoning and saute for a while. Then add the chopped Hadigadde and then salt, sugar and amchur powder according to taste. 
  • Mix it nicely and cover with a lid. Cook it on medium flame for around 10 minutes or till done. Stir it occasionally.   
  • Once its done, add the grated coconut and cook it for 3 - 4 minutes. 
  • Serve this delicious Palya with rice or roti!

ಕನ್ನಡದಲ್ಲಿ ಓದಲು ಇಲ್ಲಿ ಕ್ಲಿಕ್ ಮಾಡಿ. 

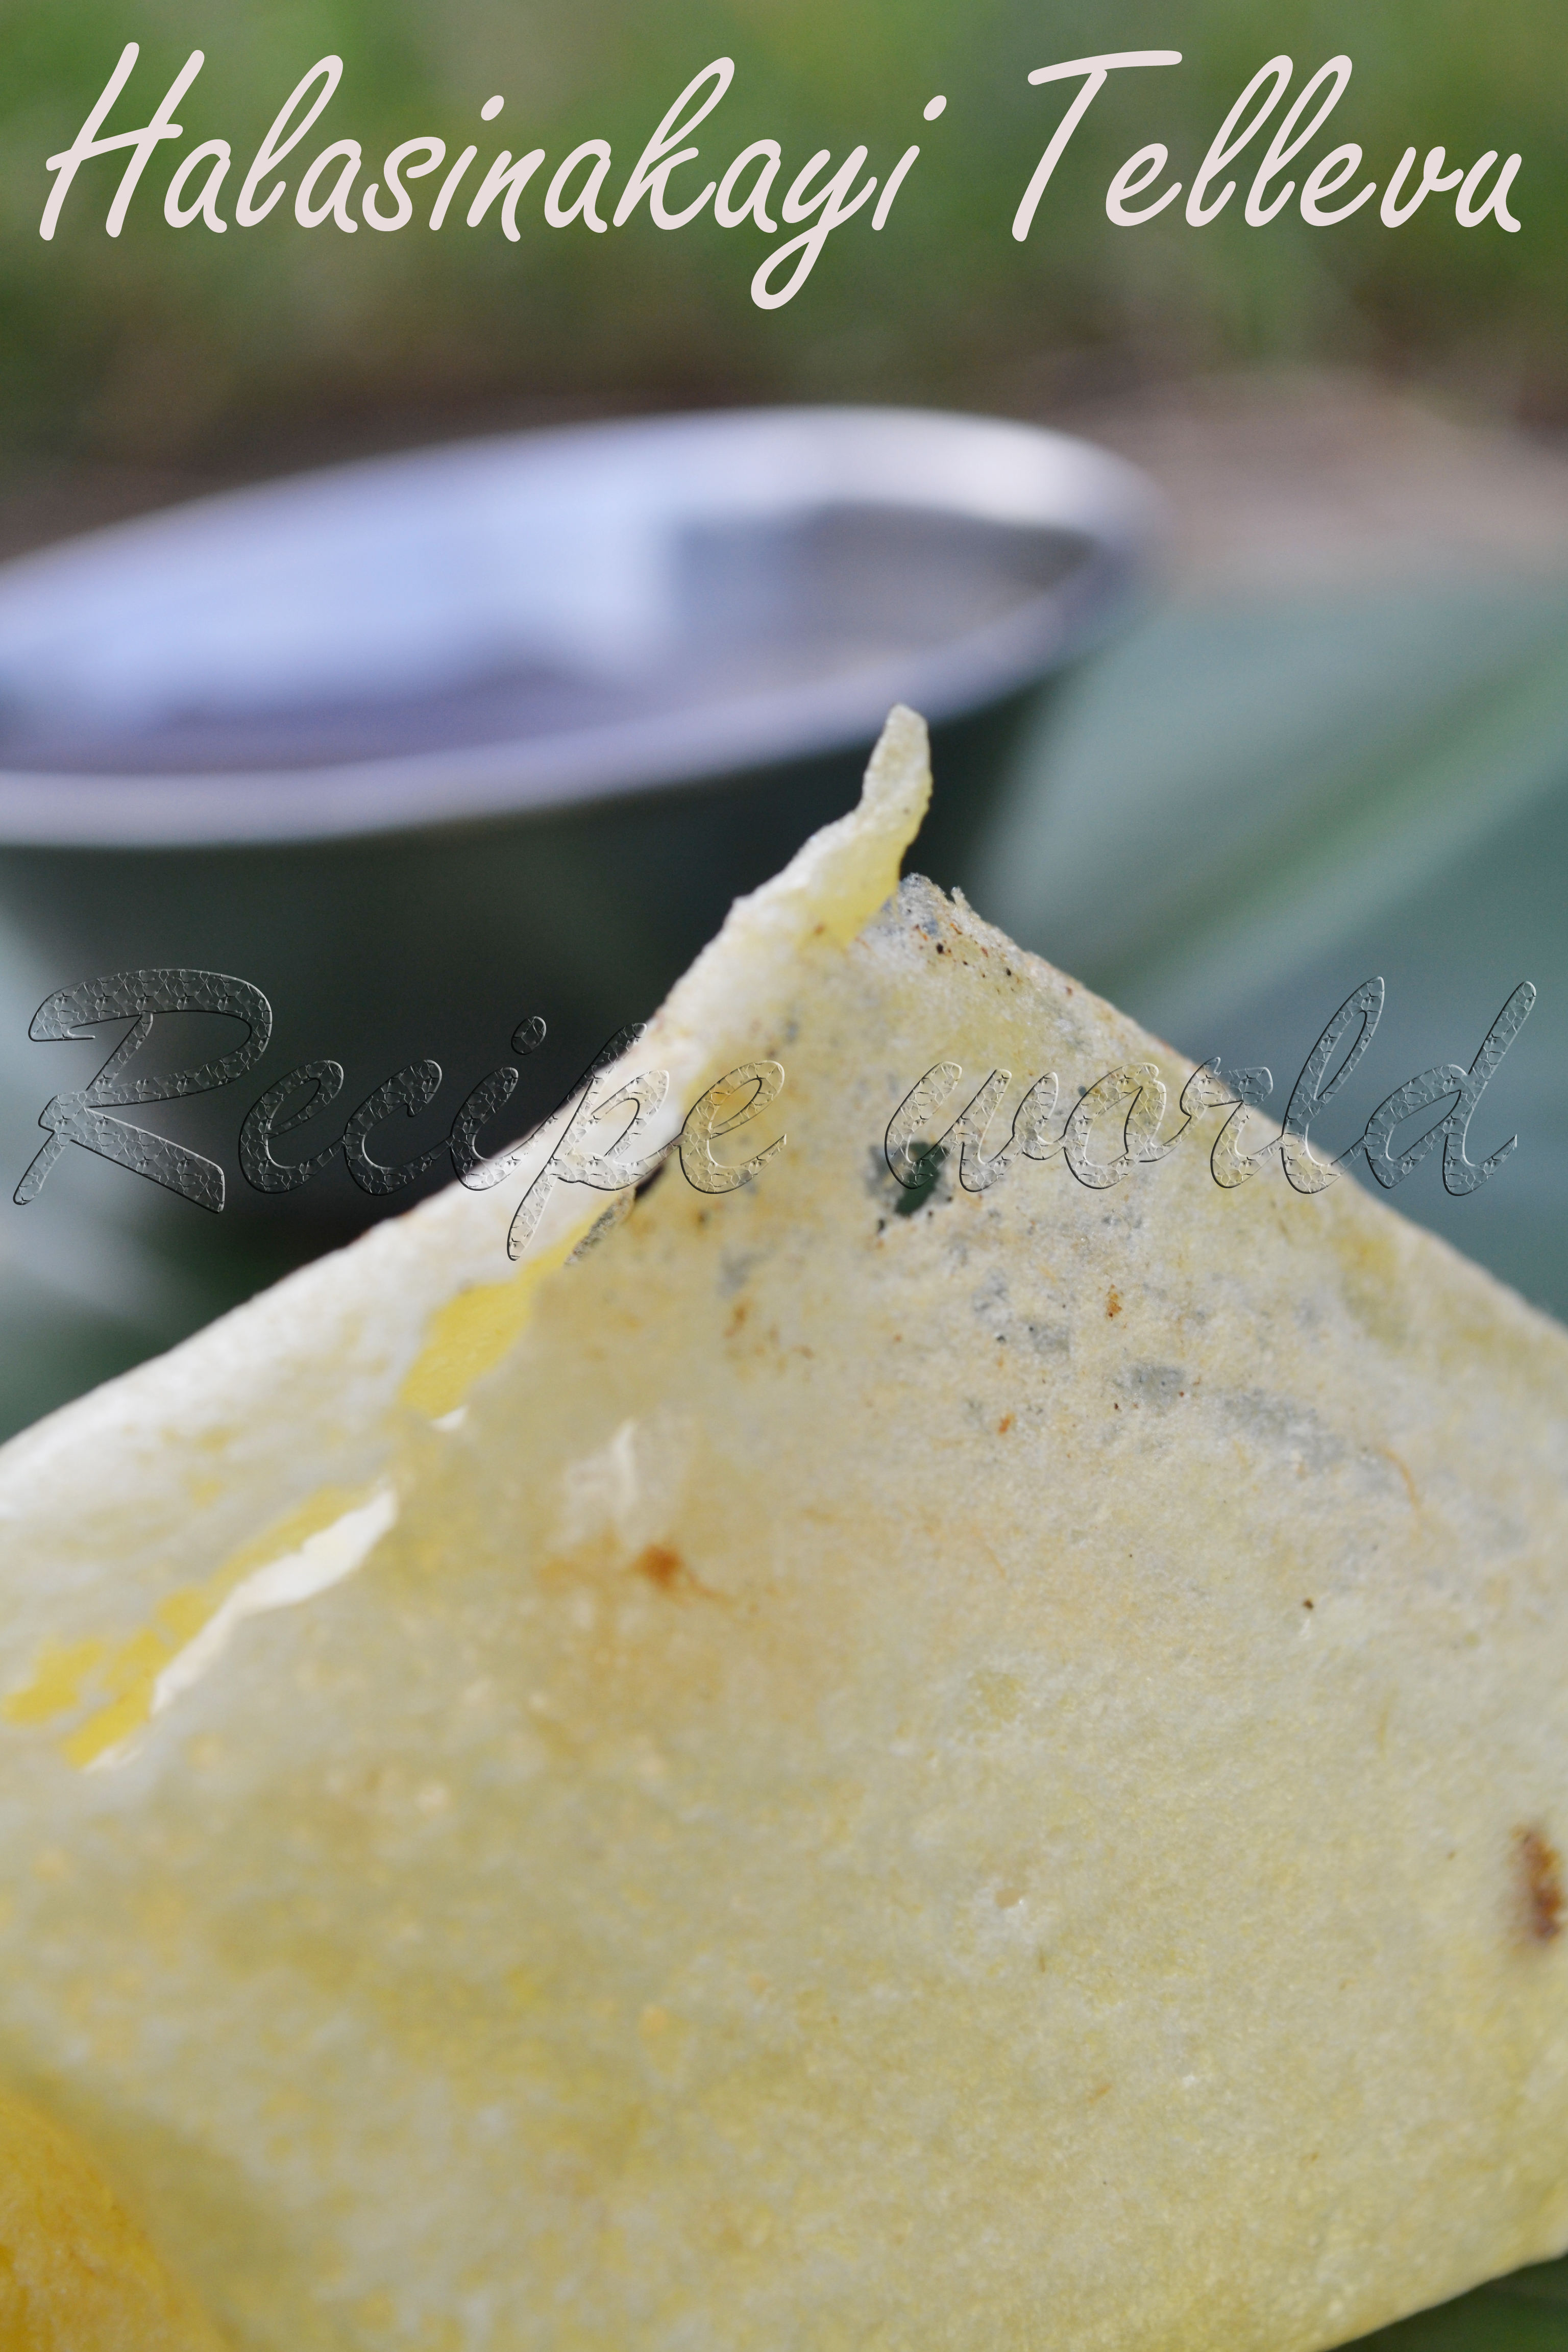
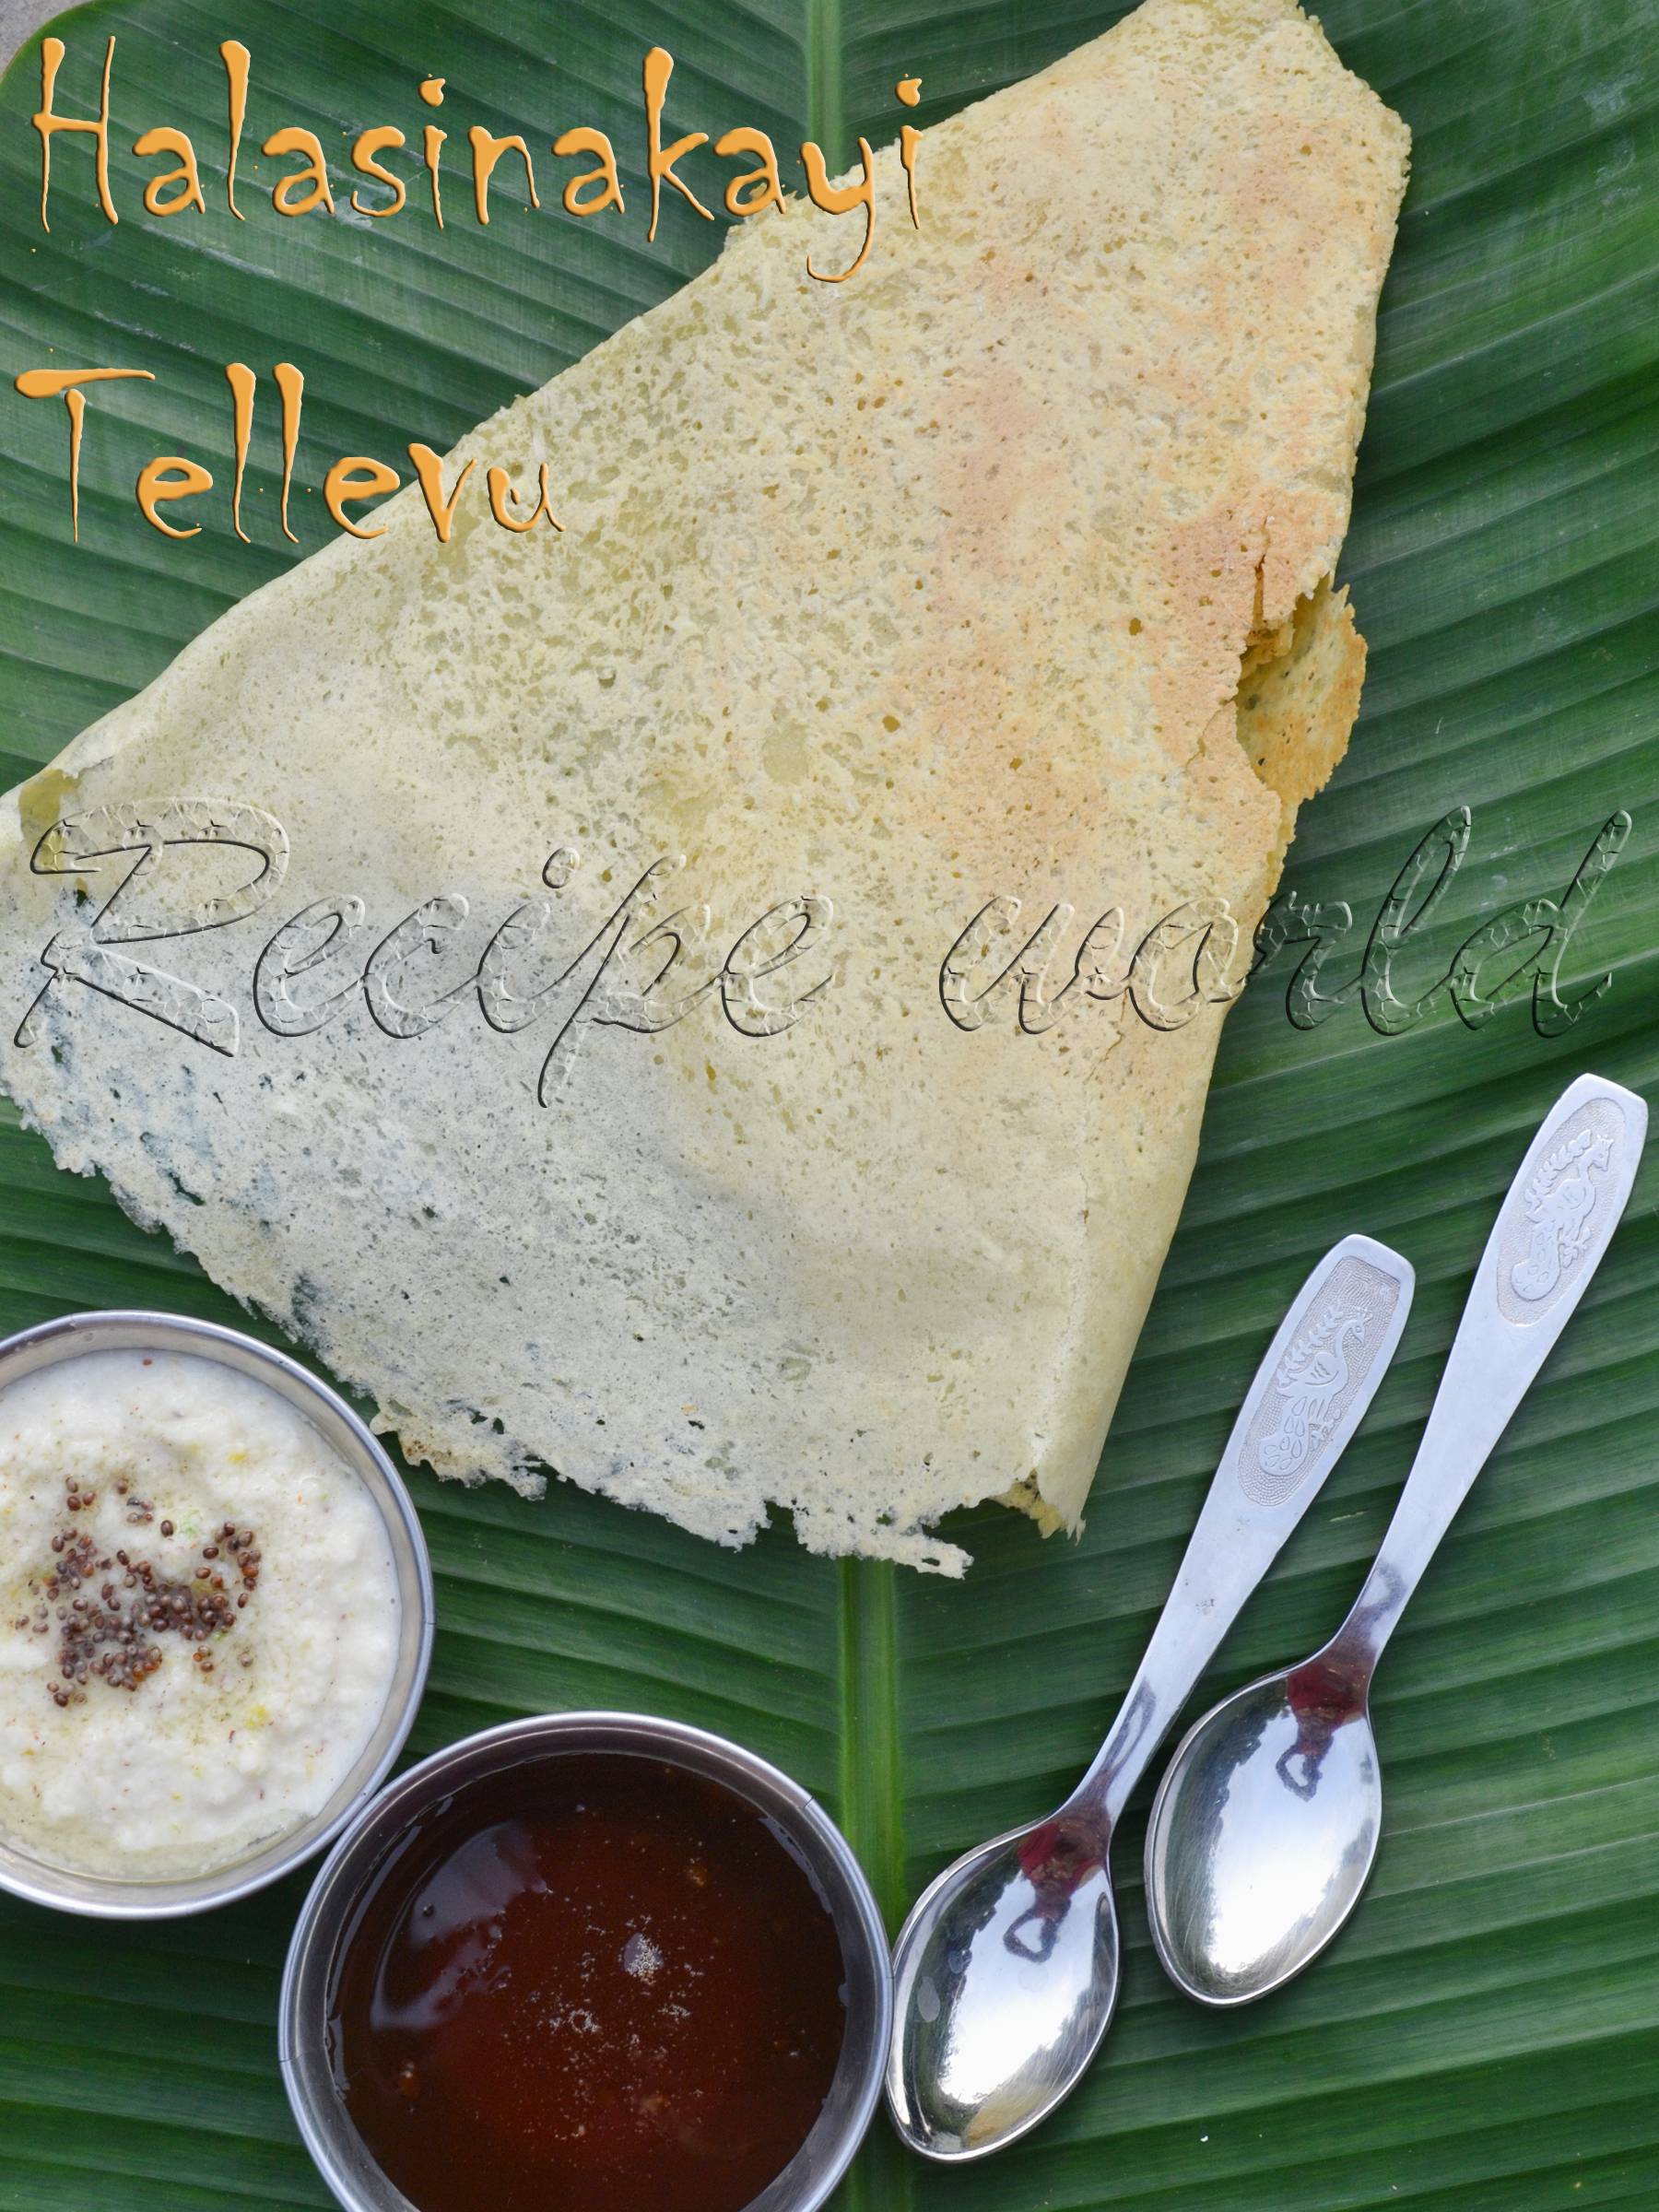
'Tellevu' is the signature dish of Havyakas. In rural parts of South India, Tellevu is the daily breakfast item in most of the Havyaka homes. Preparing such a thin dosa on the hot pan is an art. It needs some practice and lot of patience!
Different varieties of Tellevu can be prepared using different veggies. Mogekayi and cucumber are the main vegetables used for preparing Tellevu. During the season of Jack fruit, people love to prepare Raw Jack Fruit Tellevu. For this Tellevu, raw jack fruit flesh collected should be ground immediately and with that batter, Tellevu / Dosa should be prepared quickly. Since it requires lot of back end work, its convenient to prepare this Tellevu for the evening snacks.
I had this Tellevu ages back during my college days. This year, I was at native during the jack fruit season and got a chance to enjoy this delicious Tellevu. Mom prepared this Tellevu on a fine evening and the entire family enjoyed eating it. Honey and Coconut Chutney are the best combo with Raw Jack Fruit Tellevu.
I had posted regular 'Tellevu' recipe long back which contains the video of preparing Tellevu. Click here to see the Tellevu video recipe.


Time required: 2 hours
Serves: 5 - 6
Difficulty level: Difficult

Ingredients:
  • 1 medium sized raw jack fruit, fully grown
  • Water - as required
  • Salt to taste

Method:
  • Cut the raw jack fruit, separate the seeds and collect the flesh. 
  • Chop the jack fruit flesh finely. 
  • Grind it finely by adding salt to taste. While grinding, add water as required. Let the batter be thicker than regular dosa batter.
  • Heat the dosa pan on medium flame. Take a laddle full of batter, pour it on the hot pan and spread it thinly.
  • Cook the Tellevu on medium flame on one side till its crispy. 
  • Enjoy hot Tellevu along with Honey and Coconut Chutney!


Tips:
  • Use the prepared batter immediately. If kept for long time, Tellevu won't come out nice.
  • If the Tellevu is not coming out well some time say, half an hour after preparing the batter, try using it after grinding it again.
  • Not all the raw jack fruit are suitable for preparing this Tellevu. Thats why sometimes you may end up preparing slightly thicker dosa instead of thin ones. 
  • Mixie is not good for preparing batter for this Tellevu. Wet grinder or 'Oralu' (traditional Indian Mortar and Pestle) would be better for this purpose.  
ಕನ್ನಡದಲ್ಲಿ ಓದಲು ಇಲ್ಲಿ ಕ್ಲಿಕ್ ಮಾಡಿ. 

Villages like my native are the places where people can stay happily by spending very less on the daily needs like fruits and veggies. What I mean to say is, villages are such heavens where almost every plant, bush or creeper is useful either as food, medicine or in some other way! People will prepare delicious and healthy food even when there is no vegetable at home, using these naturally available ingredients.
For instance, we use raw banana for cooking and ripened ones for eating directly. Many of us don't know that even the plantain / banana stem can be used for cooking! It has got lot of medicinal values and some healthy and tasty dishes can be prepared using plantain stem. As I heard, regular usage of plantain stem is very good for kidney stone problem. Also, its a good remedy for stomach pain and dry cough. These days, its not that difficult to get plantain stem in cities. Coz plantain stem is easily available in vegetable markets in cities like Bangalore.
Well, today's recipe is Plantain Stem Salad - a yummy and healthy starter for your lunch. Credit goes to my Mom who helped me in preparing and presenting this recipe. Traditional name for this salad is 'Hulilu' even though I called it as Salad! Below is the recipe of Plantain Stem Salad..


Preparation Time: 15 - 20 minutes
Servings: 4
Difficulty level: Easy

Ingredients:
  • Plantain stem - 1 small
  • Ginger - 1 inch
  • Green chilli - 1
  • Lime - half piece
  • Thick curd - 1/2 cup
  • Salt - 1/2 tsp or to taste  

Method:
  • Cut the plantain stem into thin slices. Remove the fiber and chop the slices finely. About one cup of chopped plantain stem is enough for this salad.
  • Chop the ginger and green chilli finely. Either you can chop them or crush them, its fine anyways.
  • Combine chopped plantain stem, chopped ginger and chilli, curd in a mixing bowl. Add salt and lime juice for taste. 
  • Enjoy this healthy and delicious salad with your lunch!


Tips:
  • Don't be scared if chopped plantain stem looks like oxidized. It will be back to its original color when you add lime juice to it.  
ಕನ್ನಡದಲ್ಲಿ ಓದಲು ಇಲ್ಲಿ ಕ್ಲಿಕ್ ಮಾಡಿ. 

I had thought of posting this recipe before the jack fruit season ends. But these days, I am busy with my little daughter. There's no time left for doing even my routine things! And now, I am realizing why many women blogger buddies stop their writing after having kids :) 
This year, I was in my native during jack fruit season and enjoyed different dishes of jack fruit. Here is the recipe of Jack Fruit Kheer (Payasa) for you. Hope you enjoy this easy and delicious kheer when you get this fruit next time!


Preparation Time: 20 minutes
Servings: 4 - 5
Difficulty level: Medium

Ingredients:
  • Ripe jack fruit flesh cut into medium size pieces - 2 cups
  • Milk - 2 cups
  • Water - 2 cups
  • Salt to taste (a pinch)   
  • Sugar - 1 cup or according to taste
  • Jaggery - 2 tsp (optional)
  • Semolina (sooji rava) - 1/4 cup
  • Cardamom powder - 1/4 tsp

Method:
  • Take semolina in a small bowl. Add about half a cup water and mix it nicely with fingers or a spoon. Drain all the water and allow it to soak for 10 minutes.  
  • Heat 2 cups of water in a medium size vessel. Once the water becomes hot, add salt and sugar and boil it for 2 minutes. To this, add jack fruit pieces and cook it for a minute. 
  • Once the jack fruit pieces are cooked, add washed semolina. Stir it continuously to avoid lumps.
  • When the semolina is cooked and the kheer mixture becomes thick, add milk and cardamom powder. 
  • Allow it to boil for 2 minutes and switch off the flame. That's all, delicious kheer is ready to enjoy!


Tips:
  • Ripe jack fruit flesh gets cooked faster. So, take care and don't allow to overcook. If overcooked, it will become like a thick gravy.
ಕನ್ನಡದಲ್ಲಿ ಓದಲು ಇಲ್ಲಿ ಕ್ಲಿಕ್ ಮಾಡಿ.

The season of mangoes is coming to end now in India. I was in my native this year throughout the mango season. There are lot of mango trees in our backyard, but this year, we couldn't get any mangoes there! Of course we bought mangoes from the city, but its not at all equal to the home grown ones.
It was during our childhood days we were running to my Grandma's place to enjoy those delicious mangoes. Going to their place was the happiest thing for us during those times! Grand parents are no more now, but my Mom's brothers invite my Mom's family every year to enjoy the mangoes at their place. This year, nobody could visit their place during mango season even after frequent invites by them. Finally, the kind hearted brothers sent a big parcel of both ripened and unripened mangoes to my mom's place! Everybody felt so happy and enjoyed the delicious mangoes up to a week. Even my little one enjoyed eating mangoes :)
When it is the mango season, most common dessert we prepare at home is Mango Seekarane (Rasaayana). Either it can be served as dessert or as side dish with Dosa or Roti. Click here to know more about Mango Seekarane. 
Coming to the recipe part, its a sweet and tangy dish which I had recently at my sister's place. It was prepared from raw mango and they call it as 'Mango Sweet Pickle'. Just learned the preparation method from them and tried it at home. Everybody at our home liked this pickle. Hope you will also like it!


Preparation Time: 40 minutes
Difficulty level: Medium

Ingredients:
  • 1 large mango - unripened (preferably Totapuri Mango)
  • Liquid jaggery - 1 to 1 1/2 cup (adjust according to sweetness)
  • Salt - 1 tsp or to taste
  • Green chillies - 2 
  • Water - 1/2 cup

Method:
  • Peel off the mango and cut it into thin slices of medium size.
  • Heat water in a vessel. Add the mango slices to the hot water and cook it for a minute or till half done.
  • To this, add salt, jaggery, slit green chillies and cook till the syrup becomes thick (May be 2 1/2 string consistency). By the time the syrup becomes thick, mango slices will be cooked fully and they will become transparent. 
  • Transfer the prepared sweet pickle to an air tight jar and use it when required. This can be stored up to 2 - 3 weeks.
  • This pickle goes well with rice like any other pickle.
 
Tips:
  • Any unripened mango can be used for this recipe. But Totapuri Mango is the most suited one.
  • Red chilli powder can be used instead of green chillies for this recipe.
  • This pickle should be both sweet and tangy in taste. When the pickle is almost done, check and adjust the taste. If the mango does not have a sour taste, few drops of lime squeeze can be added to make the pickle more tasty. 
ಕನ್ನಡದಲ್ಲಿ ಓದಲು ಇಲ್ಲಿ ಕ್ಲಿಕ್ ಮಾಡಿ.

Just think of a situation where you are expecting some guests and confused what to prepare for them. Ideal condition is that it should be a sweet which is neither too simple nor too difficult and it will be nice if it can be stored for few more days..right? Here is one such recipe which I learnt from my mother. Unlike other varieties of Holige (Obbattu) we prepare, it will not be that soft; its kind of crispy and not too sweetish. Best thing I admire is that it can be stored up to 15 days!
All the credit for this recipe goes to my mother. These days, I am out of my kitchen and busy with my little one. I just clicked some photos and noted down the measurements while my mother was preparing Sakkare Holige (Obbattu). I am thinking of posting some more delicacies from mother's kitchen till I am back to cooking.
Hope to see you all with new recipes soon! Here is the recipe of Sakkare Holige (Obbattu)..


Preparation time: 1 1/2 hour
Time for the dough to get set: 1 hour
Yield - 40 pieces
Difficulty level - Medium

Ingredients:
For the filling:
  • Sooji rava (semolina) - 2 1/4 cup
  • Sugar - 2 3/4 cup
  • Fresh grated coconut - 10 cups
  • Salt - 1 1/2 tsp
  • Cardamom powder - 1 tsp
  • Ghee - 2 tsp

For the outer covering:
  • Wheat flour - 1 cup
  • All purpose flour / Maida - 1 cup
  • Salt - 1 tsp
  • Turmeric powder - 1 tsp
  • Water - 1 cup approx.
  • Oil - 1 cup or little more


Method:
  • Combine wheat flour, all purpose flour and turmeric powder in a mixing bowl. Take about a cup of water and add salt to it. Pour the flour mixture to the salt water and knead it nicely. Add 3/4th portion of oil and knead the dough without lumps. Finally, pour the remaining oil on the top of the dough and press it gently. Keep the dough closed ith a lid for an hour.
  • Heat the ghee on a heavy bottom pan and roast sooji rava on medium flame for 5 minutes or till you hear a nice aroma. Just after switching off the flame, combine sugar and grated coconut with sooji rava. Also add salt and cardamom powder and mix it well.
  • Now, take the sooji rava - coconut mixture and grind it without adding water. For grinding, you can use mixie jar - small ones or if you are preparing in large quantity, grinder would be the better option. If you can use use the grinding stone, its very convenient to grind this mixture because the mixture becomes bit sticky and sticks to the mixie jar. Do not grind the mixture very finely, it should be in the consistency of sooji rava.
  • Prepare lemon size balls from the ground mixture. Also divide the covering dough into same number of small parts. Apply oil to your hands and place the covering dough on your palm. Place the filling upon that and cover it completely. 
  • Roll the covered balls on a greased plastic sheet or a plantain leaf into circles. Transfer the rolled Holige to the hot tava and cook it on medium flame till you find brownish spots on one side. Turn it and do the same with other side. 
  • Delicious Sakkare Holig is ready to eat now! Enjoy it with ghee or simply you can eat that!

 Tips:
  • This Holige will be moderately sweet. If you add more sugar, mixture becomes too sticky and it will be very difficult to grind it. So, be sure to make proper measurements. 
ಕನ್ನಡದಲ್ಲಿ ಓದಲು ಇಲ್ಲಿ ಕ್ಲಿಕ್ ಮಾಡಿ.

Here is one more recipe which I learned from my mother recently. In fact its an old recipe, but never I had got a chance to prepare it :) Kadlemaddi is bit similar to the filling which we prepare for Obbattu. This traditional sweet is also called as 'Hayagreeva'. Below is the recipe of this simple sweet which is liked by most of the sweet lovers!   


Preparation time: 40 minutes
Servings: 4
Difficulty level: Medium

Ingredients:
Split chana dal - 3 cups
Jaggery - 1 3/4 cup (according to sweetness)
Sugar - 1/4 cup or according to taste
Salt - 1 1/2 tsp
Fresh grated coconut - 1 1/2 cup (see tips)
Cloves - 2
Cardamom - 2
Ghee (optional) - 2 tsp
Cashews (optional) - 10
Raisins (optional) - 15

Method:
Soak chana dal for about 30 minutes and pressure cook with enough water till very soft. It will get cooked nicely within 1 - 2 whistles.
Drain off all the excess water and mash the cooked mixture lightly using a ladle or a masher.
Take a heavy bottom pan and combine the mashed dal, jaggery, sugar, salt and grated coconut.
Keep mixing it on medium flame till most of the liquid content is evaporated. Once the mixture becomes thick and won't stick to the ladle any more, add cashew pieces, raisins, powdered cloves and cardamom and switch off the flame.  
Finally, add 2 tsp of ghee to the Kadle Maddi, mix it well and close the lid. Allow to get set for 10 minutes before serving.
Serve it warm with a spoonful of ghee on the top. It tastes nice even without ghee.


Tips:
  • Kadle Maddi can be prepared using sugar also. Adding of jaggery is not a compulsion here. But adding of jaggery will definitely make a difference in taste.
ಕನ್ನಡದಲ್ಲಿ ಓದಲು ಇಲ್ಲಿ ಕ್ಲಿಕ್ ಮಾಡಿ.

From past couple of months, I am not able to update my blog regularly. That's why, some of the recipe picks I clicked long back are still pending with me. Today I was just glancing at them and got inspired to write this recipe!
Marige Gojju is one of the traditional recipes of Havyakas. The name Marige Gojju is because of a special kind of vessel called as 'Marige' which was used to prepare this recipe. Marige means a wooden vessel which was used to mash and powder the ingredients for this Gojju. These days, nobody is using this kind of vessel in their kitchens. But we can see this 'Marige' in some houses of Malnad.
Here is the recipe of Marige Gojju which I learnt from mom. Try and taste this Gojju for your lunch or dinner..


Preparation Time: 15 minutes
Servings: 4

Ingredients:
Cooking oil - 2 1/2 tsp
Urad dal - 1/4 tsp
5 - 6 dry red chillies 
Sesame seeds - 1/2 tsp
Pinch of asafoetida
Mustard seeds - 1/4 tsp
Salt to taste
Thick curd - 1 to 1 1/4 cup

Method:
Heat oil in a heavy bottom pan. Add dry red chillies, urad dal, mustard seeds, asafoetida and sesame seeds and roast them nicely.
Add salt to taste before switching off the flame and allow the mixture to become cool.
Now, mash and powder the whole mixture with the help of a ladle. Make the powder as fine as possible. Small grinding stone may ease your work.
Add curd to this mixture and mix it well. That's all, tasty Marige Gojju is ready to serve!


Finally, I want to make one more addition to this recipe. When I told my Grandma that I wrote this recipe, she asked me what all the ingredients used. After knowing the ingredients which I normally use, she told that adding of 1/2 tsp of crushed garlic to the seasoning will enhance the taste of Gojju! Thanks a lot my dear Ajji for this nice tip :)
If you love the flavor of garlic, try adding crushed garlic to this recipe sometime.

Tips:
  • Mixie is not recommendable for powdering the ingredients here. Because, mashing the ingredients will enhance the taste of this Gojju. 
ಕನ್ನಡದಲ್ಲಿ ಓದಲು ಇಲ್ಲಿ ಕ್ಲಿಕ್ ಮಾಡಿ. 

Bread fruit, which in Kannada is generally known as Beru halasu or Deevi halasu. It is one of the commonly used vegetables in Malnad areas. Sambar (Curry) prepared from this veggie tastes delicious. We can also prepare tasty chips, paapads, bhajjis and podis using Bread fruit. I have tasted varieties of Bread fruit dishes since childhood, but Chakke Paladya using this veggie was new to me. My mom prepared this particular curry sometime back and I liked it a lot. So, here is the recipe of Bread Fruit Chakke Paladya for you..


Preparation time: 35-40 min
Serves: 5 - 6

Ingredients:
Bread fruit - 1/2 cut
Lemon - 1 1/2 (according to taste)
Green chillies – 2 to 3 (according to taste)
Water 4 - 5 cups
Oil - 1/2 tsp
Salt to taste
Seasoning: 1 tsp oil, 3/4 tsp mustard seeds, pinch of asafoetida, 1 strand of curry leaves.


Method:
Peel off the skin and core part of the bread fruit. Make medium sized pieces.
Take a pan and add water, salt, lemon juice, slit green chillies. Once the water starts getting hot, add the bread fruit pieces and cook till soft.
Take out one cup of cooked pieces and allow to cool. Make a fine paste of  the same once its completely cool.
Add the prepared paste to the cooked mixture and bring to boil. Switch off the flame after 5 minutes.
Heat oil for seasoning and add mustard seeds, asafoetida and curry leaves. Put it into the Chakke Paladya mixture.
Enjoy this tasty curry with hot rice!
ಕನ್ನಡದಲ್ಲಿ ಓದಲು ಇಲ್ಲಿ ಕ್ಲಿಕ್ ಮಾಡಿ.

Normally, the season for Jack fruit starts by the mid or end of summer in rural areas. People will be busy preparing chips, papad and other preserves from raw jack fruit during summer. During rainy days, they will enjoy sweet dishes like Jack fruit Kadubu (Idli). These days, people started preserving jack fruit pulp in refrigerator and use it whenever required.  Even I enjoyed this kind of Kadubu after the jackfruit season this year :)
Sometime back, I had prepared Jack fruit Kadubu in our home. I actually wanted to post the recipe here and clicked some picks too..but couldn't take a picture of the final product that day! Last week, when my mom was preparing Kadubu, I told her the same and she insisted me to continue the recipe by taking some photos here. I did the same thing and now, able to post the recipe finally!
Its the common procedure adopted these days is to prepare the Kadubu using Idli moulds. Traditional way is to cook it using plantain leaf covers. Kadubu cooked in plantain leaf wraps will be tastier than Idli kind of Kadubu.
One more thing I wanted to tell with all my blogger friends.. I am not able to visit any of yours blogs these days. The reason is that I have got shifted to my mom's place now. Usage of internet is very limited and even I am not able to check my mails regularly. This may continue for few more months till I am back to my routine life. But whenever time permits, I will keep posting new recipes.
Here is the recipe of Jack fruit Kadubu for you..

Preparation Time:
Servings: 3 - 4

Ingredients:
Jack fruit pulp - 1 1/2 cup
Akki kadi (coarsely powdered rice) - 3/4 cup (See Tips)
Thick jaggery - 1/2 cup
Sugar - 2 tsp
Salt - 1/2 tsp
Cardamom powder - a big pinch
Cooking oil (preferably coconut oil) - 1 tsp


Method:
Combine jack fruit pulp, jaggery, sugar and salt in a mixing bowl.
Once the jaggery is diluted fully, add Akki Kadi and mix it nicely.
Finally add cooking oil and cardamom powder and mix well.
Kadubu batter should be little watery than dosa batter. If the batter looks too thick, you can add some water to dilute it.
You can cook it like either as Idli or as Kadubu. If you want to cook them as Idli, pour the batter in idli moulds and cook it like idli. It takes at-least 30 minutes to cook them in idli cooker. If you are cooking them like Kadubu, it takes a minimum of an hour to cook.
Cook the Idli / Kadubu till it is done nicely. Pour a spoonful of ghee on hot Kadubu and taste it!


Kadubu once prepared will last for 2 - 3 days. Here is one more way to enhance the taste of Kadubu..mash the Kadubu using your hands after its completely cool. To this, add 4 - 5 tsp of fresh ghee, 1 - 2 tsp of sugar and few strands of saffron (purely optional). Heat it on low flame in a heavy bottom pan for around 5 minutes. Serve it hot!


Tips:
  • Akki Kadi means, coarsely powdered rice. It looks like Idli rava. This can be substituted with Idli Rava also. If using Idli rava, add around 1 to 1 1/4 cup of Idli rava for 1 1/2 cup of jackfruit pulp. Also, its better to roast the Idli rava slightly before mixing with pulp.
  • Adding the oil to the batter makes the Kadubu light. Also, it helps for easy digestion of Kadubu.
ಕನ್ನಡದಲ್ಲಿ ಓದಲು ಇಲ್ಲಿ ಕ್ಲಿಕ್ ಮಾಡಿ. 

Bitter gourd is a well known vegetable. But Madahagala (Moodahagala) is less known. It belongs to the same bitter gourd family, but is not bitter in taste. It is a creeper and grows from the root whenever it gets plenty of water as in monsoon season. Even now, in a thick forest near my grand mother's house we can find these creepers grown naturally! Many villagers get the roots from the forest and grow them in their backyards.
It was almost 4-5 years I haven't seen this vegetable around our area vegetable market. Last week when I was shopping near Jayanagar area, I saw this in a vegetable shop. I felt very happy looking at it. And now I am sharing with you a tasty recipe using  moodahaagalakayi.


Preparation time : 35 minutes
Serves 3-4

Ingredients:
Moodahagalakayi - 1 1/2 or 2
Shredded fresh coconut - 3/4 cup
Curd - 3/4 cup or 1 cup
For seasoning: oil- 2tsp, red chilli -1, udad dal - 1tsp, mustard seeds -1tsp, green chilli -1
Salt to taste.


Method:
Chop the vegetable into small pieces.
Heat oil in a fry pan for seasoning. Add red chilli, udad dal, mustard seeds and chopped green chilli. When the mustard seeds splutter, add the chopped moodahagalakayi pieces, salt and mix it. Fry this mixture in simmer for around 20 minutes stirring in between to avoid burning. Then let it cool.
Grind the coconut finely using little water.
Now, add the ground mixture and curd to the fried mixture. Add little more salt if you want.
Hashi is now ready to be served with hot rice!


ಕನ್ನಡದಲ್ಲಿ ಓದಲು ಇಲ್ಲಿ ಕ್ಲಿಕ್ ಮಾಡಿ.

Vade is one of the authentic Havyaka delicacies, especially prepared for the Ganesh Chaturthi festival. People will prepare Chakli and Vade in lots for this festival and enjoy them upto a month after the festival. This dish can be prepared with very less items which will be there in everybody's kitchen.. but it needs bit more time and little stressful job! Better to get a helping hand instead of doing it alone..


Preparation time: 1 hour
Soaking time: 5 hours
Yield: 24 vade of medium size

Ingredients:
Rice - 3 cups
Urad dal (split) - 1/4 cup
Fenugreek 8 - 10 seeds
Carom seeds - 1/4 spoon
Cumin seeds - 1 spoon
Sesame seeds - 1 spoon
Green chilli - small piece
Oil for deep frying
Salt to taste

Procedure:
Soak urad dal and fenugreek seeds in water for 2 - 3 hours.
Wash the rice thoroughly with enough water and spread them on a cotton cloth for 5 minutes to absorb the excess water. Powder them coarsely like sooji rava before it gets dried up.
Grind the soaked urad dal and fenugreek seeds into smooth paste using water. Consistency of this paste should be the same as Dosa batter.


Add the carom seeds, cumin seeds, sesame seeds and green chilli while grinding, or powder them separately and add to the batter.
Don't use all the batter to prepare the dough; keep around 1/4th portion of the dough separately to add later.
Now, take the batter, add salt and coarsely powdered rice little by little. Prepare a smooth dough like Chapati dough. Knead the dough nicely for at-least 8 - 10 minutes to ensure proper mixing.
Keep the dough covered and let it sit for about 2 hours before preparing the Vade.
After 2 hours, knead the dough again. If needed, add the urad dal batter which was kept aside.
Heat the oil in a pan. Oil should be extremely hot (smoking level) for preparing the Vade; else, it won't puff up nicely.


Take small lemon size dough and knead it nicely for a minute. Roll it into a small roundel like Poori on a greased plastic sheet. Make a hole in the middle.
Once the oil becomes nicely hot, transfer the rolled Vade into the hot oil and deep fry till golden brown on both the sides. It won't take much time to deep fry them.
Preserve the Vade in airtight containers and enjoy eating them upto a month!


Tips:
  • Don't keep the dough balls ready for longer time to avoid them getting dried up. Simultaneously, you need to prepare the dough balls, roll them and deep fry! That's why it will be better to have some helping hands.
Sending this recipe to the 'Flavours of South India', ongoing event at Simply Food.

    ಕನ್ನಡದಲ್ಲಿ ಓದಲು ಇಲ್ಲಿ ಕ್ಲಿಕ್ ಮಾಡಿ.

    There is a big shopping complex in our area, which is at walkable distance from our house. Normally, we will go there frequently for our household needs. Last week, I had been there for browsing something and I found Totapuri mangoes in a shop there. I just rushed in and bought few mangoes with the idea of cutting and eating them. But it was too much tangy and I couldn't eat even a single pie! Then, I thought of preparing this Gojju (Thick gravy). 
    More sour the mango is, its better for this Gojju. If boiled nicely, this can be preserved upto 4 - 5 days without refrigeration. Of course, you can use the mangoes preserved in salt water also instead of fresh ones. This gojju will be a good combination with rice.


    Time required: 40 minutes

    Ingredients:
    1 big raw mango (sour)
    Dry red chillies - 2
    Green chillies - 6 (Adjust as per your taste)
    Urad dal - 1/2 spoon
    Mustard seeds - 1/2 spoon
    Asafoetida
    Few curry leaves
    Pinch of turmeric
    Sugar - 1/2 spoon
    Salt - according to taste
    Garlic pods 8 - 10 (crushed)
    Oil - 3 spoon

    Procedure:
    Cook the raw mango in water till it becomes smooth.
    After the mango is cooked, take it out from the water and allow to cool.
    Take out all the pulp from the cooked mango. Use some water if needed.
    Heat the oil in a pan. Add the red chilli pieces, urad dal, mustard seeds, asafoetida and turmeric. Once it splutters, add curry leaves and sliced green chillies.
    Add the crushed garlic and saute for a while to remove the raw smell.
    Add the mango pulp, sugar and salt. If it looks too thick, add some water to dilute it.
    Boil the gojju at-least for 8 - 10 minutes and switch off the flame.
    Store it in an airtight bottle once it becomes cool.
    Enjoy the hot and sour Gojju with rice. 


    Tips:
    • If you want to have more aroma of garlic, just skip adding garlic while preparing the Gojju; and once the Gojju is done, do the tempering with garlic.
    • No need to boil the mangoes if raw mangoes preserved in salt water are used. Because, they will be boiled before preserving in salt water.

    This is my entry to the Event 'Herbs and Flowers - Garlic' hosted by Vardhini, which was started by PJ.


    Also, sending this to 'Flavours of South India', ongoing event at Simply Food.


      ಕನ್ನಡದಲ್ಲಿ ಓದಲು ಇಲ್ಲಿ ಕ್ಲಿಕ್ ಮಾಡಿ.  

      Again, this is a traditional recipe from Havyaka cuisine. This is a kind of spicy curry or side dish which suits the lovers of spicy food! Normally, people love to eat this hot curry during the rainy season.
      I used home grown Malabar spinach for preparing this recipe. If you plant it in a pot, it will grow nicely even with little care! This leafy vegetable is a good source of vitamins 'A' and 'C'. Sometimes, I will use this vegetable for preparing the Sambar and some other traditional Havyaka dishes.  


      Preparation time: 45 - 50 minutes

      Ingredients:
      Malabar spinach - 1 bunch
      Dried red chillies - 3 (adjust as per your preference)
      For seasoning: Oil - 2 spoon, Urad dal - 1/2 spoon, Mustard seeds - 1/4 spoon, Asafoetida, pinch of turmeric
      Water - 1/2 cup
      Salt to taste
      Amchur powder - 1/2 spoon
      Crushed garlic - 1 spoon

      Method:
      Clean the Malabar spinach thoroughly and chop them finely.


      Heat oil in a pan, add red chilli pieces, urad dal, mustard seeds, asafoetida and turmeric. Once it starts spluttering, add the chopped Malabar spinach.
      Add 1/2 cup of water, salt and amchur powder and allow to cook for 25 - 30 minutes by closing the lid.
      Saute them occasionally and add little more water, if required.
      By the time you cook for 30 minutes, malabar spinach will get cooked nicely and will become like a paste.
      If it has not become like a thick paste, you can crush it in the mixie for a while.
      Finally, do the seasoning with crushed garlic and enjoy this side dish with hot rice!
      No need to keep it in the fridge if you can consume it within 2 days.
      NewerStories OlderStories Home