Biscuits are the snack time favorites of people of all the ages. We are also biscuit lovers and keep browsing for new varieties of them. Apart from store bought ones, I would love to prepare different types of biscuits at home. When it comes to bakery style food like Benne (Butter) Biscuit, Nippattu, etc., hubby prefers and love to eat the home made ones.
Many of you must have heard of Karachi Bakery in Hyderabad. They are famous for their food products especially Fruit Biscuit and Cashew Biscuits. When we were in Bangalore, we were sure to get a parcel of these goodies if anybody among the friends or family is visiting Hyderabad! My sister's family who stays in Hyderabad, will bring Karachi Biscuits every time when they are coming for vacation. These days, we can find these biscuits in some of the shops in Bangalore as well. 
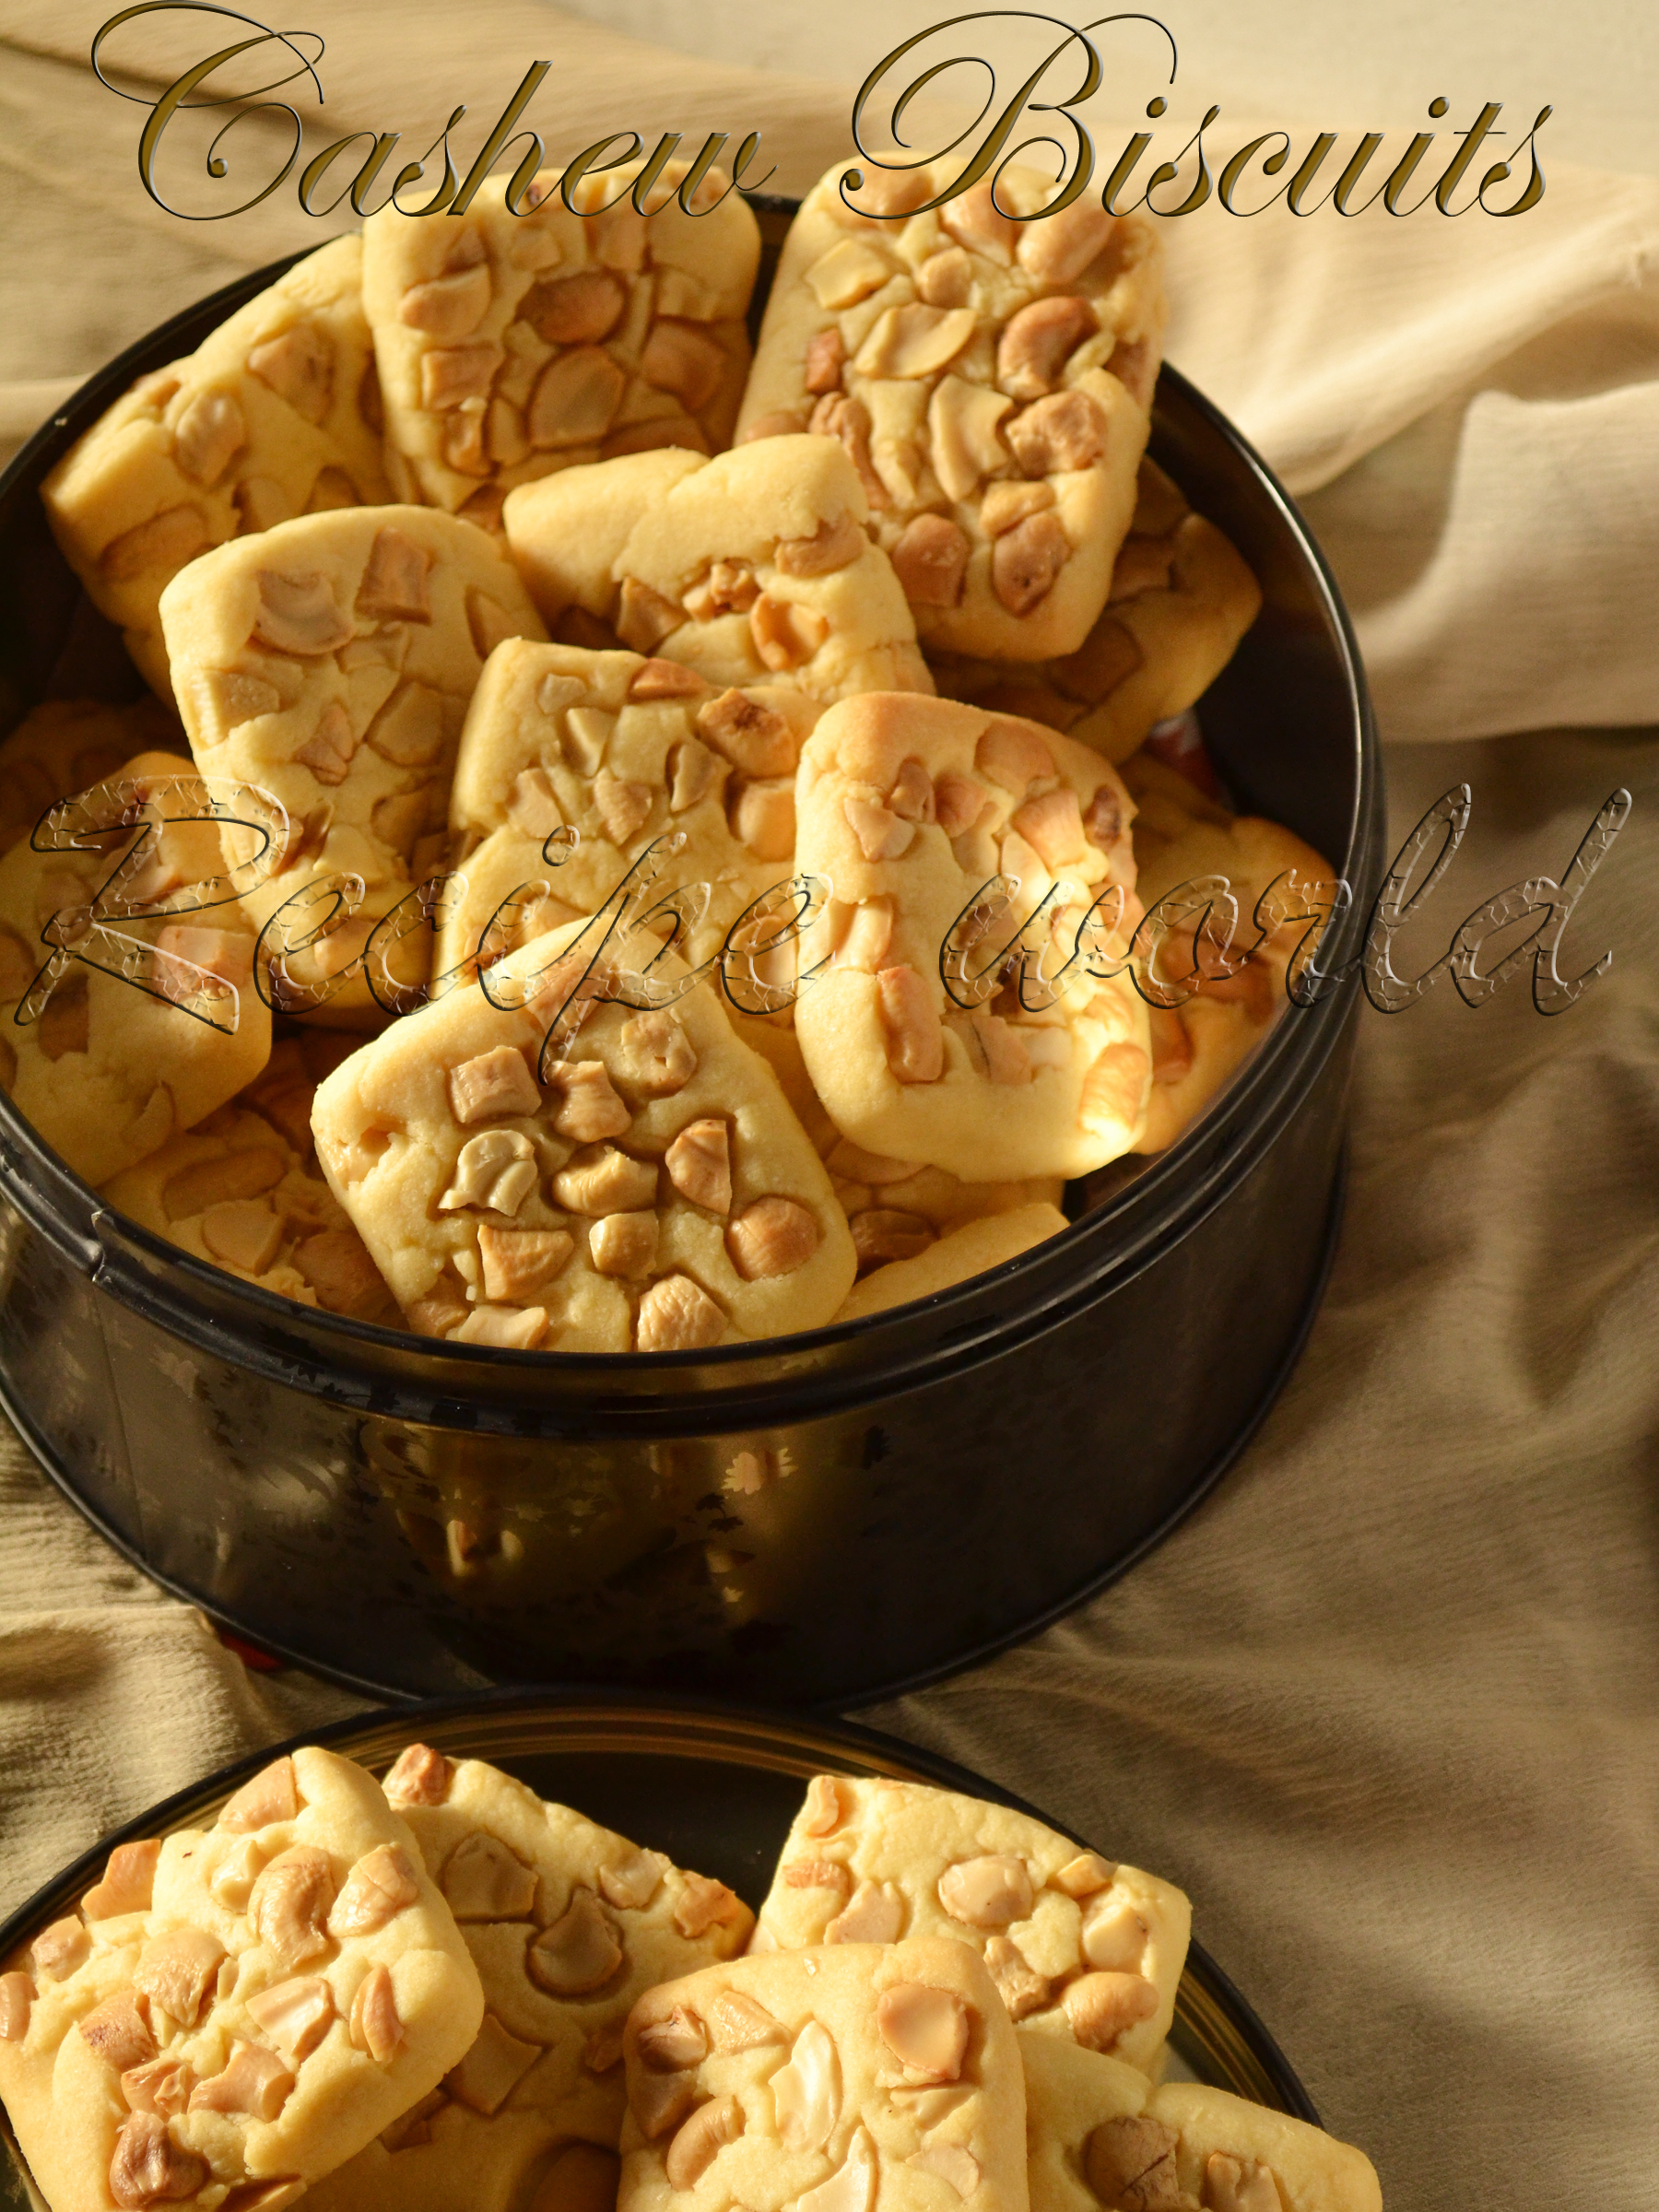
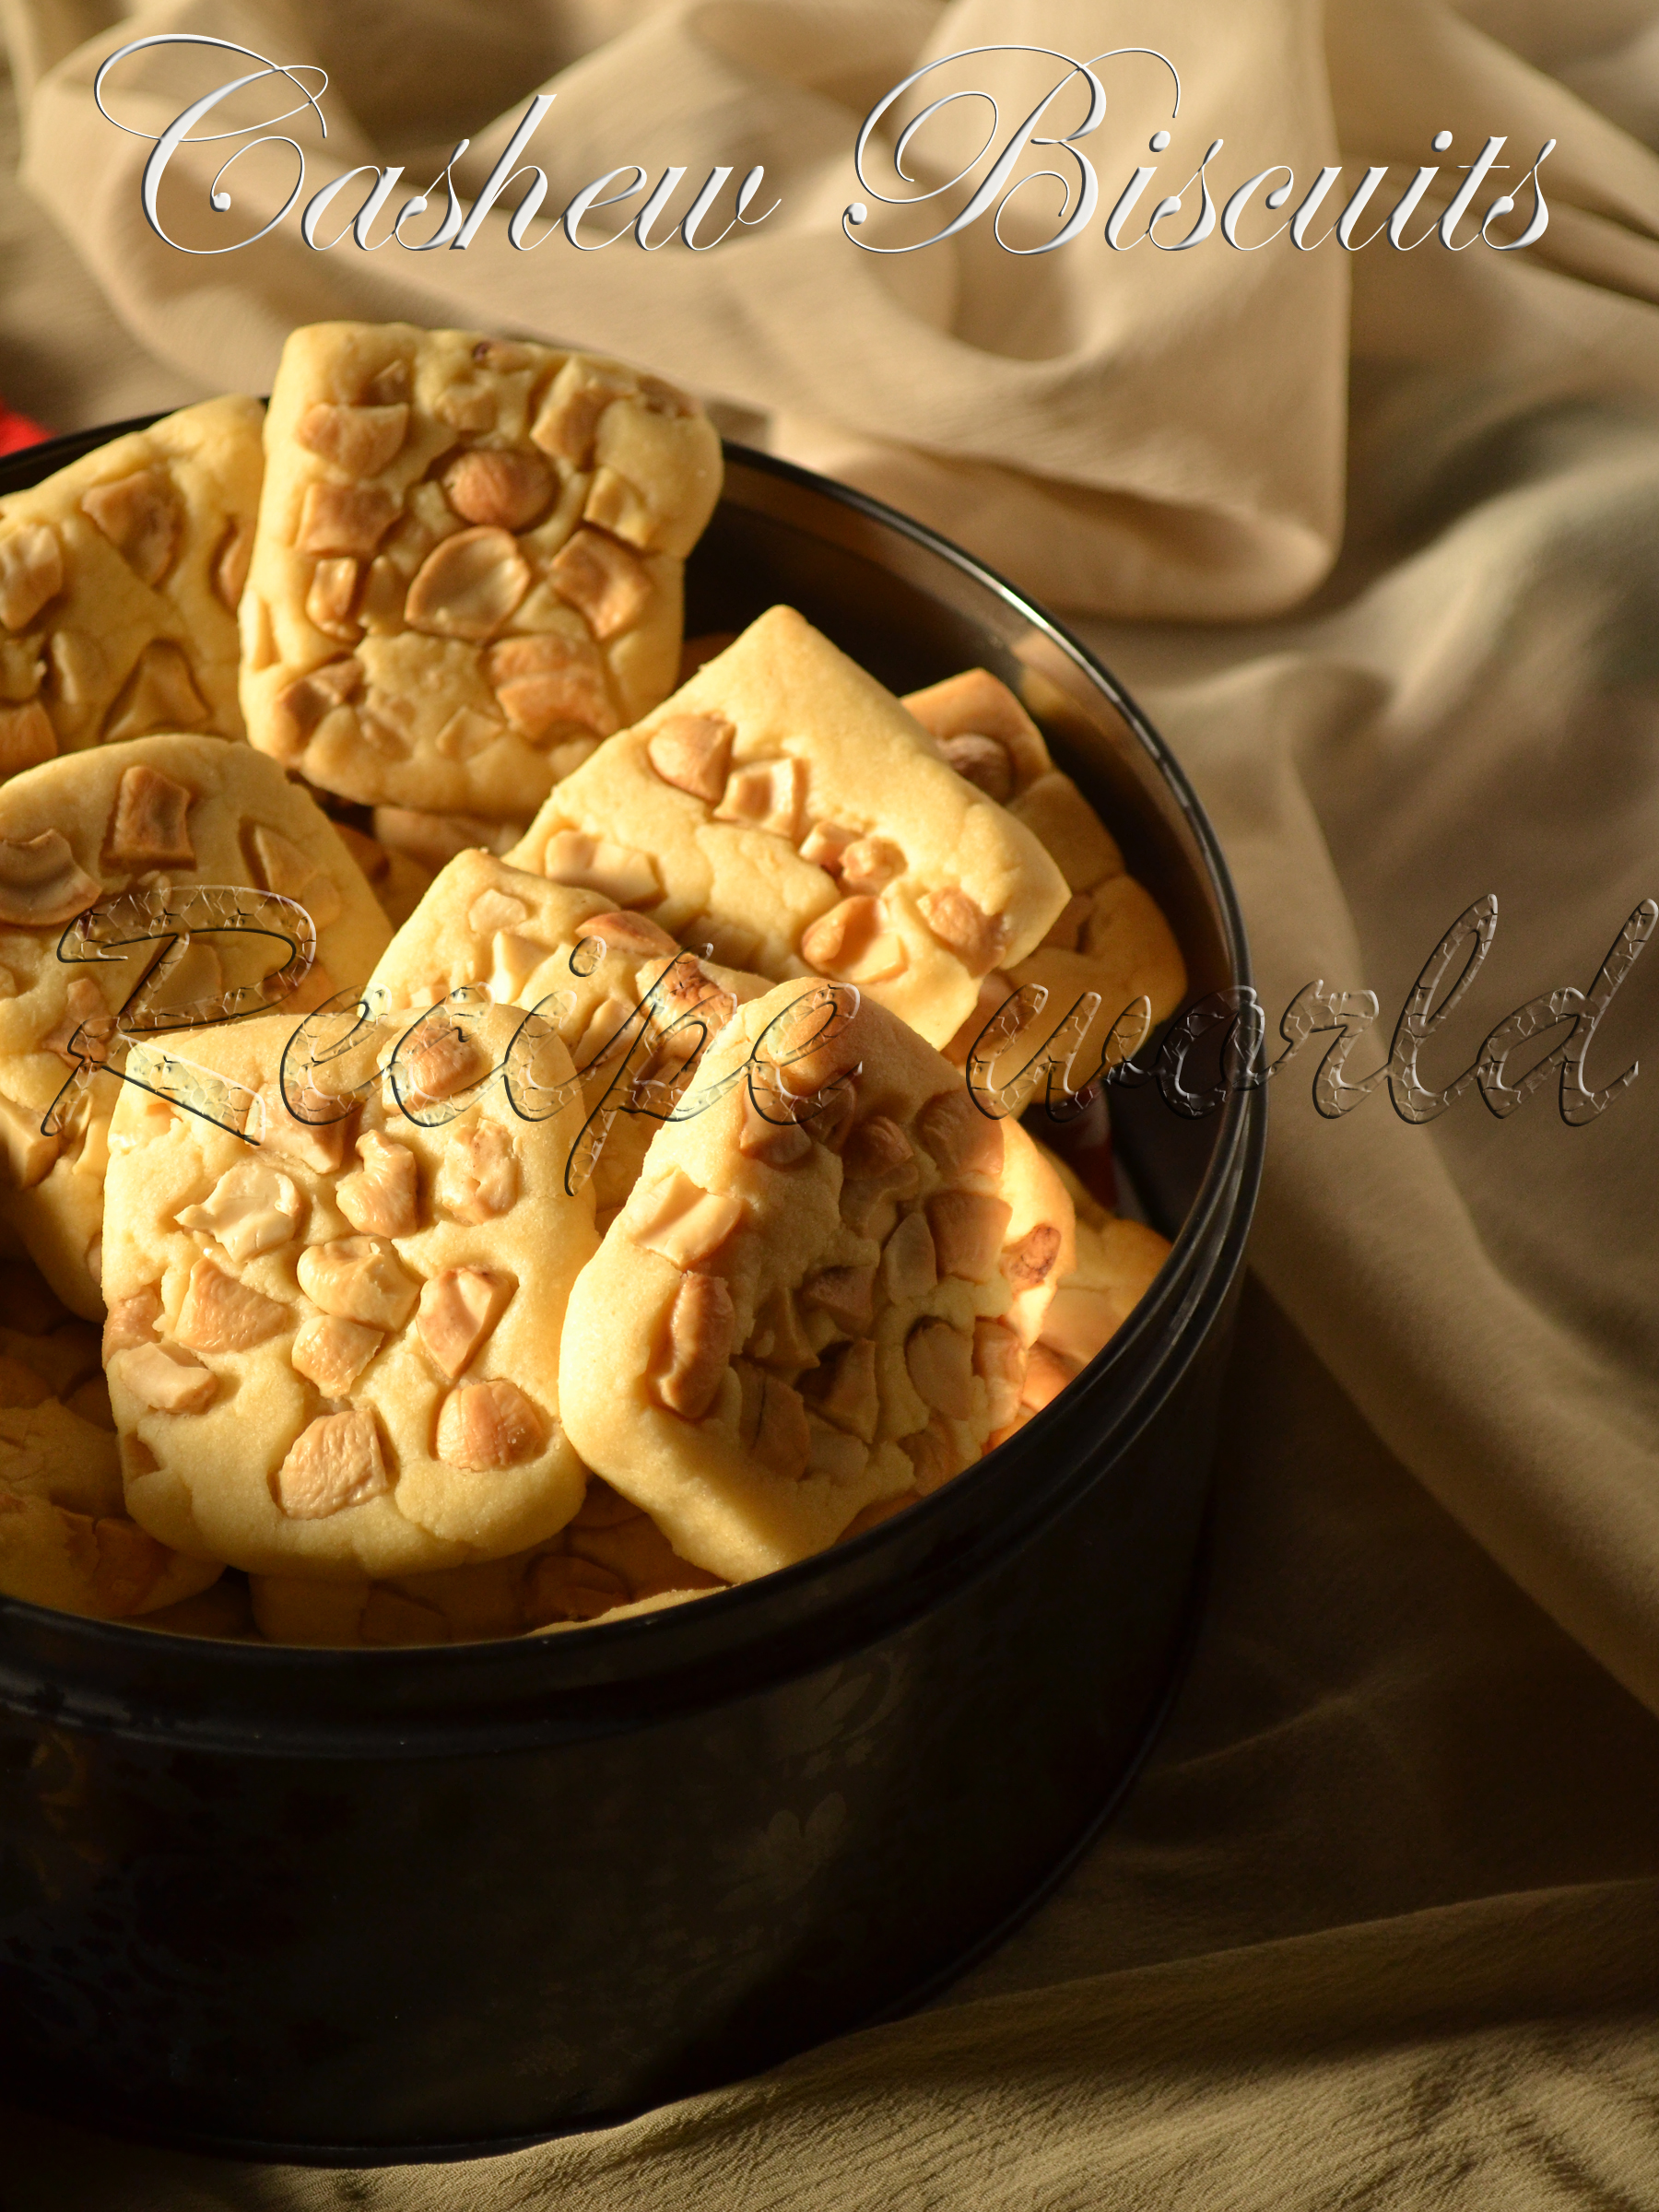
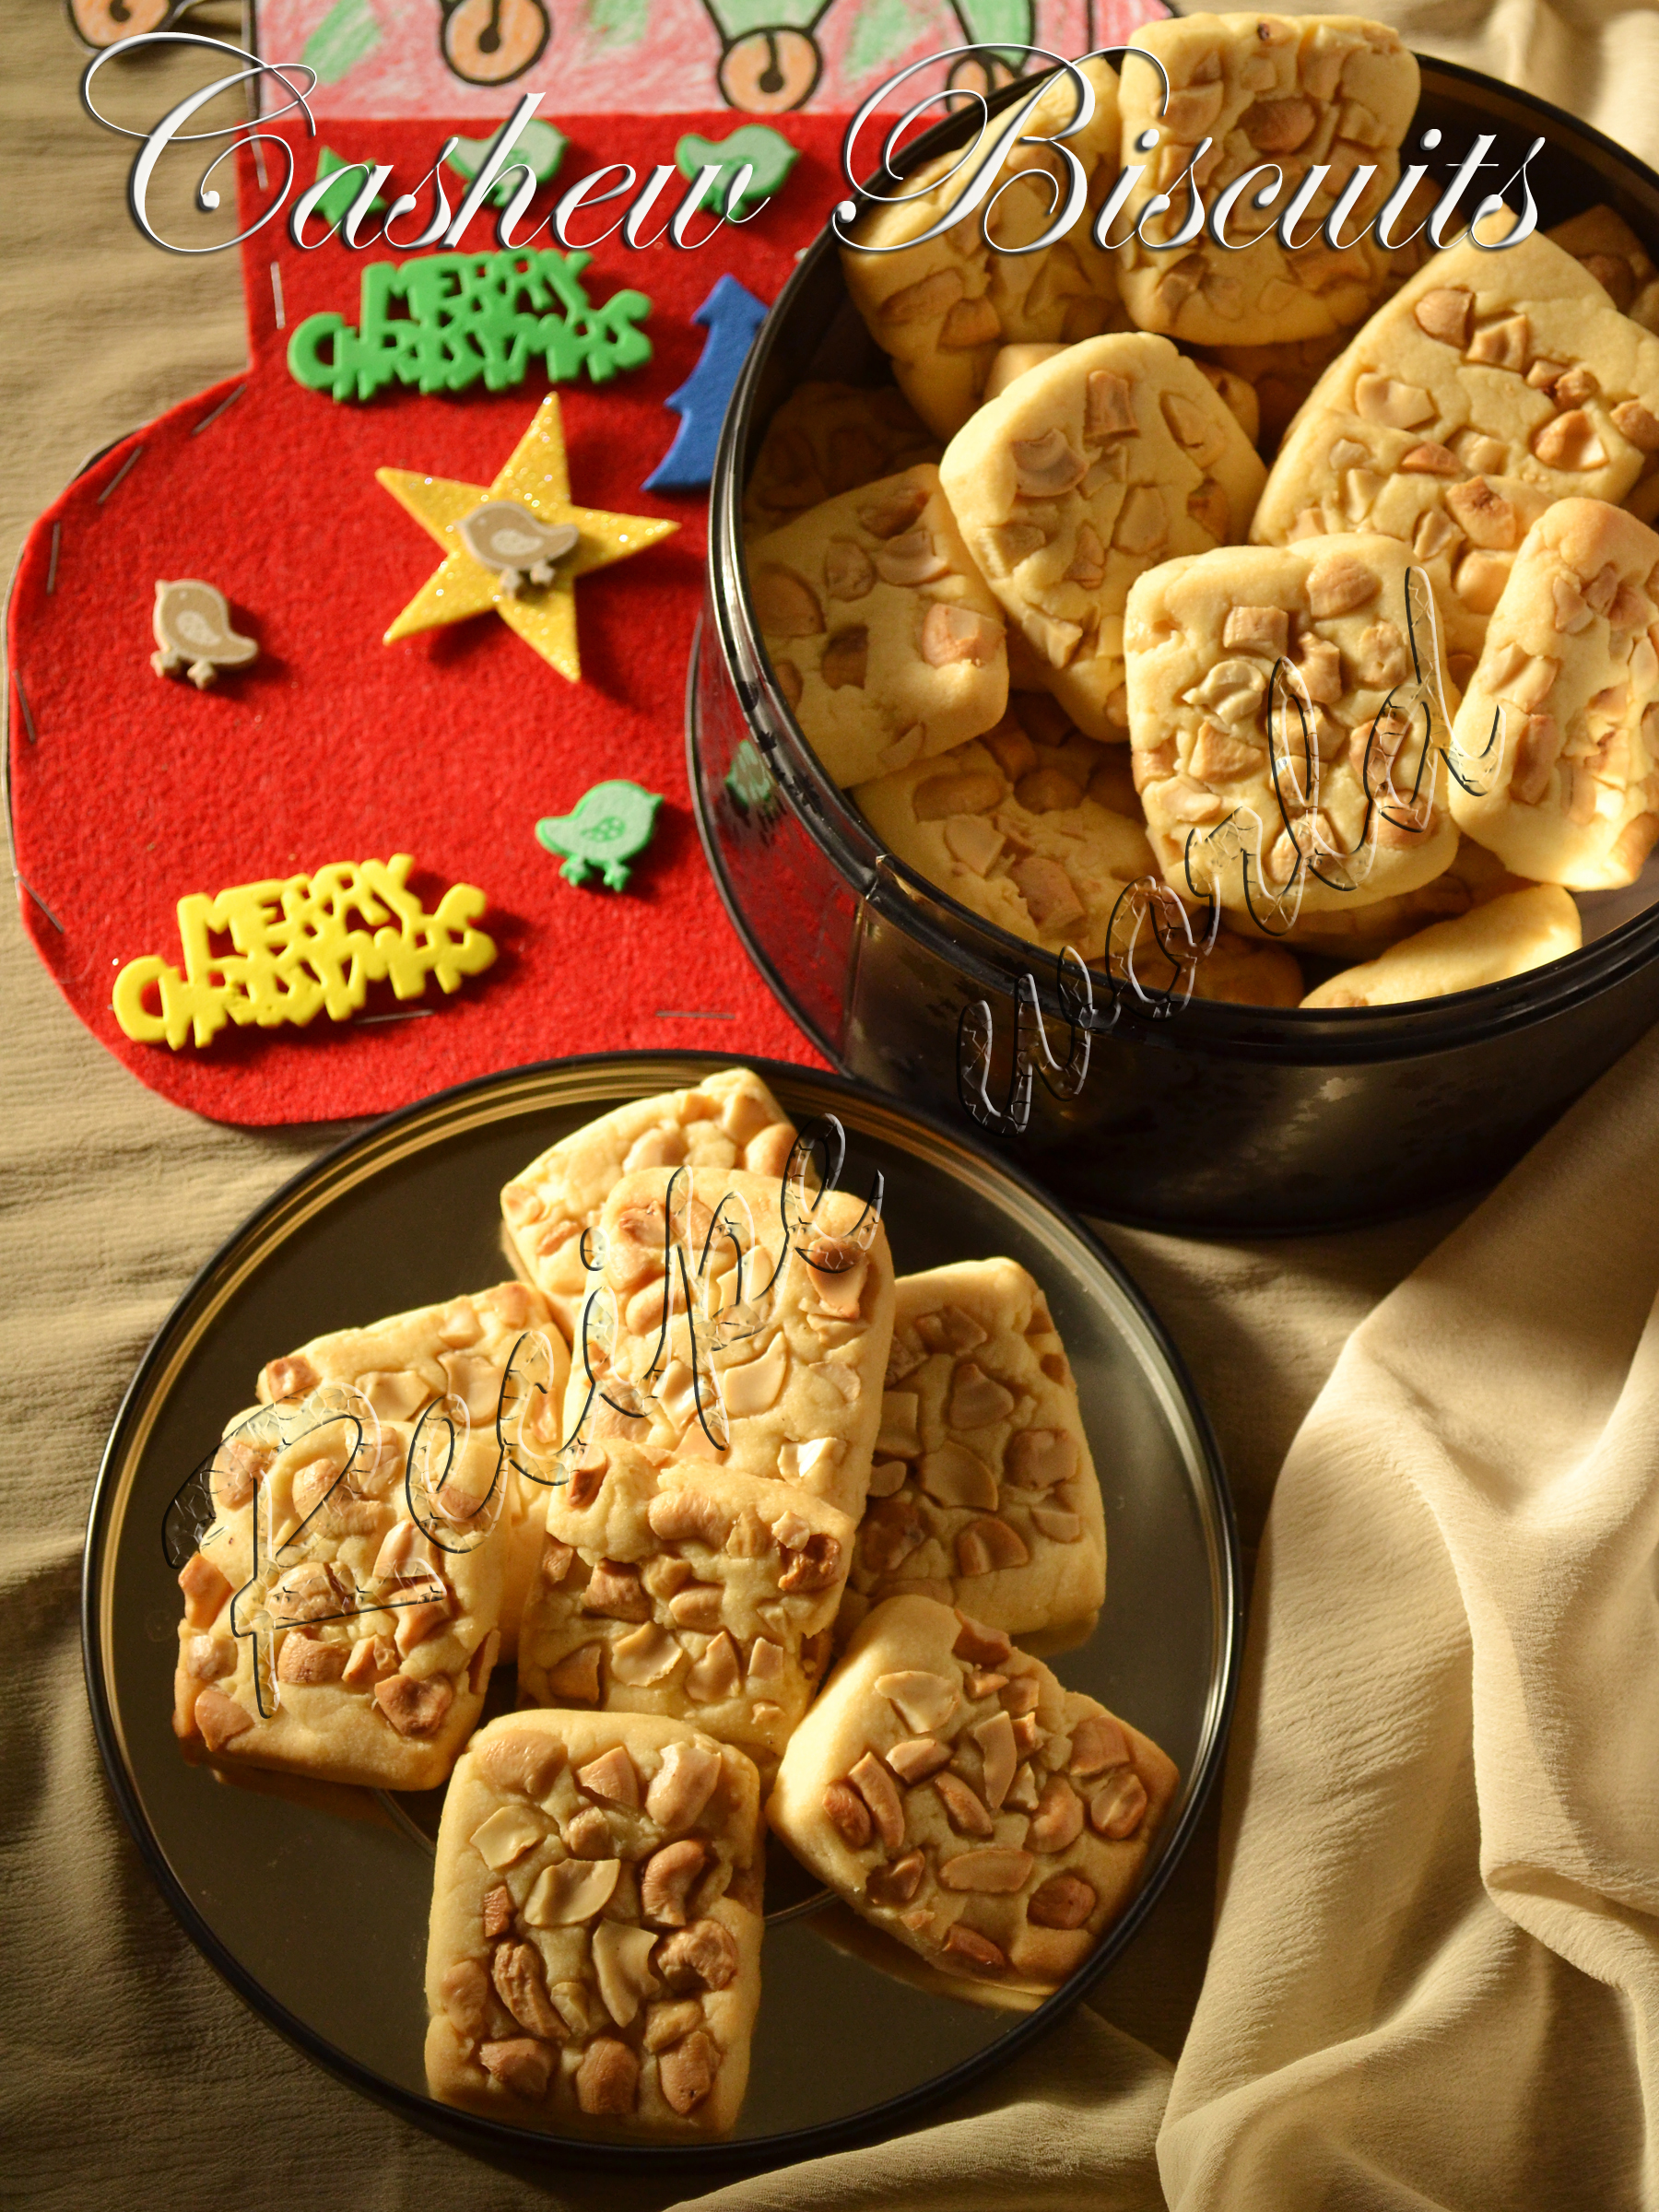
I was planning to prepare this kind of biscuits at home and was not sure how to prepare. I just went with my recipe of Orange Shortbread, made slight changes and prepared Cashew Biscuits. Hubby and daughter appreciated these biscuits a lot and I was up in the air! Prepared it several times already and the biscuits were sold out quickly! 
Sharing the recipe of these tasty and addictive Cashew Biscuits here with you. Merry Christmas to all!


Preparation Time: 25 - 30 minutes
Baking Time: 20 minutes
Yield: 30 biscuits (depending on the size)
Difficulty level: Medium

Ingredients:
  • All purpose flour / Maida - 4 1/2 cup
  • Butter (at room temperature) - 185 gm
  • Sugar - 3/4 cup + 1 tbsp
  • Vanilla essence - 3/4 tsp
  • Broken cashews - 1 1/4 cup (as desired)


Method:
  • Take out the sugar and make a fine powder using an electric mixer or blender.
  • Beat the butter till its creamy. I have used hand mixer for beating. It can be done using the egg beater as well.
  • Add the sugar powder in 2 - 3 batches to this butter and beat till its fluffy and creamy. Finally add the vanilla essence and beat it for a while.
  • Add the all purpose flour gradually and make a soft, non - sticky dough ball. 
  • Pre-heat the oven to 170°C and line the baking tray with parchment paper. 
  • Divide the dough into two or three equal parts according to your convenience. Roll each dough ball into a square or rectangle of half inch thickness. 
  • Spread the broken cashews generously on the top of rolled dough. Roll it gently to make sure that the cashews are fixed into the dough properly. 
  • Cut them into squares or rectangles and line them on the baking tray. 
  • Bake the biscuits for about 18 - 20 minutes till they turn into light golden color. Mine got done exactly at 20 minutes. 
  • Take the biscuits out after 4 - 5 minutes and allow to cool on a cooling rack.
  • Enjoy the delicious biscuits with a cup of tea or coffee!


Normally it happens every time when we bring big bag of onions to home. We won't use them daily and hence, most of them will be spoiled and become waste. This time also, leaves started coming out from the onions. What I did was I just planted those onions in the backyard. They grew up nicely and I was so happy to use those spring onions for cooking! 
Spring Onion Rotti is my new experiment using these home grown spring onions. We usually prepare different varieties of roties with various vegetables. How about preparing Rotti with spring onion? I just tried it and rotti came out really well! Since these leaves won't have much water content like most other vegetables, I have used some curd and little water in this recipe. 
Below is the recipe of Spring Onion Rotti..hope you like it and give it a try!


Time required: 1 hour
Yield: 8 roties of medium size
Difficulty level: Medium

Ingredients:
  • Spring onion - 1 bunch
  • Onion - 2 (large)
  • Rice flour -1 1/2 cup (my cup weighs around 200 gms)
  • Green chillies - 2 or red chilli powder - 1 1/2 tsp (adjust according to taste)
  • Curd - 3/4 cup (see Tips)
  • Salt to taste
  • Sugar (optional) - 3/4 tsp
  • Water - 1/4 cup
  • Oil or butter - for cooking the Rotti

Method:
  • Chop the spring onion, green chillies (if using) and onions finely and and combine in a mixing bowl. 
  • Add salt and sugar to this mixture and mix it well. Keep it for 10 minutes and allow them to leave off the water content. 
  • Then, add the rice flour and mix it nicely. If not using green chillies, add the red chilli powder at this stage. 
  • Add the curd little by little and prepare a smooth, non sticky dough ball. Add some water (I added 1/4th cup), if needed. 
  • If you have time, leave the dough for 10 minutes before using. If in a hurry, it can be used instantly, no worries!
  • Prepare big lemon size balls from the dough. Grease the plantain leaf or plastic sheet with a tea spoon of oil. Pat the ball into a thin circle using your fingers. 
  • Take out the rotti carefully and cook it on the hot tawa on both the sides. Add little oil or butter while roasting the rotti which makes it more tasty.
  • Serve the hot Rotti along with butter. This Rotti tastes better when its hot.


Tips:
  • I have used sweet curd (regular ones) here. If the curd is sour in taste, use less curd and increase the quantity of water you are adding.

Mangoes are my all time favorite. For mango lovers like me, anything with mango tastes good! This year, we had enjoyed the mango season in India to the full extent and now, its the time for mangoes here in Australia! Last week, we had been to the market and saw plenty of delicious mangoes on the store racks. I just picked some and brought them home. Whenever there are plenty of mangoes, I love to prepare Mango Seekarane / Rasayana. This time also, I prepared Mango Seekarane and wanted my daughter to taste it. She is not very much fond of sweets and said 'no' to it, as expected. Instead, she wanted me to bake a cake for her. I just googled for the mango cake recipes and finally, this is the outcome!
This was my first baking attempt using mango. While searching the recipes, I just stopped at Julie's space and found her Mango Cake recipe interesting. I have made some small changes in the original recipe according to my preferences and prepared this delicious loaf cake. This cake is perfect for tea time and also for kids snacks. Give it a try and enjoy eating!


Preparation time: 15 minutes
Baking time: 35 - 40 minutes
Yield: 1 loaf
Difficulty level: Medium

Ingredients:
  • Maida / All purpose flour - 2 cups (my cup weighs around 75 gms)
  • Fine rava (semolina) - 1/2 cup
  • 1 large mango - fully ripened (which amounts to 2 cups of puree)
  • Sugar - 1 1/2 cup
  • Big pinch of salt
  • Milk - 1/2 cup
  • Oil - 1/2 cup
  • Baking powder - 2 tsp
  • Baking soda - 1 tsp
  • Saffron strands (optional) - 8 to 10

Method:
  • Combine maida and baking powder in a mixing bowl and sieve it 2 - 3 times. Fold in the rava and mix it once.
  • Pre heat the oven to 175 °C. Grease the loaf pan and keep it ready.
  • Remove the peel and the seed part of mango. Chop it and blend them along with saffron strands and make a thick puree.  
  • Add salt, sugar and milk to this puree and mix it till sugar dissolves completely. Add beking soda and oil and mix it lightly. 
  • Fold in the sieved maida little by little and prepare the dough.
  • Transfer the dough onto the greased loaf pan and bake it for 35 - 40 minutes until the toothpick inserted comes out clean. Mine got done exactly at 38 minutes. 
  • Allow it to cool down and cut into slices once it becomes cool. 


Tips:
  • You can substitute the fresh mango puree with store bought mango pulp.
ಕನ್ನಡದಲ್ಲಿ ಓದಲು ಇಲ್ಲಿ ಕ್ಲಿಕ್ ಮಾಡಿ. 

Deepavali or Diwali is one of the important festivals we celebrate at home. We had a wonderful festival this time with our daughter darling. This was the second Deepavali for her. Even though we celebrated other Hindu festivals like Nagara Panchami, Ganesh Chaturthi, Navarathri, etc. she enjoyed the Deepavali celebration more than other festivals. Decorating the home, wearing the new clothes, enjoying the delicious food, lighting the candles, all these made her so happy. The next day after the festival, I just asked her how was the festival. She told, 'It was very nice, we will celebrate it today also'!! Ha Ha! Somehow I was able to convince her that we will celebrate it later :)
Maida Halwa is one of the sweet delicacies from India which is perfect for festivals and such occasions. It tastes very similar to Wheat Halwa which will be prepared at my Mom's place for every Diwali. Preparing Wheat Halwa is bit difficult as well as time consuming task. Whole wheat need to be soaked for 2 days in water, then need to be cleaned and ground into fine paste, later it needs filtering..keep stirring the batter on the stove top for at-least an hour..uff! such a lengthy and stressful job it is.
We were really happy to find a substitute for lengthy procedure of preparing the Wheat Halwa. My sister was going through a recipe collection sometime back and she found this Maida Halwa recipe interesting. We all loved this Maida Halwa which tasted the same as Wheat Halwa. Then onwards, this recipe has become very popular in our family circle.
This year, Maida Halwa was one of my special preparations for the Diwali festival. We enjoyed the festival of lights with all the sweet and savory preparations at home. Preparing this Halwa is bit stressful, but you feel really its worth preparing when you taste it!


Time required: 35 - 40 minutes
Yield: Around 33 pieces depending on the size
Level of difficulty: Difficult

Ingredients:
  • Maida / All purpose flour - 1 large cup
  • Sugar - 1 1/2 cup
  • Pinch of salt
  • Water - 1 3/4 cup
  • Ghee - 1/2 cup or little more
  • Broken cashew pieces - 2 tbsp
  • Raisins - 2 to 3 tbsp
  • Saffron strands - 1/2 tsp (or 3/4 tsp cardamom powder)


Method:
  • Soak the saffron strands in 2 tbsp of hot water.
  • Take maida in a mixing bowl, add around 1 1/4 cup of water gradually. Prepare the batter without any lumps. Consistency of the batter is the same as dosa batter. 
  • Roast the cashew pieces and raisins in ghee and keep aside. 
  • Take a heavy bottom pan, pour the sugar and add 1/2 cup of water. Bring it to boil. 
  • Once the syrup reaches 2 string consistency, add the maida batter and keep stirring continuously for 2 minutes. 
  • Add the saffron strands (and also the water), pinch of salt and ghee and stir it continuously on low or medium flame. 
  • When the mixture thickens, you feel it really hard to stir the mixture well. Once the mixture starts leaving the edges, take a spoon full of mixture out and make it cool. If you are able to form a ball and its not sticking to the hands, thats the right consistency. 
  • Stir in the roasted cashews and raisins and mix it well. 
  • Spread the mixture on a greased plate (or plates) evenly and allow to cool. 
  • Cut it into desired shapes once its cool. That's all, delicious Maida Halwa is ready to enjoy!


Tips:
  • I have used 1/2 cup of ghee here. Little more ghee can be added if you would like to. Adding more ghee will make it even more delicious.
  • As far as possible, try to consume it fresh. It will be good for 3 - 4 days if kept outside. If kept in refrigerator, taste of Halwa will change a bit.
ಕನ್ನಡದಲ್ಲಿ ಓದಲು ಇಲ್ಲಿ ಕ್ಲಿಕ್ ಮಾಡಿ. 

Motherhood is always an amazing thing which every woman will cherish. Every mother looks after her child with all the affection and care. Little kids need lot of love and care. When it comes to their food, they need healthy and nutritious food which is tasty and easily digestible. Cooked and mashed fruits, Ragi malt, fresh fruit juice, oats porridge, etc. are some of such foods which are good for children. 
I was thinking of posting some baby food recipes from long time. While preparing different variety of foods for my daughter, it comes to my mind and somehow, I was not able to make it out. Last week, I was preparing the Ragi Sari (Ragi Malt) for my kid. Suddenly, it came to my mind that why not I post this recipe! I just took the camera and clicked couple of photos of the same.
I had started giving this ragi malt to my daughter from her 10th month. Not only kids, this healthy mix is good for elders as well. You can prepare them in large quantity and use upto 4 - 5 months. For little ones, better to prepare this malt powder in small quantities so that you can give them the fresh stock. Ragi Malt powder recipe is as follows:


Preparation Time: 8 - 10 days (that's huge!)
Difficulty level: Medium 
Yield: Approx. 2.5 kg malt mix

Ingredients:
  • Finger millet - 1/2 kg
  • Kuchchalakki / boiled rice - 1/4 kg
  • Whole wheat - 1/4 kg
  • Mung bean - 125 gm
  • Almonds - 125 gm
  • Barley - 125 gm
  • Corn kernels - 125 gm
  • Ground nuts - 125 gm
  • Cloves - 15
  • Ondelaga / Centella asiatica - 15 to 20 stalks

Method:
  • Wash finger millet, whole wheat and mung beans separately and soak them in water for a day. Then, wash them and drain all the water. Put them on a thin, wet cloth, tie it tightly and keep it in a vessel for a day or two, till you get nice sprouts. Spread them on a cloth or on the plates and put the  under the sun for drying. 
  • Wash and clean the boiled rice, almonds, barley, corn kernels and ground nuts and dry them nicely under the sun. Better you keep these grains covered with a thin cloth while drying to ensure they are hygienic.  
  • It takes at least 3 - 4 days to get these grains dried completely. 
  • Clean the Ondelaga / Centella asiatica including the leaves and roots and dry them nicely.
  • Once all the ingredients are ready, roast them separately in a heavy bottom pan on law flame till you get a nice aroma. Roast the cloves for 2 - 3 minutes.
  • Mix all the ingredients together once they cool down. Don't forget to put the Ondelaga / Centella asiatica with them!
  • Make a fine powder of these ingredients. You can get it done in a flour mill or even do it at home using the mixer grinder. If done in a mixer grinder, you will get a course powder, not very fine. 
  • Once the malt powder is cool, transfer it to an air tight container. Take out small quantities of flour in small container for regular use.


How to prepare the Malt drink: Take around 1 1/2 tbsp of malt powder and mix it with 3 tbsp of water. Add 1 or 1 1/2 cup of milk and 1/4th tsp of ghee (optional). Add sugar / jaggery for taste. Bring it to boil and stir it occasionally. When it starts boiling, switch off the flame. Serve the malt once it is cool.

Tips:
  • You can add few pods of cardamom while preparing the malt powder to make the drink fragrant. I love adding few strands of saffron as well sometimes. 
  • Mung bean and wheat grains can be added without sprouting also. 
  • If you can't get the finger millets, can add the readily available finger millet flour instead. 

ಕನ್ನಡದಲ್ಲಿ ಓದಲು ಇಲ್ಲಿ ಕ್ಲಿಕ್ ಮಾಡಿ. 

There are some vegetables which have become part of our daily cooking, without which we can't do full pledged cooking. For eg: Tomato, Green beans, etc.. These veggies are easily available everywhere in all the seasons. Preparing the rice items like Pulao and some common daily dishes like Sambar, Palya (Stir fry) or Rasam will become really difficult without such veggies. 
I always love to use green beans (also called as French beans) in my cooking. Delicious Sambar, Stir Fry, Pulav, Hashi (Rayita), etc. can be prepared using this beans along with other different vegetables. These days, my little one loves to eat fresh green beans. She enjoys eating all the dishes prepared using green beans. Because of her love towards green beans, we are buying this vegetable every time when we go for buying vegetables!
Below is the recipe of Green Beans Palya / Stir Fry. This simple and delicious Palya suits well with rice, roti and dosa. 


Preparation Time: 20 - 25 minutes
Servings: 3
Difficulty level: Medium

Ingredients:
  • Fresh green beans - 300 gm
  • Dry red chilli - 1/2 piece
  • Green chilli - 1 (adjust according to taste)
  • Urad dal - 1 tsp
  • Mustard seeds - 1/2 tsp
  • Pinch of asafoetida
  • Turmeric powder - 1/4 tsp
  • Curry leaves - 1 strand
  • Salt to taste
  • Amchur powder - 1/2 tsp or to taste
  • Sugar - 3/4 tsp or to taste
  • Cooking oil - 2 tbsp
  • Grated coconut (optional) - 2 to 3 tbsp
  • Water - 1/2 cup or more


Method:
  • Wash and clean the green beans, chop them finely. 
  • Heat oil in a heavy bottom pan. Add dry red chilli pieces, urad dal, mustard seeds, asafoetida and turmeric powder. Saute them on low flame. Once the mustard seeds start spluttering, add chopped green chillies and curry leaves. 
  • Saute it for a while and add the chopped green beans. Add around 1/2 cup of water and cook it covered. If the beans is tender ones, this much water will be good enough for cooking. If its grown ones, you may have to add more water. 
  • Saute the mixture occasionally. Once its half cooked, add salt, sugar and amchur powder for taste and mix it well. 
  • If the beans is tender ones, it will get cooked by 10 - 12 minutes. Else, it may take more time. 
  • Once its cooked completely, add the grated coconut and cook it for 5 more minutes. 
  • Serve this healthy n delicious Palya / Poriyal along with rice, roti or dosa. 


Dear friends,

Here comes my wishes for the Diwali..

May you be blessed with joy n well-being to last through the year..once again, Happy Diwali :)

Sneak a peak at the recipe collection for Diwali..

sakkare holige hayagreeva kaja rice kesari bath rich apple custard
jangir seven cup burfi saate zucchini kheer rava kesari
boondi laddoo groundnut burfi microwave peda obbattu orange shortbread
butter biscuits gavvalu oats samosa bakarwadi khara boondi

Hope to reach you soon with a new recipe!

Cheers!
Vani

ಕನ್ನಡದಲ್ಲಿ ಓದಲು ಇಲ್ಲಿ ಕ್ಲಿಕ್ ಮಾಡಿ. 

Broccoli is one among those veggies which are very good for our health. This green colored veggie looks bit similar to cauliflower, but belongs to the family of cabbage! As read in Wiki, Broccoli is a good source of vitamin C and dietary fiber. It has got some other benefits such as anti-cancer properties. Due to its health benefits, I have made it a habit of using broccoli in my cooking on regular basis these days.
Broccoli is very good for preparing Indian dishes like Paratha, Stir Fry, Curry and so on. Broccoli Stir Fry is of our family favorite. I was thinking of sharing this recipe from quite a long time, but was not able to click the picks. These days, little one keeps an eye on my activities all the time. Whenever I prepare some dishes and arrange them for the photo shoot, her little hands will be there to rearrange everything! So, my clicking activities are restricted to week-ends most of the time, when she will be busy with her dad :)
Here is the recipe of Broccoli Stir Fry / Broccoli Palya. Simple yet delicious, I hope you will love it!


Preparation time: 15 minutes
Servings: 2
Difficulty Level: Easy
/
Ingredients:
  • Broccoli, slit into medium size florets - 3 cups
  • Onion - 1 small
  • Crushed ginger, garlic - 1/2 tsp
  • Red chilli powder - 1 tsp or to taste
  • Turmeric powder - 1/2 tsp
  • Salt to taste
  • Oil - 1 tbsp


Method:
  • Chop the onion into medium size pieces.
  • Heat oil in a heavy bottom pan. Add the crushed ginger - garlic and saute for a while. Once it turns lightly brownish, add the chopped onion and fry till it looks transparent. 
  • Add the broccoli florets and salt to taste. Cook it covered. Give it a stir occasionally.
  • Add red chilli powder and turmeric powder when the broccoli is almost done.
  • Cook it for 2 - 3 minutes more and turn off the flame. 
  • Serve this delicious Broccoli Stir Fry with lunch or just have them as it is!

ಕನ್ನಡದಲ್ಲಿ ಓದಲು ಇಲ್ಲಿ ಕ್ಲಿಕ್ ಮಾಡಿ. 

Muskmelon or Cantaloupe is one of the tropical fruits which is used mainly for preparing juices and milkshakes. This fruit is very good for use especially during summer. Muskmelon is a good source of vitamins 'A' & 'C', Folic Acid and potassium. And also, this fruit helps to maintain the water content in our body during summer and keeps the body cool. Muskmelon with its natural sweetness, is told to be very good for people who are on diet.
I use this fruit mainly for preparing juice and payasa (kheer). Sometimes, we would love to eat it simply as it is. I'm sharing the Muskmelon Payasa recipe today. Its very easy and won't take much time to prepare. Here you go!!


Preparation Time: 10 minutes
Cooling time: 1 hour
Servings:3
Difficulty Level: Easy

Ingredients:
  • Muskmelon - 1/4th part of a medium size fruit
  • Boiled milk @ room temperature - 2 cups
  • Sugar - 1/2 cup or according to taste
  • Pinch of salt
  • Cardamom powder - 1/2 tsp

Method:
  • Separate the skin and seed part of the fruit and grate the fruit using a grater.
  • To this, add milk, sugar, salt and cardamom powder and mix well.
  • Keep it refrigerated for an hour for cooling or you can serve it immediately if cooling is not required.    

Tips:
  • If you love to use jaggery, replace sugar with jaggery for this recipe.
  • If you want to prepare cold Payasa immediately, keep the boiled milk refrigerated for sometime before and once you are ready with all other ingredients, use this cold milk for making Payasa. 
ಕನ್ನಡದಲ್ಲಿ ಓದಲು ಇಲ್ಲಿ ಕ್ಲಿಕ್ ಮಾಡಿ. 

Modaka is one of the special sweet goodies prepared especially during the festival of Ganesha Chaturthi. There is a belief that the dishes Modaka and Pancha kajjaya are the favorites of Lord Ganesha among all other dishes. I really don't know how far its true, but all these dishes taste wonderful for our tongue also!
Festive preparations are going on in our house from last week. I have prepared few dishes in advance for the festival and one among them is Modaka. Every time, I used to prepare Modaka with rice flour binding. This time, I have followed my sister's recipe and used Maida flour for the cover. Modakas came out really well with a thin, crispy outer layer and tasted really good.
Here is the recipe of Modaka for you. Try preparing them for the festival and enjoy with near and dear ones :)
Time required: 1 1/2 hours
Difficulty Level: Difficult  
Yield : 30 Modakas of medium size

Ingredients:
  • Oil for deep frying

- For Stuffing:
  • Sugar - 1 1/2 cup (or according to taste)
  • Jaggery (optional) - 1 tbsp
  • Deciccated / Fresh grated coconut - 3 cup
  • Water - 1 cup
  • Sesame (Till) seeds - 2 tbsp
  • Cardamom powder - 3/4 tsp
- For Binding:
  • Maida (Plain flour) - 3 cup
  • Salt - a big pinch
  • Ghee - 1 1/2 tsp
  • Water - 1 cup approx

Method:
  • Combine Maida (Plain flour), salt and ghee in a mixing bowl. Mix it nicely using your hands for 3 - 4 minutes. Add water little by little and prepare a smooth, non sticky dough. Cover it and keep aside for 15 - 20 minutes.
  • Take a heavy bottom pan. Add shredded coconut, sugar, jaggery (optional) and bring to boil. 
  • In the meanwhile, dry roast the sesame seeds on low flame till golden brown and keep aside. 
  • Keep stirring the coconut mixture occasionally. Once all the water content is dried out, add the roasted sesame seeds and cardamom powder and switch off the flame.   
  • Divide the binding dough into small portions of equal size and give them the ball shape. Take the balls one by one, dust with some dry flour and roll them into small, very thin circles. Roll them as thin as possible.
  • Pour a tablespoon full of coconut mixture in the middle of the circle. Combine all the edges of the circle, pinch them and give it the Modak shape.
  • Deep fry the prepared Modakas in hot oil on medium flame till golden brown. 


Tips:
  •  Both fresh grated coconut as well as desiccated coconut will hold good for this recipe. You can make use of either of these. 
  • Jaggery can be substituted with sugar for this recipe. Modak tastes even better when jaggery is used. 
  • To ensure even color, keep stirring the Modakas while deep frying. 


ಕನ್ನಡದಲ್ಲಿ ಓದಲು ಇಲ್ಲಿ ಕ್ಲಿಕ್ ಮಾಡಿ.

This was one of the delicious jack fruit side dishes which I enjoyed during my last visit to native. 'Hadigadde', in Kannada means the soft, outer cover of raw jack fruit seed. For those who are well known with the jack fruit, every part of jack fruit is useful in one or the other way! We, human beings use jack fruit flesh, seeds and the Hadigadde (outer cover of raw jack fruit seed) for our cooking. Rest of the parts are used as food for the cows in rural areas. 
Hadigadde Palya is a rare recipe which I learned from Mom recently. Usage of Hadigadde is not known to many people. This tastes so good and has become one of my seasonal favorites now! Normally, while preparing raw jack fruit chips or happala, we will collect and keep the Hadigadde aside and this delicious Palya will be the part of our lunch (or dinner) menu that day. 
So, don't forget to try this simple and tasty Palya when you get the raw jack fruit next time!   


Preparation time: 15 - 20 minutes
Servings: 4
Difficulty level: Easy

Ingredients:
  • Cooking oil -8 tbsp
  • Hadigadde (Soft, outer cover of raw jack fruit seed), finely chopped - 3 1/2 cup
  • Urad dal - 1 1/2 tbsp
  • Asafoetida - a pinch 
  • Mustard seeds - 1 tbsp
  • Sambar powder - 2 tbsp or according to taste
  • Salt to taste
  • Amchur powder - for taste
  • Sugar - 1/2 tsp
  • Grated coconut - 1/2 cup


Method:
  • Heat around 8 tbsp of cooking oil in a heavy bottom pan. Add urad dal, asafoetida and then mustard seeds. Roast them till mustard seeds start crackling. 
  • Add sambar powder to the seasoning and saute for a while. Then add the chopped Hadigadde and then salt, sugar and amchur powder according to taste. 
  • Mix it nicely and cover with a lid. Cook it on medium flame for around 10 minutes or till done. Stir it occasionally.   
  • Once its done, add the grated coconut and cook it for 3 - 4 minutes. 
  • Serve this delicious Palya with rice or roti!

ಕನ್ನಡದಲ್ಲಿ ಓದಲು ಇಲ್ಲಿ ಕ್ಲಿಕ್ ಮಾಡಿ. 

'Tellevu' is the signature dish of Havyakas. In rural parts of South India, Tellevu is the daily breakfast item in most of the Havyaka homes. Preparing such a thin dosa on the hot pan is an art. It needs some practice and lot of patience!
Different varieties of Tellevu can be prepared using different veggies. Mogekayi and cucumber are the main vegetables used for preparing Tellevu. During the season of Jack fruit, people love to prepare Raw Jack Fruit Tellevu. For this Tellevu, raw jack fruit flesh collected should be ground immediately and with that batter, Tellevu / Dosa should be prepared quickly. Since it requires lot of back end work, its convenient to prepare this Tellevu for the evening snacks.
I had this Tellevu ages back during my college days. This year, I was at native during the jack fruit season and got a chance to enjoy this delicious Tellevu. Mom prepared this Tellevu on a fine evening and the entire family enjoyed eating it. Honey and Coconut Chutney are the best combo with Raw Jack Fruit Tellevu.
I had posted regular 'Tellevu' recipe long back which contains the video of preparing Tellevu. Click here to see the Tellevu video recipe.


Time required: 2 hours
Serves: 5 - 6
Difficulty level: Difficult

Ingredients:
  • 1 medium sized raw jack fruit, fully grown
  • Water - as required
  • Salt to taste

Method:
  • Cut the raw jack fruit, separate the seeds and collect the flesh. 
  • Chop the jack fruit flesh finely. 
  • Grind it finely by adding salt to taste. While grinding, add water as required. Let the batter be thicker than regular dosa batter.
  • Heat the dosa pan on medium flame. Take a laddle full of batter, pour it on the hot pan and spread it thinly.
  • Cook the Tellevu on medium flame on one side till its crispy. 
  • Enjoy hot Tellevu along with Honey and Coconut Chutney!


Tips:
  • Use the prepared batter immediately. If kept for long time, Tellevu won't come out nice.
  • If the Tellevu is not coming out well some time say, half an hour after preparing the batter, try using it after grinding it again.
  • Not all the raw jack fruit are suitable for preparing this Tellevu. Thats why sometimes you may end up preparing slightly thicker dosa instead of thin ones. 
  • Mixie is not good for preparing batter for this Tellevu. Wet grinder or 'Oralu' (traditional Indian Mortar and Pestle) would be better for this purpose.  
ಕನ್ನಡದಲ್ಲಿ ಓದಲು ಇಲ್ಲಿ ಕ್ಲಿಕ್ ಮಾಡಿ.

Amatekayi is not a well known vegetable. But I'm sure, people from rural areas will be familiar with this veggie. Amatekayi (Ambatekayi) belongs to the family of tangy vegetables like tamarind, mango, etc. It is very well suited for various types of Indian curries, side dishes and pickles. Being away from native, we really miss this vegetable many a times. 
We prepare different dishes using Amatekayi. I have already posted the recipe of Amatekayi Sambar (Amati) long back. Here is one more recipe from Amatekayi, i.e., Amatekayi Chutney. Try this tangy and spicy chutney for your lunch and enjoy!


Preparation time: 20 minutes
Servings: 4
Difficulty level: Easy

Ingredients:
  • 1 medium sized Amatekayi
  • Shredded coconut - 1 cup
  • Green chillies - 2
  • Salt to taste
  • Half lime
  • Water - 1 cup

For Seasoning: Cooking oil (preferably coconut oil) - 1 tsp, Mustard Seeds - 3/4 tsp

Method:
  • Chop the amatekayi into medium size pieces. Don't remove the skin, but leave off the seed.
  • Cook the chopped pieces in one cup of water along with green chillies. Keep it half closed while cooking. Switch off the flame after 5 minutes.
  • Once it is cool, take out the cooked amatekayi pieces and green chillies and grind them coarsely along with shredded coconut and salt to taste. Keep aside the left out water after cooking the amatekayi pieces and can use the same while grinding the chutney mix. 
  • Check the taste and add the lime squeeze accordingly.
  • Heat oil in a small wok for seasoning. Add mustard seeds and roast it till you hear the crackling sound of mustard seeds. Add this seasoning to the prepared chutney and mix well. 
  • Enjoy this tangy and yummy chutney along with your lunch.

ಕನ್ನಡದಲ್ಲಿ ಓದಲು ಇಲ್ಲಿ ಕ್ಲಿಕ್ ಮಾಡಿ. 

Fruits and vegetables are part of our daily diet and of course, they are the main sources of nutrients needed for our body. Especially, green leaves like spinach, dill, etc. contain lot of iron, calcium and folic acid. Vegetarians has to depend on these leafy veggies which is the main source of folic acid for them. Regular usage of these leaves and vegetables is highly recommended for our well being. 
I was not a big fan of Dill leaves till my pregnancy. During my postpartum period, my mom used to prepare various healthy and delicious dishes using dill leaves. She told me the benefits of using dill leaves as part of our food. I enjoyed eating them, and these recipes were added to my recipe book quickly!
Below is the recipe of Dill Leaves Stir Fry which is very quick and easy. Just try it and enjoy eating!


Preparation Time: 15 minutes
Servings: 4 - 5
Difficulty level: Easy

Ingredients:
  • Dill leaves - 1 big bunch
  • Split urad dal - 1 tsp
  • Mustard seeds - 3/4 tsp
  • Pinch of asafoetida / hing
  • Grated coconut (optional) - 2 tbsp
  • Amchur powder - 1/4 tsp or to taste
  • Masala powder - 3 1/2 tsp or to taste (See Tips)
  • Sugar - 3/4 tbsp
  • Salt to taste
  • Cooking oil - 4 tbsp

Method:
  • Wash the dill leaves in running water and chop it finely.
  • Take a heavy bottom pan. Heat 4 tbsp of oil on medium flame. Add urad dal, asafoetida and mustard seeds. 
  • Once you hear the crackling sound of mustard seeds, add the masala powder and chopped dill leaves. Add salt, sugar and amchur powder according to taste and mix it well. Keep the lid half closed and cook it for 5 minutes. Saute it occasionally.    
  • Once it is cooked nicely, add 2 tbsp of grated coconut, if you wish. Saute it for 2 minutes and switch off the flame. 
  • Try this yummy n healthy side dish with rice or chapathi.


Tips:
  • Any kind of Sambar Powder can be used for this recipe. Adjust the quantity of masala powder according to its spiciness.
NewerStories OlderStories Home