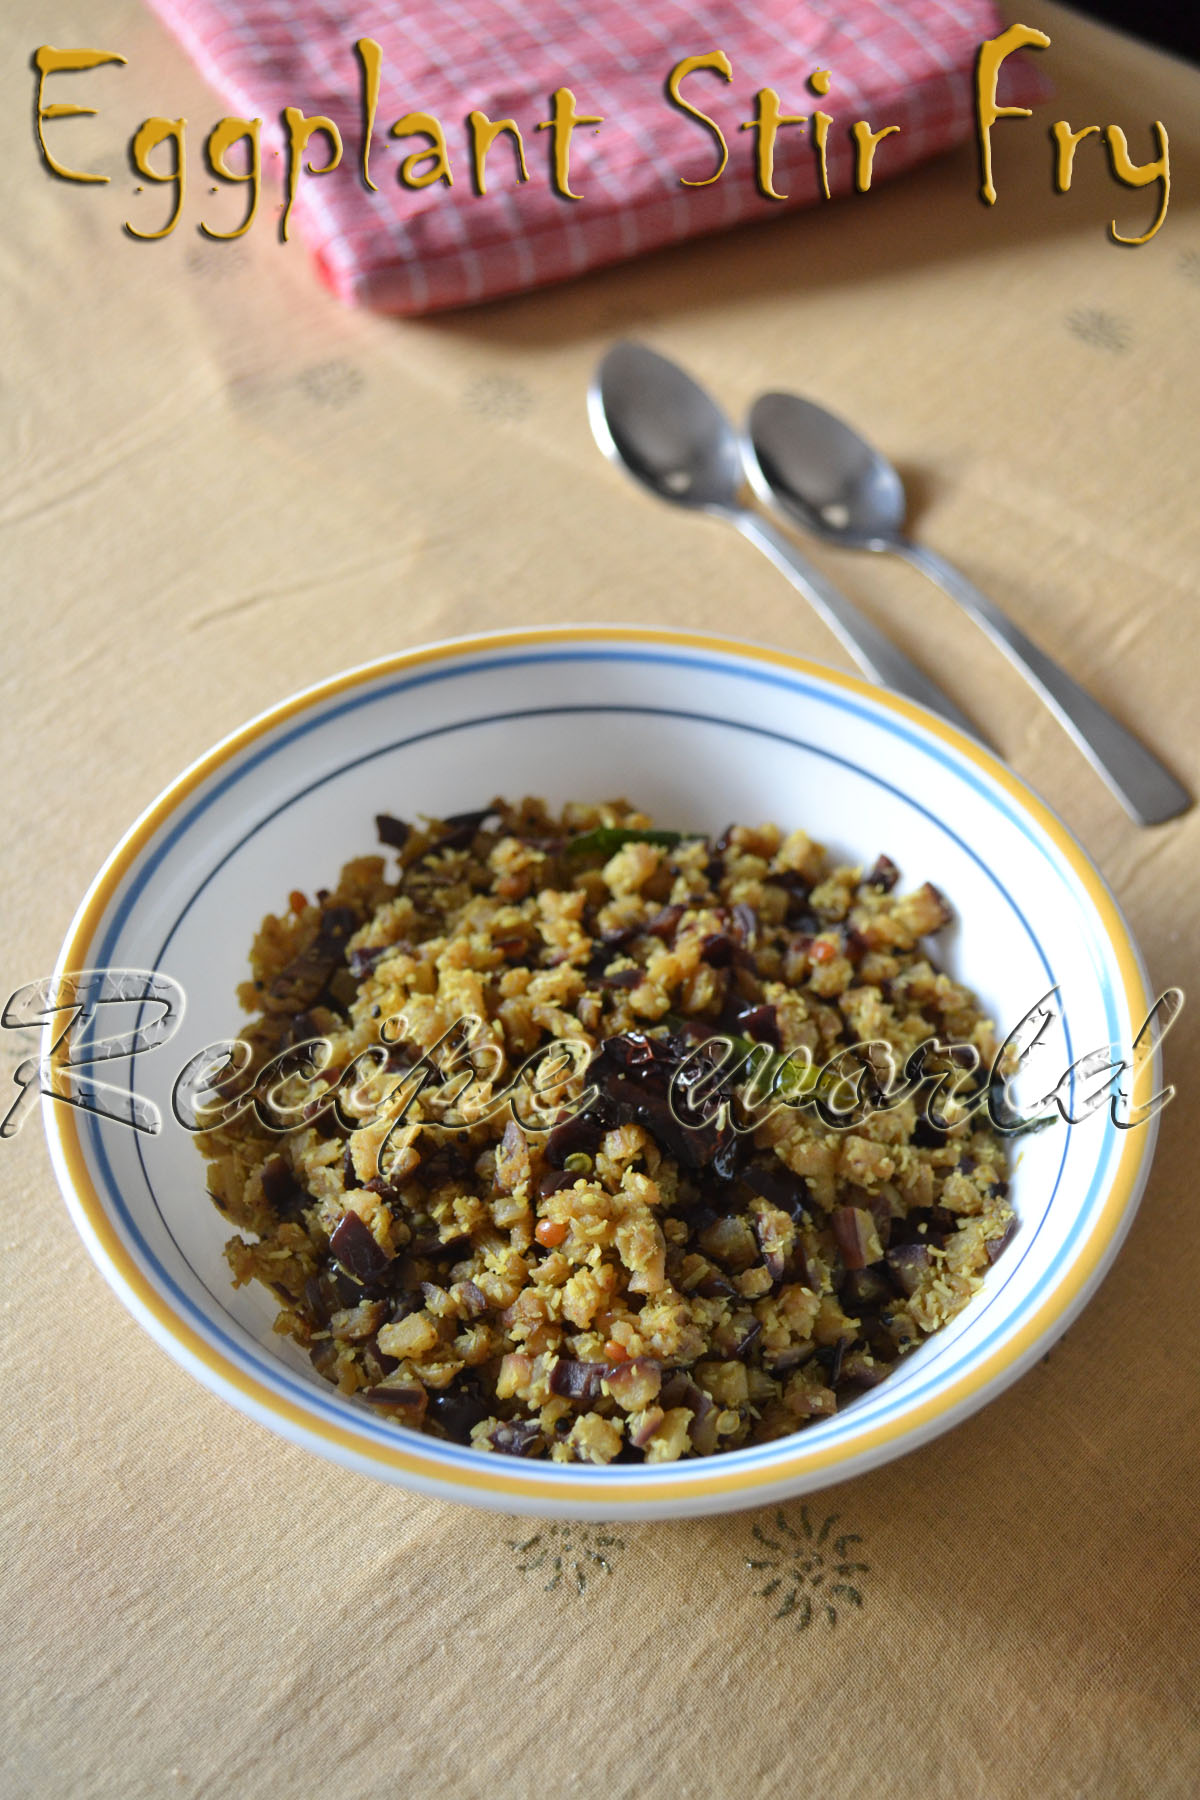
Eggplant is used in preparing wide variety of Indian dishes. We too love this vegetable in our cooking. Varieties of side dishes and stir fries can be made using this vegetable. Today, I am sharing a unique Stir fry (Palya) recipe from my native place. 
As per my observation, most of the eggplant recipes tastes good only when onion or garlic is added. But this Stir fry tastes delicious without adding garlic and onion. Try this simple yet delicious Stir Fry and let me know your feedback!


Preparation time: 20 minutes
Soaking time: 15 minutes
Serves: 4
Difficulty level: Medium

Ingredients: 

  • Eggplant (Finely chopped) - 1 large 
  • Oil - 5 to 6 tbsp
  • Dry red chilli (optional) - 1 small piece
  • Urid dal - 1 tsp
  • Mustard seeds - 1 tsp
  • Asafoetida / Hing - big pinch
  • Turmeric powder - 1/4 tsp
  • Green chillies - 2 (add according to spiciness needed)
  • Curry leaves - 1 strand
  • Salt to taste
  • Amchur powder - 1 1/2 tsp or to taste
  • Grated coconut - 4 tbsp


Method:

  • Take the finely chopped eggplant in a bowl. Add 1 1/2 tsp salt, 1 tsp amchur powder. Mix it well and leave it for 15 minutes.
  • Squeeze off the water content from the eggplant mixture and discard the water.
  • Heat oil in a heavy bottom pan. Add red chilli, urid dal, mustard seeds, hing and turmeric. 
  • Once the mustard seeds start crackling, add slit green chillies and curry leaves. Saute the mixture for a minute.
  • Add the squeezed eggplant chunks to the seasoning and mix it once. Check the taste and add salt and amchur powder accordingly. 
  • Cook this mixture on low flame without closing the lid for 8 - 10 minutes or till done. 
  • When its cooked half-way, add the grated coconut. Stir the mixture frequently to ensure even cooking.
  • Turn off the flame when the eggplant chunks become soft and cooked nicely. 
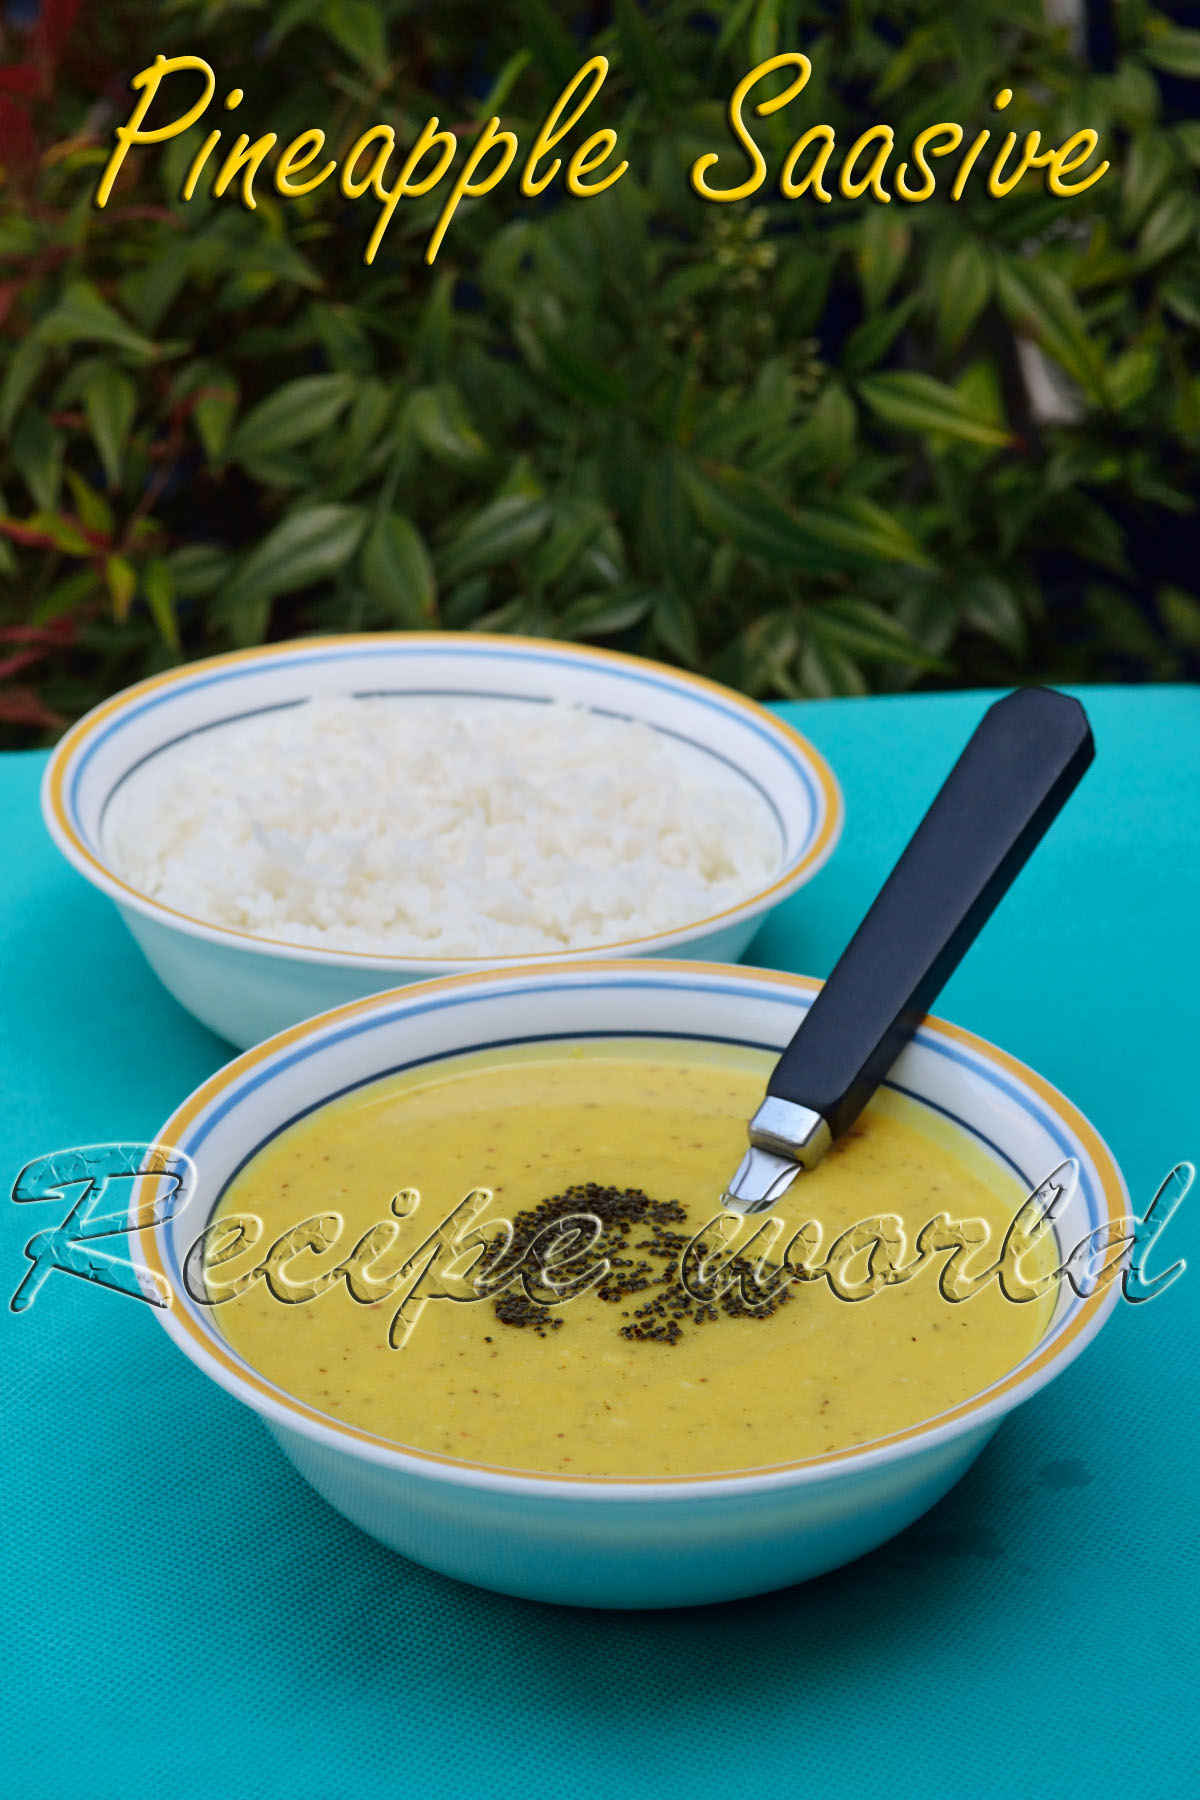
  • Serve this delicious stir fry as a side dish along with rice. 
  • If cooked nicely, this stir fry stays good for 2 - 3 days at room temperature.


Tips:

  • If you would like to add onion, add chopped onion while adding the grated coconut.
  • This stir fry tastes better when eggplant is chopped very finely.
ಕನ್ನಡ ಆವೃತ್ತಿ  
My school going daughter has recently developed a great craving for snacks. Everyday after coming from the school, she asks for some snacks thats crunchy. I rarely entertain store bought snacks at home and also, she loves homemade food. So, I always keep a stock of 2-3 varieties of homemade snacks for her. One among those is Spiced Phool Makhana. These crunchy balls are very addictive and they are a good source of protein and Vitamin B too!
Puffed Phool Makhana is available in most of the Indian grocery stores here. With this, one can easily prepare this delicious snack anytime. So, here is the recipe of Spiced Phool Makhana or Lotus Seed Snacks..


Preparation time: 15 minutes
Servings: 8 - 10
Difficulty level: Medium

Ingredients:
  • Phool Makhana (Lotus seeds) - 100 gm
  • Cooking oil - 4 1/2 tbsp
  • Turmeric powder - 1/2 tsp
  • Red chilli powder - 1 tsp or to taste
  • Chaat masala - 1 1/2 tsp
  • Salt to taste
  • Sugar powder (optional) - 1 1/2 tsp


Method:
  • Take a wide bottom pan, add Lotus seeds and toast them on low or medium flame for 8 - 10 minutes or till they turn crispy. 
  • Heat oil in the same pan; Add turmeric powder, chilli powder and turn off the flame. Take care not to burn the spice powders. To this, add salt, sugar powder and chat masala powder. Mix it well.
  • Add the roasted Lotus seeds / Phool makhana to the seasoning and toss it nicely to ensure even coating of spices. 
  • Serve this delicious snack along with a cuppa Tea!


Tips:
  • Chat masala can be replaced with amchur powder. 
  • Use your hands for easy and even mixing.
Rainy season has started in various parts of India now. In my native, its the time to enjoy different seasonal fruits like mangoes, jackfruit, pineapple and so on. They are good to eat just like that. Also, varieties of sweets, jams and side dishes can be prepared using them. I have shared some of those recipes already. Please click on the recipe names below to check them.
Coming back to today's recipe, we all know that pineapple can be used to prepare Jam, Pastry, Kesari (Shira), etc. sweet dishes. I am sharing with you all the recipe of a delicious yogurt based gravy using pineapple. Its one of the authentic Havyaka recipe and we call it as Pineapple Saasive. Try this sweet gravy with hot rice and let me know how you liked it!


Preparation time: 20 minutes
Serves: 4 - 5
Difficulty level: Medium

Ingredients:
  • Pineapple chunks - 1 1/4 cup
  • Fresh grated coconut - 1/2 cup
  • Till seeds - 1 1/4 tsp
  • Mustard seeds - 3/4 tsp
  • Dry red chilli or fresh green chilli - 1 small piece
  • Turmeric powder - 1/4 tsp
  • Salt - 1/2 tsp or to taste
  • Jaggery / sugar - 4 tbsp or to taste
  • Water - 1/2 cup
  • Yogurt / Curd - 1/2 cup
For Seasoning: Oil (preferably coconut oil) - 1 tsp, Mustard seeds - 1 tsp


Method:
  • Combine pineapple chunks along with salt, jaggery / sugar and water in a vessel and bring to boil. Turn off the flame after it is boiled for 5 minutes and allow to cool. 
  • Separate the liquid from the cooked pineapple chunks and keep aside.
  • Grind the cooled pineapple chunks along with grated coconut, till seeds, mustard seeds, chilli piece and turmeric powder into fine paste. Use the liquid you saved before, while grinding. 
  • Add half a cup of curd to the ground mixture. Check the taste and add salt or jaggery if needed.
  • If the mixture is too thick, you can add a little water. But don't make it too watery. 
  • Heat oil in a small wok. Add mustard seeds and when it crackles, add this seasoning to the Saasive. 
  • Serve this Saasive as a side dish with rice. 
 
Here is a simple stir fry recipe from my kitchen. It can be prepared quickly using the common ingredients in the pantry. We
Many people dislike okra because of its slime. But you won't feel it when its cooked with proper care. Okra is a good source of fibre which is needed for our body.
Try this Okra Stir Fry and I hope you like it!


Preparation time: 20 minutes
Serves: 2
Difficulty level: Medium

Ingredients:

  • Medium size Okra - 15 nos
  • Amchur powder - 3/4 tsp or for taste
  • Salt to taste
  • Fresh grated coconut - 2 to 3 tbsp
  • For seasoning: 
         Oil - 2 tbsp,
         Dry red chilli - half piece,
         Urid dal - 1 tsp,
         Mustard seeds - 1 tsp,
        Asafoetida / Hing - a pinch,
        Turmeric powder - 1/4 tsp,
        Curry leaves - 7 or 8 leaves,
        Green chilli - 1 (adjust according to spiciness)

Method:

  • Wash the Okra in water and drain the water using a cotton cloth or paper towel. Slice them into very thin rounds.
  • Heat oil in a heavy bottom pan. Add dry red chilli, urid dal followed by mustard seeds. When the mustard seeds splutter, add pinch of hing, turmeric powder, slit green chilli and curry leaves. Saute them for a minute. 
  • Add the Okra slices to the seasoning and mix it once. Add salt and Amchur powder for taste. 
  • Cook the mixture without putting the lid and give it a stir regularly to avoid burning. It won't take much time to cook since we have sliced the Okra very thinly. 
  • Once the mixture is almost cooked, add the fresh grated coconut and cook it till done. 
  • Serve this delicious Stir Fry / Palya along with rice or chapathi. 


Tips:

  • This Stir Fry tastes really good when Okra is slices into very thin roundels. 
  • Do not over mix the stir fry while cooking, otherwise it becomes mushy. 
  • Adding onion will give a different taste for this recipe. Chopped onion can be added along with grated coconut. 


ಕನ್ನಡ ಆವೃತ್ತಿ 

Most of you are familiar with the famous Indian sweets Kaju Katli and Badam (Almond) Katli. These sweets taste heavenly and were mostly store bought when I was a kid. These days, many of us are able to prepare these famous sweets at the convenience of our homes. 
OPOS (One Pot One Shot) is an innovative or rather I can say, more simplified way of cooking which is becoming famous these days. I was introduced to OPOS cooking few months back by one of my friends. Many thanks to Rama Krishnan Sir for making cooking so simple through OPOS.
Basically, OPOS cooking needs a 2 litre pressure cooker which I didn't have. But I was eager to try OPOS cooking and hence, started experimenting my dishes using my 3 litre pressure cooker. Luckily, my experiments went well and I'm preparing most of my side dishes in OPOS way now a days. 
After seeing the OPOS Kaju Katli recipe, I thought to prepare Katli using groundnuts. My Mom makes Groundnut Burfi, which takes a lot of time stirring the mixture on the stovetop. I just modified my Mom's Groundnut Burfi recipe to suit the OPOS way. Groundnut Katli turned out very well and tasted amazing! My daughter loved them a lot and I ended up preparing one more batch of Groundnut Katli the very next day. Believe me, they are really addictive!


Preparation time: 7 - 8 minutes
Time to set: 20 minutes
Difficulty level: Easy
Yield: 35 pieces

Ingredients:
  • Sugar - 1 cup minus 1 tbsp (1 cup = 200 gm)
  • Milk - 1/2 cup
  • Groundnut powder (Roast, remove the skin and make fine powder) - 1 cup 
  • Ghee / Clarified butter - 1 tbsp (for greasing)
  • Pressure cooker - 2 litre or 3 litre (I have used 3 litre pressure cooker)

Method:
  • Combine milk and sugar in the pressure cooker and give it a stir. If the sugar crystals are bigger, stir the mixture nicely till sugar dissolves. 
  • Close the lid and cook on high till 6 whistles. Make sure to wipe off the sugar water which comes out with every whistle; else, it won't whistle properly.
  • Turn off the flame and release all the pressure using a spoon. 
  • Take the lid out and fold in the groundnut powder. Mix it quickly without lumps and close the lid again. Allow it to set for 20 minutes.
  • Open the cooker lid after 20 minutes and by that time, the mixture will become like a thick dough. Grease your palms with ghee and mix the dough once. Transfer the dough onto a greased plate and pat it thinly. 
  • Cut them into desired shapes and enjoy the delicious Groundnut Katli!


Tips:
  • Since the cooking needs to be done on high flame, you have to use either induction or gas stove. 
  • While preparing groundnut powder, don't run the mixie / blender continuously; instead, try to whip and powder. 
Hi everybody,
I am here with a new recipe after long time. Life has made me busy with the arrival of our second baby. Taking care of two naughty kids is not an easy task. But I'm not exhausted, I'm enjoying this phase of life with them :)
Well, this is the recipe of Chakli which my Mom prepared during her stay with us. My daughter is a big fan of Chakli and this was made on her demand. Try this melt in mouth Chakli and I'm sure you will love it!


Preparation time: 2 hours
Soaking time: 2 - 3 hours
Difficulty level: Difficult
Yield: 60 Chaklis (depending on the size)

Ingredients:

  • Rice - 1 big cup full (1 cup = 175 gms)
  • Roasted rice flour - 3 1/2 cup (approx)
  • Till seeds - 4 tsp
  • Cumin seeds - 2 tsp
  • Carom seeds - 2 tbsp
  • Butter - lemon size
  • Salt to taste
  • Oil for deep frying
  • Water for grinding


Method:

  • Wash the rice 2 times and soak it in water for 2-3 hours. 
  • Drain the soaked rice and grind it along with till seeds, cumin seeds and carom seeds into fine paste. Add water as required. Consistency should be like the Dosa batter.
  • Add 2 1/2 tsp salt and 2 cups of water to the prepared batter and mix well. 
  • Transfer the batter to a thick bottomed vessel and keep stirring on medium flame for few minutes. Add lemon size butter while heating up the batter.
  • When the batter thickens, add around 3 1/2 cups (or as needed) of roasted rice flour and mix it when its still hot.
  • Knead the dough well and prepare a soft, non sticky dough ball. Keep the dough covered with a wet cloth and take out small portions as needed.
  • Fill the dough in a Chakli press and make them into spirals. 
  • Deep fry in hot oil and crispy Chaklis are ready to eat!
Strawberry is one of my kiddo's favourite fruits. She demands for it everytime when we go for buying  fruits. Strawberries are tend to spoil very quickly, even when we refrigerate them. So whenever we buy 2-3 boxes of strawberries, I will end up preparing some milkshake, jam or ice-cream. Home made ones are free from artificial colors, flavours and preservatives and delicious too! 
Here is my simple recipe of Strawberry Ice-cream..


Preparation time: 25 minutes
Refrigeration time: 5 - 6 hours
Serves - 7 to 8

Ingredients:
  • Strawberries - 250 gm
  • Thick cream - 250 gm
  • Sugar - 2 tbsp or to taste

Method:
  • Wash and clean the strawberries, remove the stems. Chop them into small / medium chunks.
  • Combine them with thick cream and sugar and blend smoothly using a mixer or blender. 
  • Transfer the blended mixture to an airtight container and refrigerate for 2 - 3 hours or till it becomes hard.
  • Take out the ice-cream mixture and blend it for 4 - 5 minutes or till smooth and keep it back into the freezer. Repeat this step 2 - 3 times to get a smooth textured ice-cream.
  • Scoop the ice-cream and serve it!


Tips:
  • If you want some strawberry chunks in the ice-cream, add 4 - 5 tsp of finely chopped strawberries after blending the mixture for the final time. Mix it well and refrigerate.
Bottle Gourd is one of those vegetables which are available throughout the year. Here in Australia, it is commonly available not only in Indian grocery stores, but also in most of the Asian grocery stores. Bottle gourd is a good of vitamins and minerals and hence, regular consumption of this veggie is good for our health.
In our home, we would prefer typical Indian style food most of the time. We buy bottle gourd more frequently to prepare different Indian dishes. I have shared the recipe of Bottle Gourd Palya / Spiced Bottle Gourd long back. Here is one more delicacy made with Bottle Gourd. Do try this Bottle Gourd Payasa when you buy bottle gourd next time and let me hear your feedback! 😊


Time required: 35 - 40 minutes
Serves - 3
Difficulty level: Medium

Ingredients:

  • Sugar - 3/4 cup (1 cup = 
  • Bottle gourd peeled, seeded and chopped into small or medium pieces - 2 cups
  • Semolina (medium) - 1/3 cup
  • Jaggery - 2 tbsp (see Tips)
  • Salt - big pinch 
  • Ghee / clarified butter - 1 tsp
  • Milk - 2 1/2 cup
  • Water - 2 1/2 cup
  • Cardamom powder - 1 tsp
  • Saffron strands - 8 to 10 (optional)


Method:

  • Heat the water in a pan. Once it becomes nicely hot, add a teaspoon of ghee and chopped bottle gourd. Continue cooking till bottle gourd pieces become soft.
  • In the meanwhile, wash the semolina by adding some water and drain it off.
  • Add this semolina to the cooked mixture and mix it continuously for 2 - 3 minutes to avoid lumps.
  • Add sugar, salt, jaggery (optional), milk and saffron strands. Allow the Payasa to boil for 8 - 10 minutes. 
  • Add cardamom powder before switching off the flame.
  • Serve this delicious Payasa hot or cold. This Payasa goes well with Poori, if you are a sweet lover.


Tips:


  • If you don't like jaggery, you can replace it with sugar. If you like to use jaggery, use more jaggery and reduce the quantity of sugar accordingly. If using more jaggery, no need to add saffron as the flavour will be dominated by jaggery. 
NewerStories OlderStories Home