Balekai or plantain is one of our family favourite vegetables. We get raw banana or plantains once in a while in the Indian grocery stores here. We love different dishes made using plantains in our native style. 

I had brought raw bananas after a long time during my recent grocery shopping. My daughter requested to prepare Banana chips since its her all time favourite. Hence, I had to make some Banana / Plantain Chips for her. One dish we never want to miss is Plantain Palya / Poriyal / Fry / Thoran. 

Here is the recipe of Havyaka Style Balekayi / Plantain Palya for you all!


Preparation time: 20 -25 minutes
Difficulty level: Medium
Serves: 4 - 5


Ingredients:

  • Medium sized plantains - 3
  • Grated coconut - 3 tbsp (fresh / frozen or desiccated coconut)    
  • Green chilli - 1 (according to taste)
  • Salt - to taste
  • Sugar - big pinch
  • Lime squeeze - 2 tbsp or to taste
  • Curry leaves - 1 string
  • Dry red chilli - 1 inch piece
  • Urid dal - 1 tsp
  • Mustard seeds - 3/4 tsp
  • Hing / Asafoetida - generous pinch
  • Turmeric powder - 3/4 tsp
  • Cooking oil - 2 1/2 tbsp (use Coconut oil for authentic Havyaka taste)
  • Water - 4 to 5 cups (to cook the bananas)


Recipe Instructions:

  • Heat 4 - 5 cups of water in a pan. Add 2 - 3 drops of oil to avoid stickiness. Once the water is hot enough, add the whole plantains and cook for 8 - 10 minutes or till they are nearly cooked, but still firm. Once cooked, their skin will turn darker brown and plantains will be a bit soft than before. 
  • Take out the cooked plantains and allow them to cool. 
  • Peel the skin and grate the plantains using a grater. 
  • Take the grated plantains in a mixing bowl. Add grated coconut, salt, sugar and lime juice for taste. 
  • Heat 2 1/2 tbsp oil in a heavy bottom pan for seasoning. Once the oil is hot, add red chilli, urid dal, mustard seeds and hing. When mustard seeds start spluttering, add turmeric powder, slit green chillies and curry leaves. Sauté it for half a minute.
  • Add grated plantain to the seasoning and mix it well. Close the lid half way and cook it for 5 more minutes. 
  • Serve it as a side dish with Rice, Sambar and Curd.

Tips:

  • While cooking, if the plantains became softer than required, wash them in cold water immediately. This will avoid them from becoming smoother again.
  • Lime squeeze can be replaced with Aamchur powder / Hulipudi.


ಕನ್ನಡದಲ್ಲಿ ಓದಲು ಇಲ್ಲಿ ಕ್ಲಿಕ್ ಮಾಡಿ 

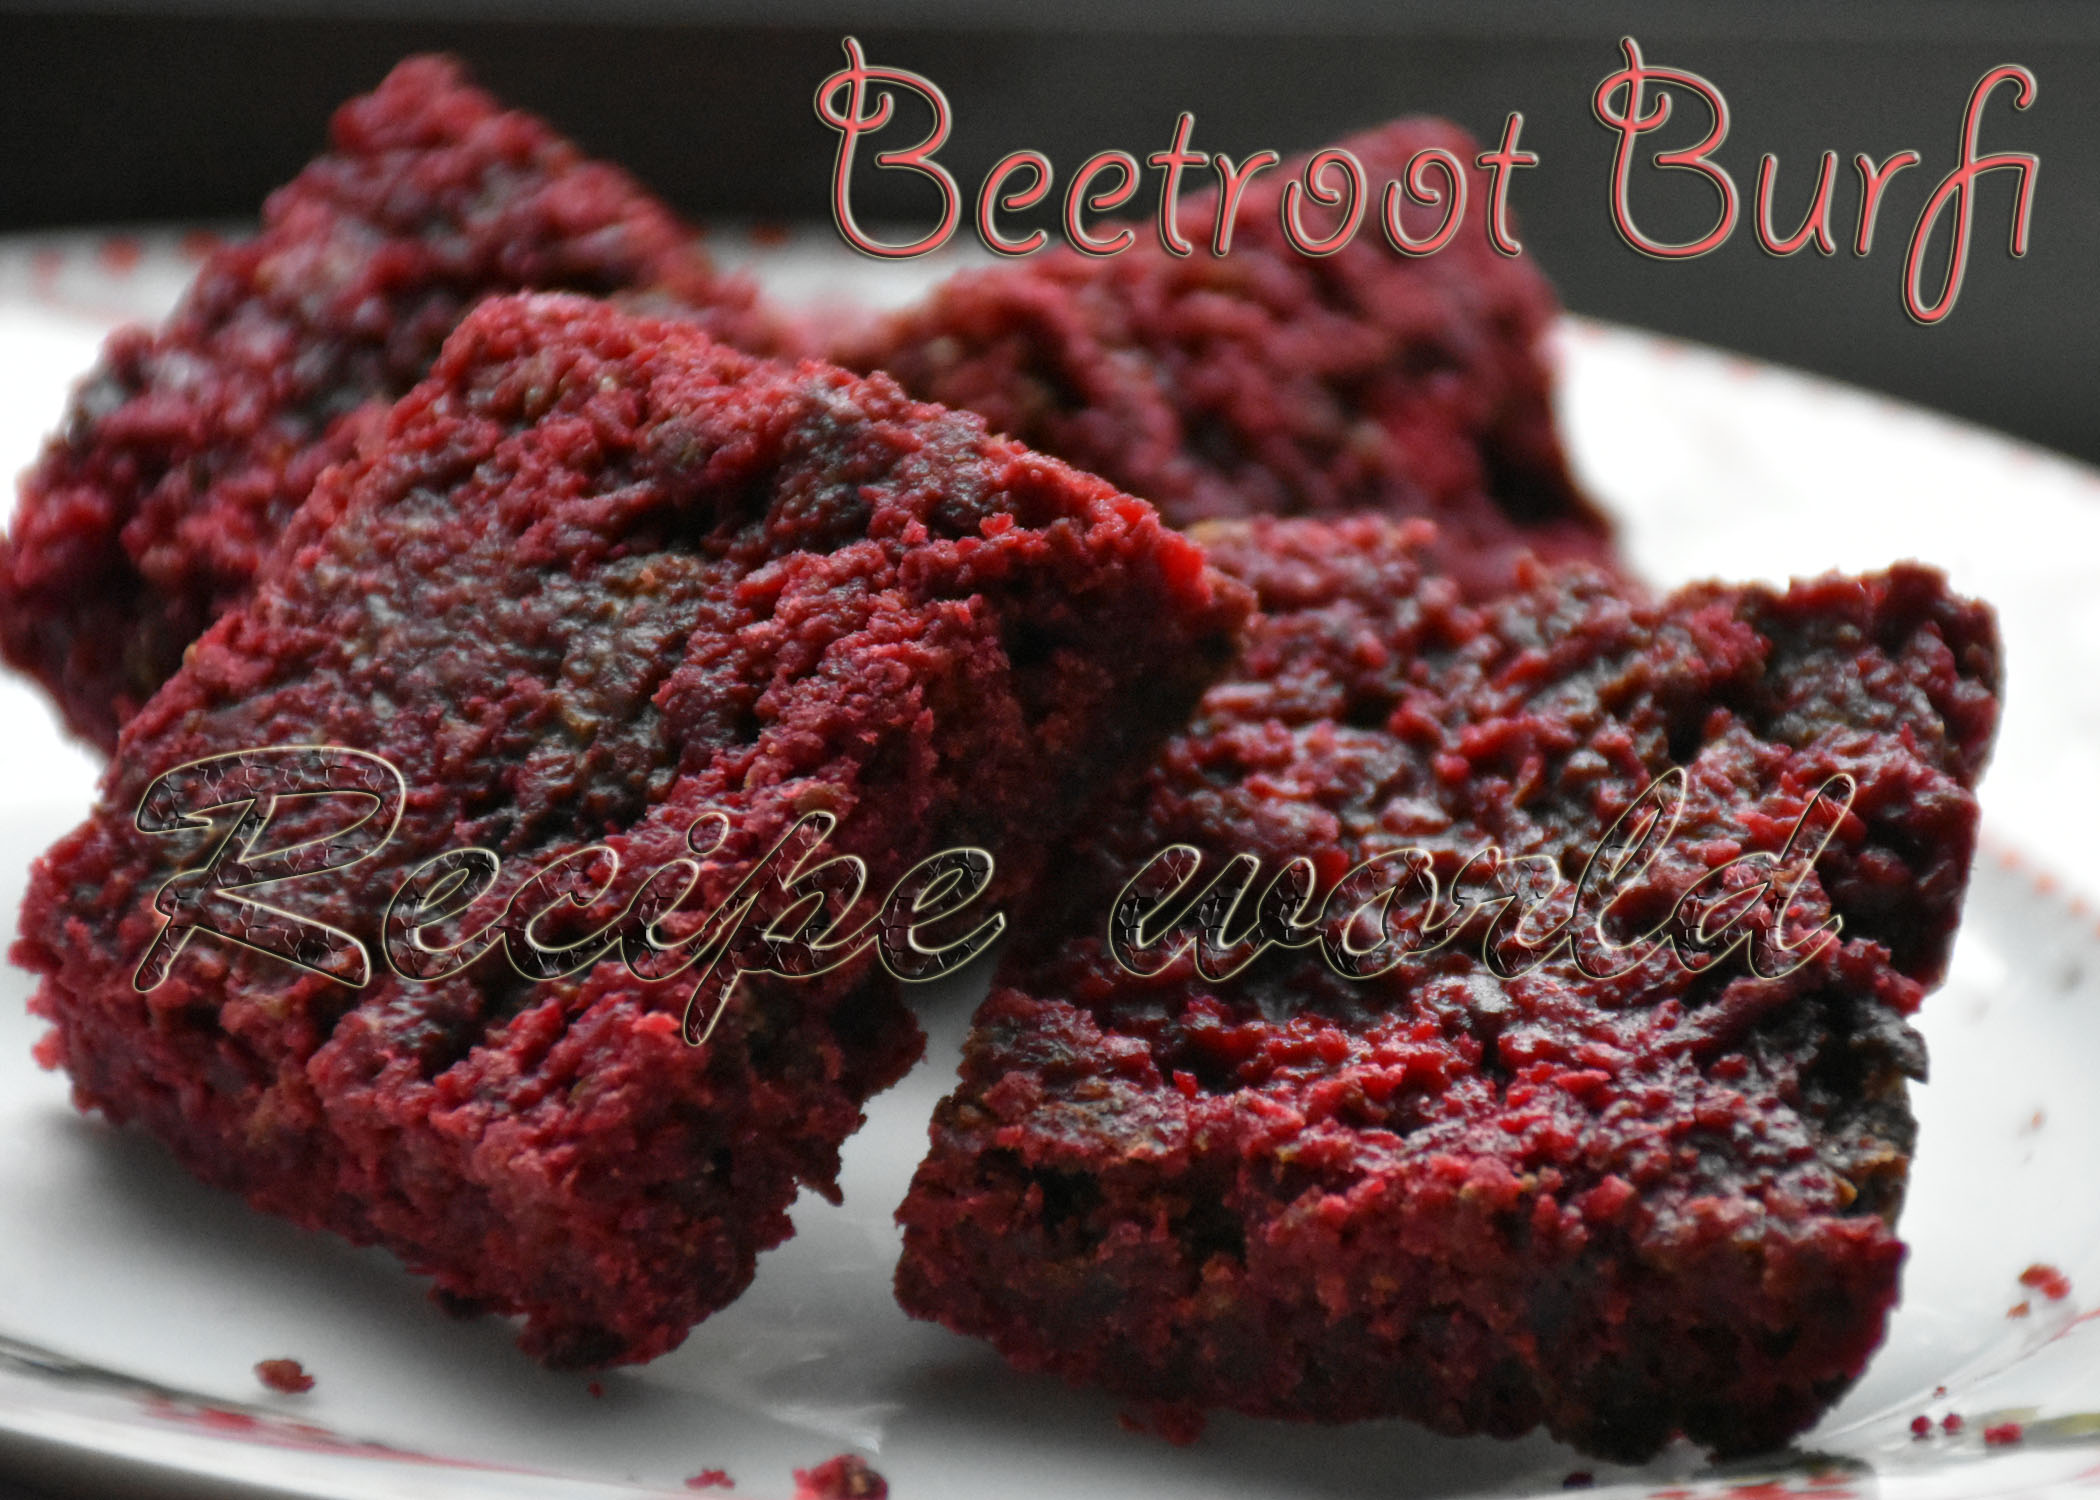
We do prepare varieties of sweet dishes using different vegetables. Beetroot Burfi is one of those delicious sweets which I frequently prepare. My kids love to eat non - sticky sweets. This colourful burfi tastes divine and is the perfect Indian sweet for any occation!

Below is the recipe of Beetroot Burfi / Beetroot Barfi for you all..


Preparation time: 30 minutes

Difficulty level: difficult

Yield: 12 pieces


Ingredients:

  • Grated beetroot - 1 cup
  • Grated coconut (fresh / frozen) - 1 cup
  • Sugar - 1 cup 
  • Ghee / clarified butter - 3 tbsp
  • Cardamom powder - 1/2 tsp


Recipe Instructions:

  • Pulse the grated coconut in a mixie or blender for a few seconds to make it evenly course.
  • Take a heavy bottom pan. Mix 2 tbsp of ghee and grated beetroot on medium flame for about 2 minutes or till the raw smell is gone.
  • Add grated coconut and sugar to this mixture and keep mixing on medium flame till it thickens. It took me around 30 minutes to achieve this stage. If the quantity is more, you may need a bit more time.
  • When the mixture starts leaving the sides and becomes like a lump, add a tablespoon of ghee and cook for a few more minutes.
  • Once it starts leaving the vessel and it feel very hard to stir the mixture, its time to add cardamom powder.
  • Spread the mixture evenly on a greased plate and cut into desired shapes when it's warm. 
  • Allow it to cool completely and enjoy the sweet burfi!


ಕನ್ನಡದಲ್ಲಿ ಓದಲು ಇಲ್ಲಿ ಕ್ಲಿಕ್ ಮಾಡಿ 

 Broccoli is one of our family favourite vegetables. Kiddos love it because of the color and we, adults love it for its health benefits. I heard a few people won't like this vegetable for its distinct smell. But we love every dish prepared using broccoli. 

3 years back, my Mum and Dad were here with us for a few months. During that time, buying vegetables was not that easy for us as many vegetables we get here are totally different from what they get in India. When we go out for groceries, mum eyes usually look for only those veggies which are available in hometown! To my surprise, they both liked broccoli and she used to prepare Broccoli Stir Fry (Palya) 2 - 3 times a week during their stay. 

I would like to share the recipe of Broccoli - Potato Cutlet / Broccoli Patties with you all today. These patties are perfect for breakfast, snacks, starter and kids lunch box too. Below is the recipe of Broccoli - Aloo Cutlets:


  • Preparation time: - 25 - 30 minutes
  • Difficulty level: Medium
  • Servings: 2

Ingredients:

  • Broccoli florets - 2 cups
  • Medium size potato - 1
  • Chat masala powder - 1 tsp
  • Green chillies - 2 (adjust according to taste)
  • Onion - 1 (small)
  • Amchur powder / lime juice - 1/2 tsp
  • Salt - to taste
  • Bread crumbs - 1 cup or more
  • Oil - for shallow frying

Recipe Instructions:

  • Cook the potatoes till soft. I have halved the potato and pressure cooked till two whistles.
  • Finely chop the onion and crush the green chillies.  
  • Wash the broccoli florets and put them in a bowl. Add 1 tsp salt and about 4 cups of hot water. Leave them for 5 minutes.
  • Drain all the water and spread the broccoli florets on a kitchen towel for 4 - 5 minutes.
  • Pulse the broccoli florets in a mixie or blender coarsely without adding any water.
  • Peel the cooked potatoes, and mash it nicely.
  • Take a mixing bowl and add pulsed broccoli, mashed potato, crushed chillies, chopped onion, chat masala, amchur powder / lime juice and salt to taste. 
  • Also add 2 - 3 tbsp bread crumbs and mix everything well. 
  • Make lime sized balls and pat them into flat discs. 
  • Roll these discs in bread crumbs and shallow fry on hot tawa. Flip the discs a few time and cook till both the sides turn slightly brownish. 
  • Serve hot cutlets along with tomato sauce or your favourite dip. We would love to have it with coconut chutney!


Tips:

  • Green chillies can be replaced with red chilli powder. 


ಕನ್ನಡದಲ್ಲಿ ಓದಲು ಇಲ್ಲಿ ಕ್ಲಿಕ್ ಮಾಡಿ 

Keeper recipes like Chutney, Thokku, Gojju are our family favourites. A few varieties of these preserves will always be there as part of our lunch and dinner. Not only there are tasty, they come very handy when I feel tired and can't make varieties of fresh curries.
Here is a finger licking Thokku recipe which I learnt during my India trip last year. This Thokku goes well with rice, chapathi or dosa.


Preparation time: 15 minutes
Serves - 20
Difficulty level: Medium

Ingredients:
  • Mint leaves - 50gm
  • Dry red chillies - 50 gm 
  • Garlic peeled - 50 gm
  • Tamarind - 50 gm
  • Salt - to taste
  • Jaggery or sugar - 1/2 tsp or to taste
  • Water - 1/4 cup (if needed)
 - For seasoning:
  • Oil - 5 to 6 tbsp
  • Mustard seeds - 1 tsp

Method:
  • Grind together mint leaves, dry red chillies, garlic pods and tamarind into a fine paste. Add a few tablespoons of water if needed. 
  • Heat oil in a thick bottom pan. Add mustard seeds to the hot oil and let it splutter. 
  • Now, add the prepared paste to the seasoning slowly and carefully. Mix it well.
  • Add salt and jaggery/sugar for taste. 
  • Mix everything well and cook till it becomes a thick paste and there is no water left in it. If minimal water is added, it takes less than 10 minutes to do this.
  • Keep mixing it regularly to avoid burning. 
  • Once it becomes like a big lump and starts leaving the bottom of the pan, turn off the flame and allow it to cool. 
  • Store in an airtight container. 
  • Mint leaves thokku can be served as pickle or chutney along with rice, dosa or chapathi. 
  • It stays good for 3 - 4 days at room temperature and can be stored in the fridge for a few months.

Tips:
  • Quantity of tamarind can be adjusted according to your taste.

Wheat flour dosa is popularly known as a fasting recipe. I was never a fan of Wheat Flour Dosas till I learn this recipe from my friend Maitri. Since then, Wheat Flour Dosa has become our family favourite breakfast. This is an instant dosa, and won't need any fermentation. 
Below is the recipe of Wheat Flour Dosa / Paper Dosa / Tellevu / Crepe:


Preparation time: 10 minutes
Difficulty level: Medium
Serves: 3

Ingredients:
  • Whole wheat flour - 1 1/2 cup
  • Sooji rava / Semolina - 1/3 cup
  • Green chillies - 1 or 2 (depending on spiciness)
  • Ginger - half inch
  • Cumin seeds - 1 tsp
  • Curry leaves - 5 to 6 leaves
  • Turmeric powder - 1/4 tsp
  • Hing / asafoetida - generous pinch 
  • Fresh grated coconut (or frozen) - 1/2 cup
  • Salt - 1 tsp or to taste
  • Water - to prepare the batter


Recipe Instructions:
  • Combine wheat flour and sooji rava in a mixing bowl. 
  • Blend coconut, green chillies, ginger, cumin seeds, curry leaves, turmeric powder and hing into a smooth paste. Add water as needed while blending.
  • Add this paste to the wheat flour - semolina mix and also add salt to taste. Mix everything well. 
  • Add water little by little and keep mixing it. Make it a thick batter without any lumps.
  • Take a ladle full of batter and spread it thinly on the hot tava. 
  • Cook it on medium flame till it turns a bit crispy. 
  • Serve hot dosa along with Coconut Chutney or your favourite side dish. 


Tips:
  • Adjust the wheat flour - sooji rava ratio as needed. The more sooji rava you add, more crispier the dosa will be.


NewerStories OlderStories Home